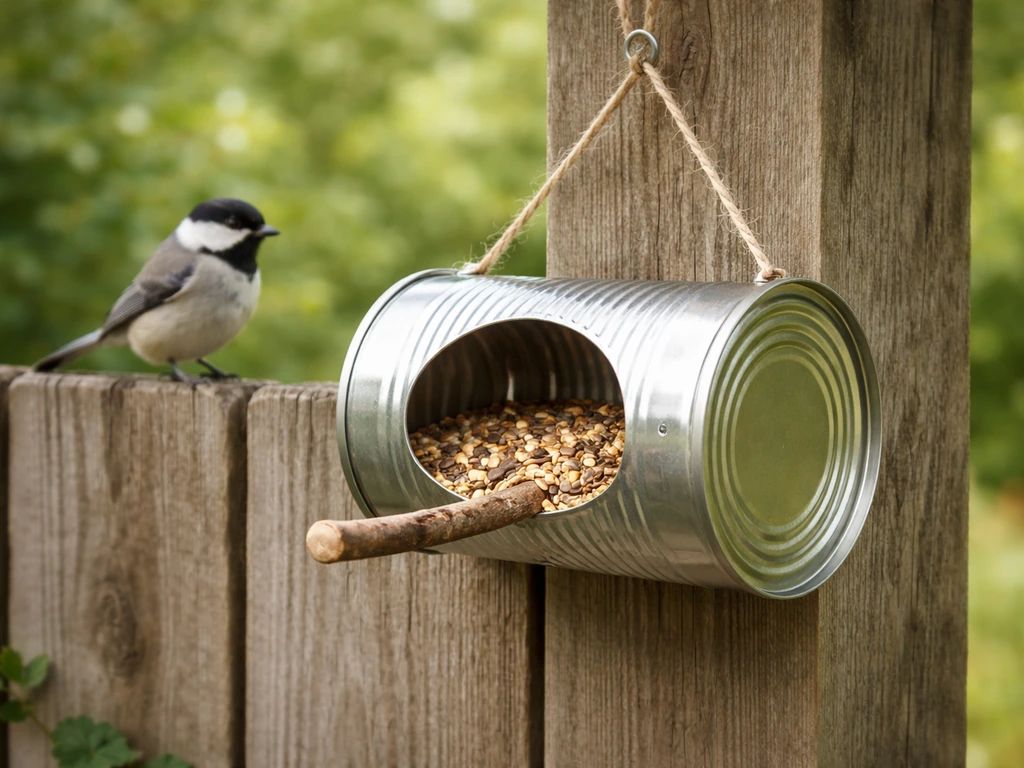
You can build a functional tin can bird feeder in about 20 minutes with an empty soup or coffee can, a wooden dowel, some wire, and a drill. It works, birds will use it, and it costs almost nothing. That said, there are a few things you need to get right from the start: smoothing the sharp edges so birds don't get cut, choosing a can that isn't coated with anything toxic, drilling drainage holes so rain doesn't pool and rot your seed, and mounting it securely enough that it won't spin or fall in wind. Get those basics right and you'll have a feeder that attracts chickadees, house finches, and sparrows within a few days.
Tin Can Bird Feeders: Easy DIY Build, Placement and Cleanup
Marcus Hendricks
24 Apr 2026
What a tin can bird feeder is (and when it actually makes sense)
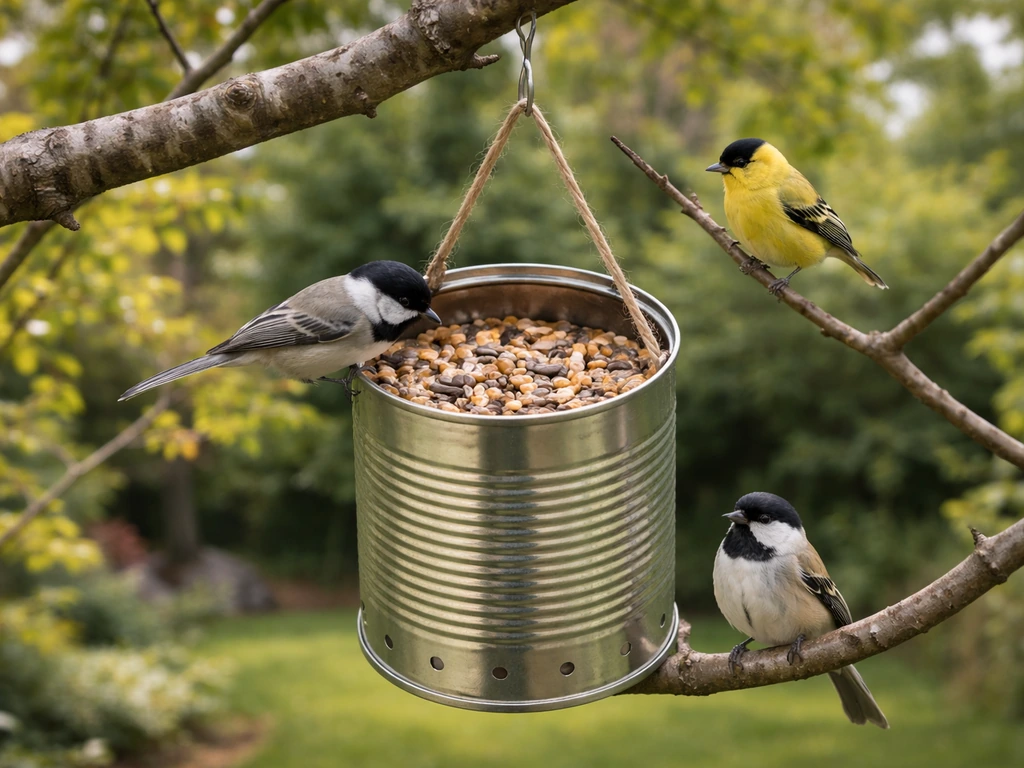
A tin can bird feeder is exactly what it sounds like: a repurposed metal can, most commonly a steel food can (the kind soup, beans, or vegetables come in), converted into a seed dispenser or platform feeder for backyard birds. Some people also use larger cans like coffee cans or shortening tins, which give you more capacity and a wider opening. You'll sometimes see searches for a "tin can man bird feeder," which is just a decorative stacked-can design meant to look like a little figure hanging in a tree. Fun project, same principles.
These feeders make the most sense in three situations. First, you want to start feeding birds today and don't want to spend money yet. Second, you're doing a project with kids and want something simple and hands-on. Third, you're testing a new location in your yard before investing in a quality feeder and want to see if birds will actually visit that spot. What tin can feeders are not ideal for is long-term, year-round use without regular maintenance, attracting larger birds like blue jays or woodpeckers who need more room to perch, or any situation where you want serious pest resistance. For those goals, a purpose-built feeder will serve you better.
Materials, tools, and what you need to set it up safely
The most important safety issue with tin can feeders is the cut edge at the opening. A standard can opener leaves a sharp rim that can injure birds' feet and beaks. You must address this before putting any feeder outside. Beyond that, the material of the can itself matters. Standard steel food cans with a plain interior lining are fine. Avoid cans with heavy plastic liners (some newer food cans have these), cans that held chemicals or paint, or anything that smells strongly of the original contents even after washing.
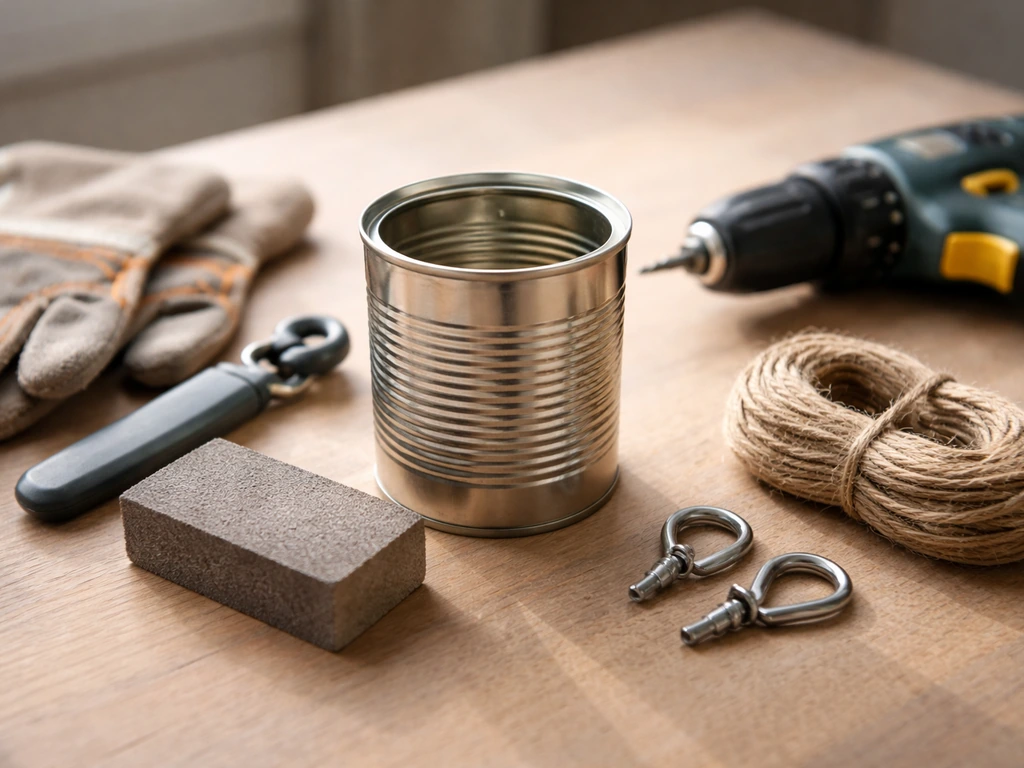
Here's what you'll need to gather before you start:
- One or more clean steel food cans (15 oz soup cans, 28 oz tomato cans, or larger coffee cans all work)
- A power drill with a 1/4-inch bit for drainage holes and a 3/16-inch bit for wire holes
- A can opener that leaves a smooth edge, OR metal files and needle-nose pliers to fold the rim inward
- Heavy-gauge wire (16 or 18 gauge galvanized wire) or a strong zip tie rated for outdoor use
- A wooden dowel, 1/4-inch diameter, cut to about 6 inches for a perch
- Waterproof exterior spray paint or clear lacquer if you want to extend the can's life (optional but recommended)
- Sandpaper (120-grit) for smoothing any rough spots
- Dish soap and a scrub brush to clean the can thoroughly before use
The single most effective edge-safety step is to use a safety can opener, which cuts below the rim and leaves a smooth, rolled edge. These run about $10 at any kitchen store and make the whole project safer and easier. If you're using a standard opener, use needle-nose pliers to carefully fold the sharp rim inward around the entire circumference, then file it smooth. Run your finger slowly around the edge with light pressure to check for any remaining sharp points before mounting.
Step-by-step: how to build it (plus a few variations)
The basic horizontal can feeder
- Wash the can thoroughly with dish soap and hot water. Let it dry completely.
- Use your safety can opener to remove the lid, leaving a smooth rim. If using a standard opener, fold and file the edge as described above.
- Drill two small drainage holes (1/4 inch) in what will be the bottom of the can when it's mounted horizontally. These prevent water from pooling inside.
- Drill two wire holes near the back of the can (the closed end), one on each side, for your hanging wire.
- Drill a 3/16-inch hole near the front opening on the bottom side. Push your wooden dowel through and secure it with a small knot of wire or a dab of waterproof wood glue. This is the perch.
- Thread your galvanized wire through the two back holes, twist it securely, and form a hanging loop at the top.
- If you're painting or sealing the outside, do it now and let it cure for 24 to 48 hours before use. Never paint or seal the inside of the can.
- Fill the can about two-thirds full with seed, hang it from a branch or shepherd's hook, and you're done.
The vertical open-top variation
Instead of mounting the can horizontally, you can stand it upright and fill it from the top, similar to a small tube feeder. This works better in sheltered spots because rain goes straight in, so it's not great for open yards unless you add a rain guard. To make one, remove both the top and bottom lids (smooth both edges), drill drainage holes in the bottom, and mount the can vertically using wire threaded through holes near the top rim. Add a small roof made from a bent aluminum pie tin secured above the opening with the same wire. The covered version of this design holds up much better through light rain.
The stacked "tin can man" design
This is the decorative version you'll see on craft sites. You stack two or three cans of different sizes on a central dowel or threaded rod, with the largest at the bottom acting as a seed tray and the smaller ones above acting as baffles or decorative elements. Each can needs drainage holes, and you fill the bottom can with seed. It's charming, especially as a kids' project, but the large open tray attracts squirrels aggressively and has no pest protection whatsoever. Enjoy it as a decorative piece in a squirrel-free setup or accept you'll be feeding the whole neighborhood.
Where to hang it and what seed to use for your target birds
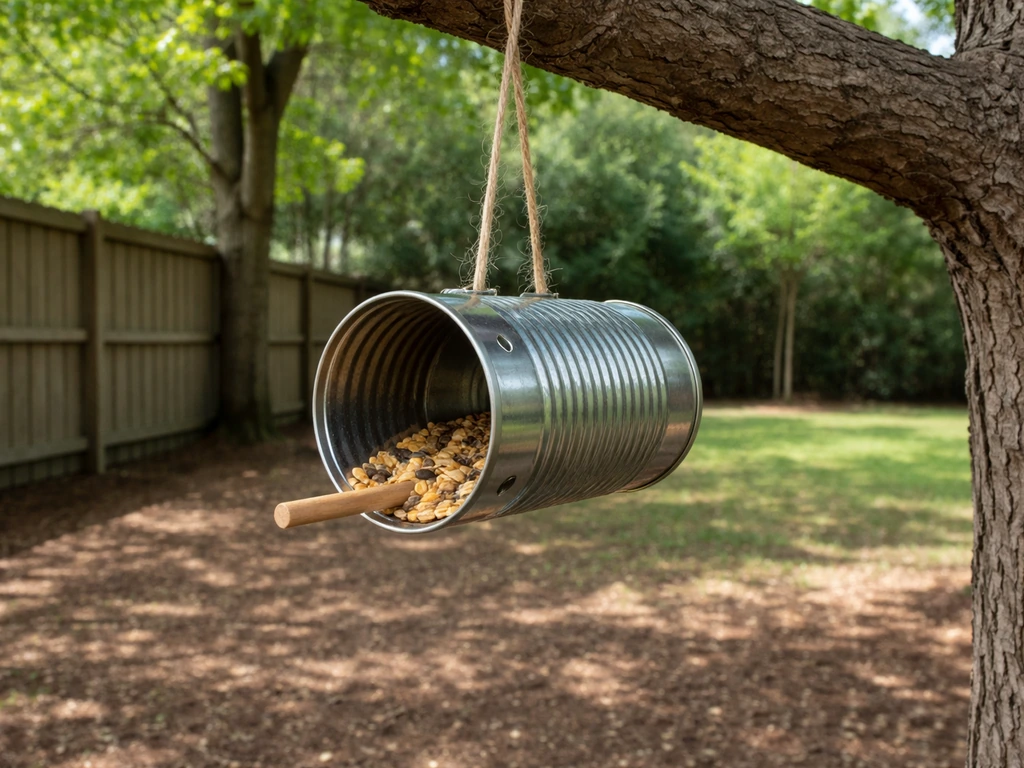
Placement matters as much as the feeder itself. Hang your tin can feeder at least 5 feet off the ground to keep it out of easy reach of cats and ground-level predators. Keep it at least 10 feet from dense shrubs where cats can hide, but within 10 to 15 feet of some tree cover so birds have a quick escape route. The oft-cited rule for window placement is either closer than 3 feet or farther than 30 feet from glass. Between those distances, birds build up enough speed to injure themselves on window strikes. A spot on a covered porch, close to a window, is often ideal.
For seed selection, match what you offer to the birds you actually want to attract. Black oil sunflower seed is the single best all-around choice for a tin can feeder because it draws the widest variety of birds including chickadees, house finches, nuthatches, and cardinals, and the small shell is easier for birds to crack than striped sunflower. Here's a quick reference for common backyard targets:
| Target Bird | Best Seed or Food | Notes |
|---|---|---|
| House finch, goldfinch | Nyjer (thistle) or fine sunflower chips | Use a smaller can with a narrow opening to reduce waste |
| Black-capped chickadee | Black oil sunflower, sunflower chips | Will visit quickly, especially near tree cover |
| Northern cardinal | Black oil sunflower, safflower | Prefers a stable, wider perch; a coffee can works better than a soup can |
| White-throated sparrow, junco | Millet, sunflower chips | Often prefer scattered seed below the feeder rather than in it |
| Blue jay | Whole peanuts, shelled corn, sunflower | Too large for a soup can; use a wide open-top design or a platform |
| Woodpecker | Suet, peanuts | Tin cans don't work well for suet; a suet cage is the better tool |
| Mourning dove | Millet, milo, cracked corn | Ground feeders; they'll eat what drops below your can feeder |
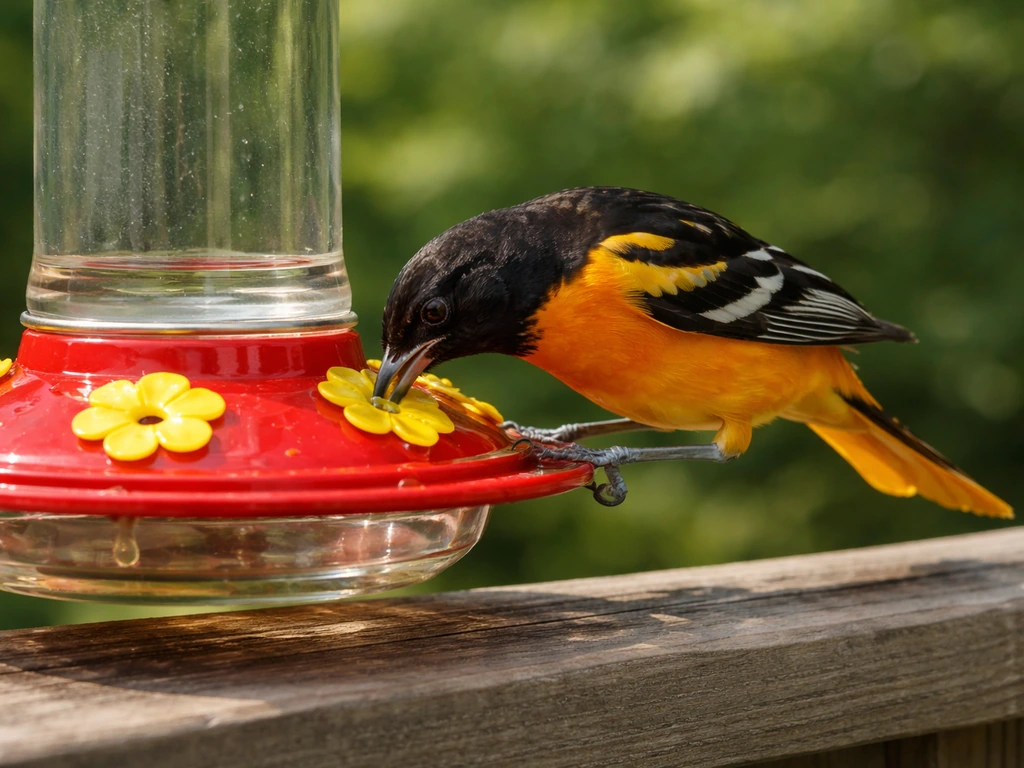
| Oriole | Fresh fruit, grape jelly, nectar | Tin cans aren't suited to these foods; use a dedicated oriole feeder |
Avoid mixes with lots of milo, red millet, or filler grains. Most North American backyard birds reject these and they pile up as wet, moldy waste, which is both a health hazard and a pest magnet. Straight black oil sunflower or a quality sunflower-and-safflower mix will outperform a cheap mixed bag every time.
Handling rust, sharp edges, weather, and pests
Rust and weather protection
Rust is the number one durability problem with tin can feeders, and it moves fast once it starts. A standard steel food can will begin showing surface rust within a few weeks of outdoor exposure, especially in humid climates or during rainy seasons. To slow this significantly, coat the outside of the can with a rust-inhibiting spray paint or a clear exterior lacquer before mounting. Rust-Oleum's outdoor spray products work well for this and are non-toxic once fully cured. The inside of the can should stay uncoated since birds are eating from there directly. Replace any can that shows rust on the interior immediately, and inspect the outside monthly.
Wind is the other weather problem. A hanging can feeder will spin and swing in strong wind, spilling seed and stressing birds who can't land safely. Two fixes: add a little weight to the bottom of the can (a smooth river stone or a small piece of hardware like a washer glued inside), and use a hook or carabiner that limits swinging rather than a simple loop. If you live somewhere with strong seasonal winds or heavy winter weather, take the feeder down during storms.
Squirrels, rats, and other pests
A tin can feeder has essentially zero built-in pest resistance. Squirrels will reach in from above or hang off the perch without difficulty. The most effective solution is location: hang the feeder at least 10 feet from any tree trunk, branch, or structure a squirrel can leap from, and at least 5 feet below any branch above it. A pole-mounted setup with a baffle below the can works better than a hanging feeder for squirrel deterrence.
Rats are attracted by seed that spills or accumulates on the ground below the feeder. Reduce spillage by not overfilling, and rake up fallen seed every few days. If you have serious rodent pressure in your yard, a sealed hopper or tube feeder with a tray that catches hulls is a more practical long-term solution than any open can design.
Cleaning, maintenance, and fixing what goes wrong
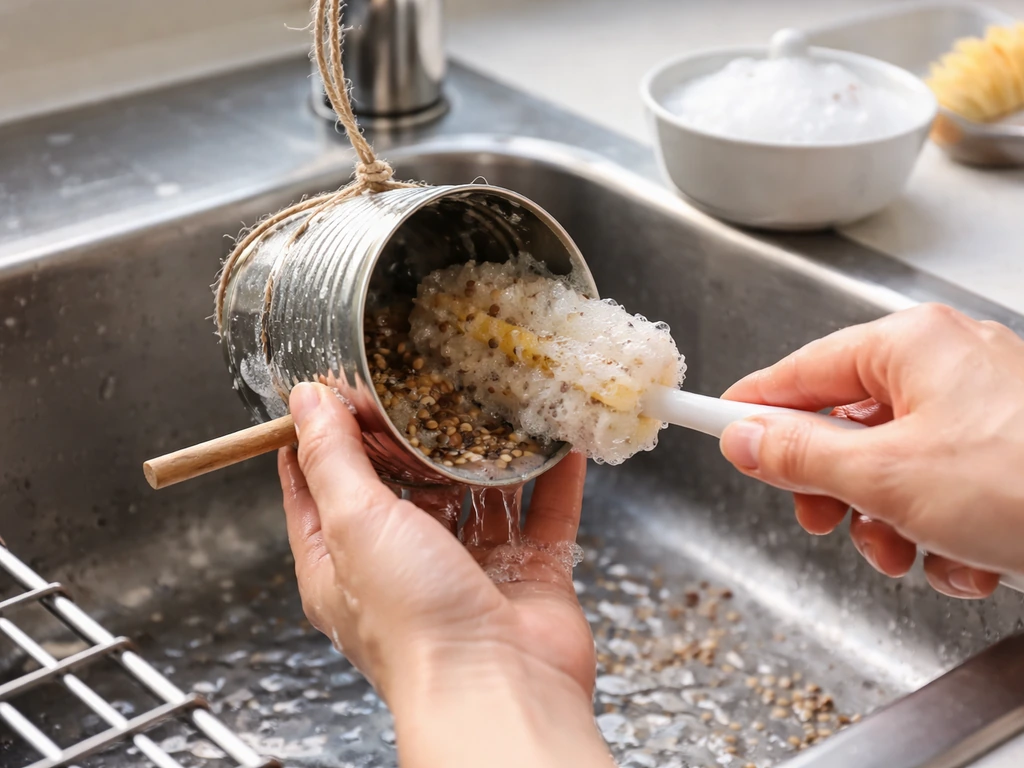
Clean your tin can feeder at least once every two weeks during active use, and more often during wet weather or if you've noticed sick-looking birds in your yard. The standard disinfecting method is a 10% bleach solution: 1 part household bleach to 9 parts water.
Remove all old seed, scrub the interior and exterior with a brush and dish soap, rinse thoroughly, soak in or wipe down with the bleach solution, then rinse again and let the feeder air dry completely before refilling. Refilling a wet feeder leads to mold growth within days. During a local salmonella outbreak (your state wildlife agency or birding groups will often report these), increase cleaning to once a week or temporarily take the feeder down.
Because a tin can is small and disposable, honest maintenance sometimes just means replacing the can entirely. If you see interior rust, heavy mineral deposits, or persistent mold that won't scrub out, throw the can away and start with a fresh one. This is actually one of the practical advantages of this feeder style: the "can" portion of the feeder costs nothing to replace.
Troubleshooting common problems
- No birds after a week: Check that the feeder is visible from nearby perches, that the seed is fresh (smell it, old seed goes rancid), and that cats or other disturbances aren't keeping birds away. Moving the feeder 10 to 15 feet can make a surprising difference.
- Seed gets wet and clumps: You need more drainage holes. Add two or three additional 1/4-inch holes at the lowest point of the can when mounted. Also check that the feeder isn't tilted so water runs inward.
- Feeder spins constantly in wind: Add internal weight to the bottom of the can, or switch to a pole-mounted setup with a wire bracket that holds the can horizontally without swing.
- Squirrels empty it daily: Relocate to an open hanging position away from jump-off points, add a baffle, or accept the situation and switch to a squirrel-resistant tube or hopper feeder.
- Rust appearing quickly: The exterior coating wasn't applied or has worn off. Sand the rust, reapply exterior spray paint, and let it fully cure. Interior rust means it's time to replace the can.
- Birds fight at the feeder: The perch is too short or the opening too small for the birds visiting. Try a larger can or add a second feeder nearby to reduce competition.
When a tin can feeder is fine vs. when to upgrade to something better
A tin can feeder is a legitimate short-term solution and a good starter feeder. But it's worth being honest about where its limits are, especially if you're serious about attracting a specific variety of birds or solving a recurring problem like pests or weather damage. Here's how it compares to purpose-built feeder types:
| Feeder Type | Best Use Case | Advantage Over Tin Can | Worth Upgrading If... |
|---|---|---|---|
| Tube feeder | Finches, chickadees, small songbirds | Holds more seed, weather-protected ports, easy to clean | You want consistent daily visits without frequent refills |
| Hopper feeder | Cardinals, blue jays, mixed species | Large capacity, roof protection, stable perch | Your tin can empties in a day or birds can't fit comfortably |
| Platform feeder | Doves, sparrows, blue jays, larger birds | Open access, easy to fill, works for many food types | You want to attract ground feeders without mess below |
| Suet cage | Woodpeckers, nuthatches, chickadees in winter | Holds suet cakes securely; tin cans can't do this | Woodpeckers are visiting and you want to keep them |
| Window feeder | Any small songbird; close observation | Suction-mounted, easy viewing, small footprint | You want to watch birds up close without a yard setup |
| Pole-mounted feeder | Any species; squirrel-prone yards | Baffle compatibility, stable, no wind swing | Squirrels are your primary problem |
Other repurposed can feeders follow similar logic. A coffee can bird feeder gives you more interior volume and a wider opening, making it better for cardinals and jays. p39s1: If you want a more themed option like a dr who bird feeder, it can still follow the same ideas, but you may need to upgrade to improve weather durability and pest resistance plastic coffee can bird feeder.
If you want a more themed option like a dr who bird feeder, it can still follow the same ideas, but you may need to upgrade to improve weather durability and pest resistance. A Pringles can bird feeder offers a narrow tube shape that works surprisingly well for nyjer seed and small finches.
If you want a narrow-tube option for small finches, a Pringles can bird feeder is a related style worth considering alongside your tin can design. A milk can bird feeder is more of a decorative piece than a functional design. Each has its niche, but all share the same core limitation: they're not engineered for pest resistance, seed preservation, or long-term weather durability the way a purpose-built feeder is.
If you've been running a tin can feeder for a month and you're still fighting rust, refilling every day, or watching squirrels eat your seed, that's the signal to invest $20 to $40 in a proper tube or hopper feeder. The tin can got you started and showed you where birds want to feed in your yard. That's real value. Now let that information guide you to the right long-term setup. Now let that information guide you to the right long-term setup pringles can bird feeder.
FAQ
How can I tell if a repurposed can has a risky coating or liner before I build the feeder?
Look for any can interior that feels tacky or rubbery, has a strong persistent odor after rinsing, or shows a visibly thick plastic-like film. If you see a heavy liner or cannot fully eliminate the smell of the original contents, skip that can, even if it looks clean.
What should I use to test the edge after I smooth the opening?
Run a gloved finger slowly around the entire rim and press lightly at multiple points. If you feel any catch, snag, or burr, re-fold the edge or file again. Birds will often perch where the sharpest point is, so it has to be uniformly smooth.
Is it safe to use the feeder with nyjer (thistle) or other very small seeds?
It can work, but small seeds spill and stay wet longer. If you try nyjer, use a covered or rain-guard style and keep the hole sizes and opening small to reduce waste, then clean more frequently because fine seed clumps faster when damp.
Can I put suet or peanut butter in a tin can feeder?
Not in a typical tin can seed feeder, because the feed paste can trap moisture, foul quickly, and be hard to sanitize. If you want to feed fats, use a purpose-built suet feeder or a dedicated tray setup designed for that food type.
How do I prevent the feeder from getting clogged when humidity is high?
Use black oil sunflower instead of high-filler mixes, and avoid overfilling so old seed does not sit and cake. If you notice clumping, empty the feeder, brush out damp seed, and dry the interior before refilling.
Should I paint or lacquer the whole can to stop rust?
Coat only the outside. Keep the interior uncoated because birds will contact and eat directly from the seed surfaces inside, and coatings can interfere with cleanup or introduce residues if not fully cured.
What’s the best way to handle a feeder that’s getting moldy, even though I clean it?
Check for rain pooling by confirming drainage holes are clear and not blocked by bent metal. Also reduce fill level so fresh seed replaces damp seed faster. If mold persists in the can interior, replacing the can is often faster than repeated scrubbing.
How often should I expect to replace the can itself?
There is no fixed timeline, but interior rust or permanent discoloration after multiple cleanings is a clear cutoff. In humid or rainy areas, swapping the can sooner prevents recurring mold and seed contamination.
Do I need to adjust my seed choice if I want fewer pigeons or bigger birds?
Yes. Many large birds are attracted to readily accessible sunflower and open trays. If you are seeing unwanted visitors, switch to a narrower-entrance design like a tube or reduce the opening so only small-footed birds can access seed, while still offering compatible seed types.
How can I reduce squirrel damage without changing the feeder design?
Reposition it first. Keep the feeder well away from launching points (trees, fences, and overhanging branches) and increase the vertical gap from any branch above. If squirrels persist, switching to a pole setup with a baffle under the can usually works better than a simple hanging loop.
What should I do if the feeder is spinning even after I hang it securely?
Use a connector that limits swing, not just a free loop. Adding a small weight inside or at the bottom of the can also helps the center of mass stay stable, reducing seed spill and making it easier for birds to land.
How should I handle cleaning during a disease scare without going too long between visits?
Increase frequency, but also reduce exposure by removing the feeder temporarily if you see illness or heavy wetness. Always let the feeder air dry fully before refilling, because trapped moisture is what accelerates bacterial and fungal buildup.
Is the window-distance rule the same for a porch or covered area?
The risk still depends on how close birds fly to the glass, even under a porch roof. If the feeder is near windows and birds repeatedly approach rapidly, adjust placement to be clearly closer than the typical “safe” buffer or clearly farther away, and consider adding visual deterrents on the glass.
Next Article
Best Bird Feeder for Baltimore Orioles: Buyer Guide
Choose the best bird feeder for Baltimore orioles: styles, features, placement tips, and fixes for heat, pests, and acce