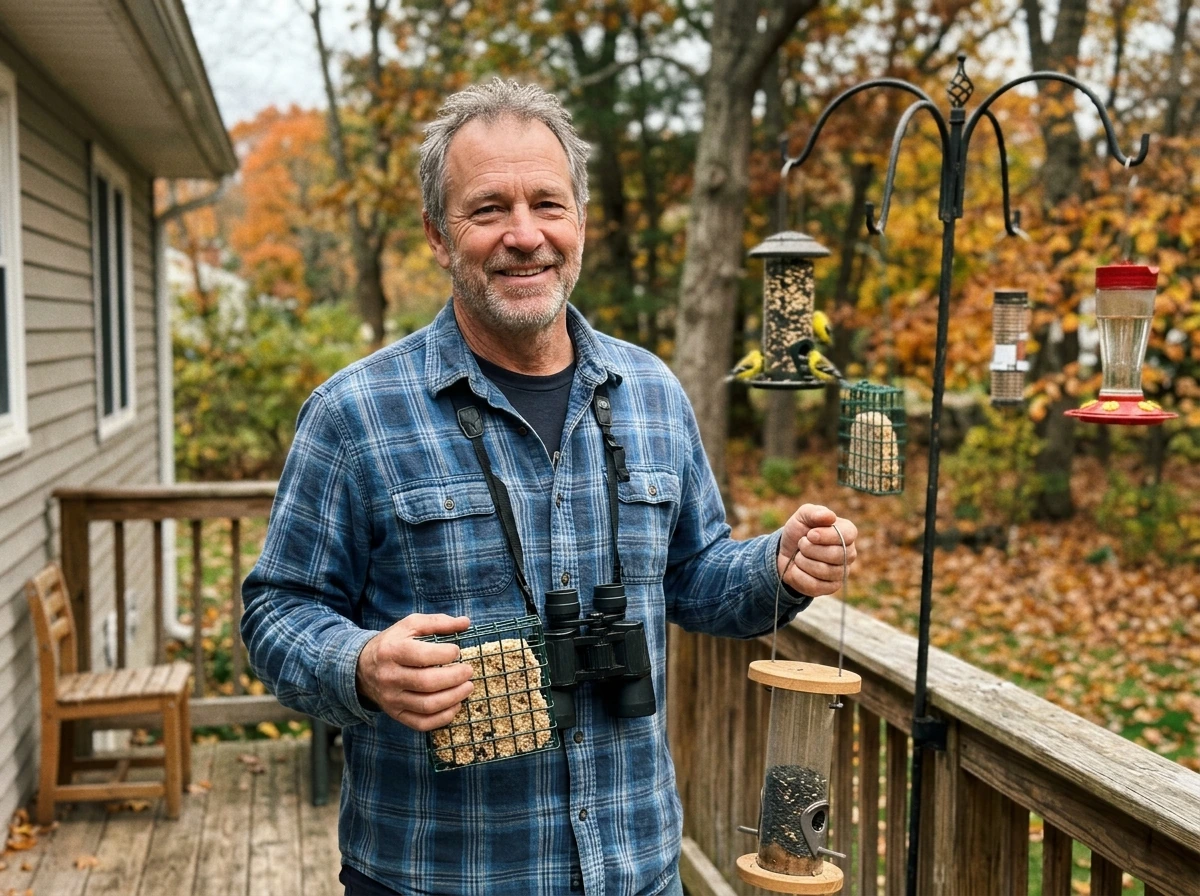
The best buy bird feeder camera right now depends on three things: where your feeder sits (window, pole, tree branch), how reliable your backyard Wi-Fi is, and which birds you're actually trying to watch. If you want a single recommendation to start with, the Birdfy Cam hits the best balance of AI species recognition, 1080p video, and practical app experience for most backyard setups. But depending on your birds, your power situation, and your tolerance for fiddling with settings, a different pick might serve you better. Here's how to figure that out.
Best Bird Feeder Cam Guide: Top Picks and Setup Tips
Marcus Hendricks
23 Mar 2026

What a bird feeder cam actually needs to do
A camera on a bird feeder isn't like a security cam or a wildlife trail cam. The subject is small, fast-moving, and often backlit by open sky. The camera needs to fire quickly the moment a bird lands, hold focus at close range (usually 6 to 18 inches from the perch), and handle harsh lighting shifts between a sunny feeder and a shaded background. At night, it needs IR night vision that doesn't spook nocturnal visitors or wash out moths and other insects that trigger false alerts.
Beyond raw video quality, the camera needs to connect reliably to your home Wi-Fi so you actually get push alerts when something lands. It needs to survive rain, snow, and summer heat without fogging up the lens. And it needs to be positioned so refilling the feeder doesn't require dismantling the whole setup. These sound obvious, but most of the frustrations people have with bird feeder cams come down to exactly these basics being underdelivered.
Key buying criteria for the best camera bird feeder
Video resolution and frame rate
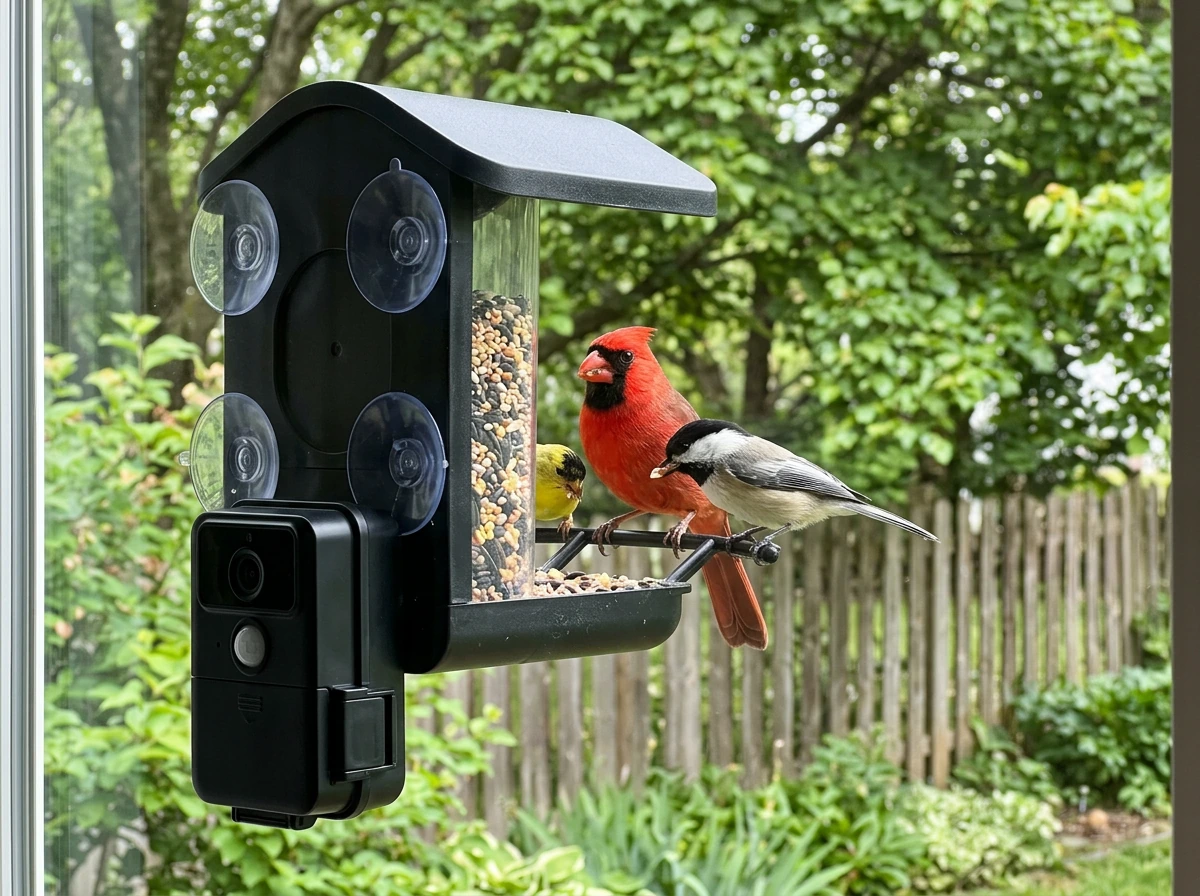
1080p at 30 fps is the current standard worth aiming for. That's what the BeakView and Birdfy Cam both deliver, and it's enough to clearly see plumage detail on a cardinal or the barring on a woodpecker. Bird Buddy's camera module captures 5-megapixel still photos, which are actually excellent for ID purposes, but drops to 720p HD for video clips. That trade-off matters if you want smooth, shareable footage rather than just photo postcards from your feeder.
Night vision quality
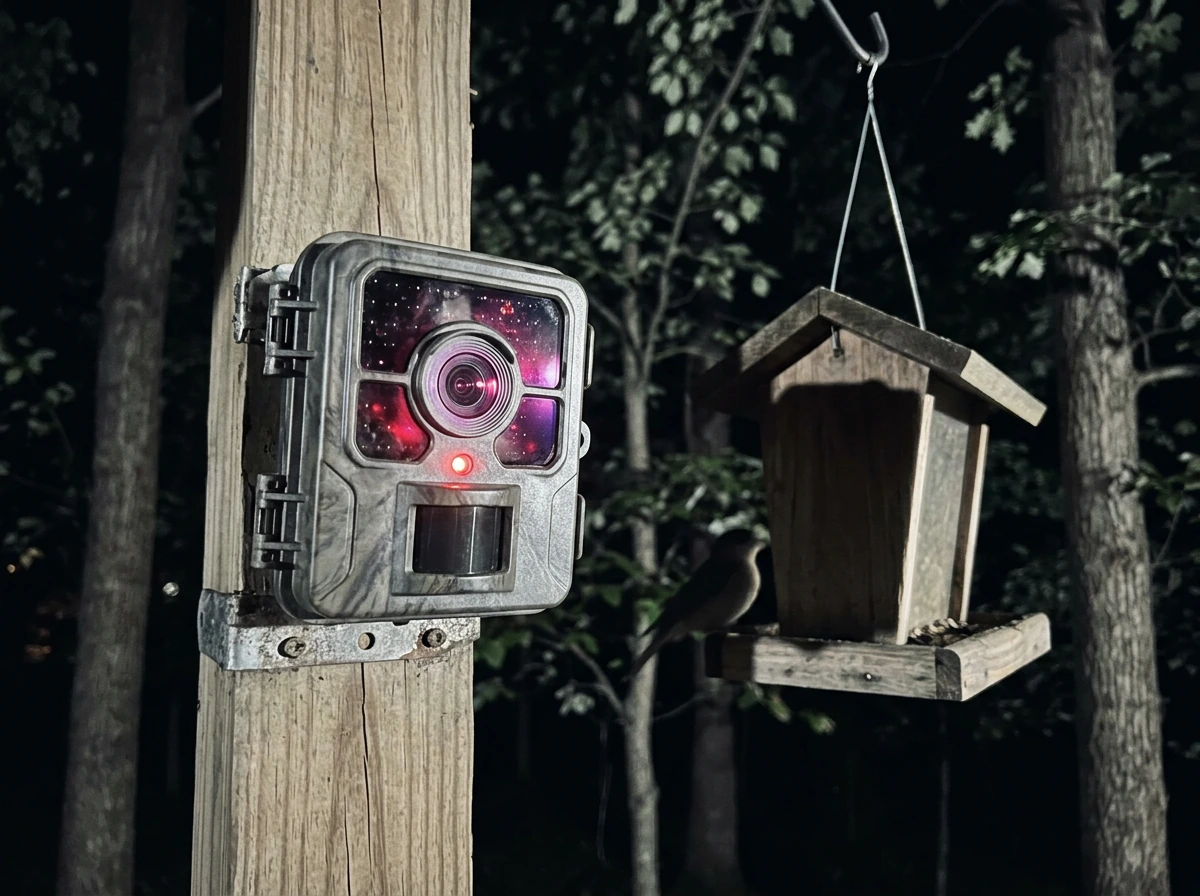
Look for infrared night vision with at least 6 to 8 IR LEDs and an automatic day/night switching filter. The BeakView uses 8 IR LEDs at 850nm wavelength with an automatic optical filter switch and an effective IR range of about 7 meters (roughly 23 feet). That's more than enough for a feeder a few feet away, but the 850nm wavelength does emit a faint red glow that some birds may notice. If you're worried about disturbing skittish species at dusk, some cameras use 940nm (completely invisible) IR, though those tend to produce darker footage.
Motion detection and AI species ID
Basic motion detection fires on anything that moves, including swaying branches and passing squirrels. AI bird recognition is a genuine upgrade: cameras like the Birdfy Cam and Bird Buddy use on-device or cloud AI to identify species and log them, so your app shows you 'American Goldfinch visited at 7:43 AM' rather than just a motion clip. The BeakView takes a slightly different route, using AI human contour detection and activity zone filtering to cut down on false alerts, which is more useful for security but less exciting for birders.
Wi-Fi connectivity and range
This is where a lot of people run into trouble. Most bird feeder cams use 2.4 GHz Wi-Fi only, which has better range through walls and foliage than 5 GHz but can get congested in dense neighborhoods. Bird Buddy 2 supports both 2.4 GHz and 5 GHz (802.11 b/g/n), which gives you more flexibility. Whatever camera you choose, plan to have your router signal reach the feeder location with at least two bars. If your feeder is 60+ feet from the router with walls or a fence in between, add a Wi-Fi extender before you buy the camera, not after.
Power options
Bird feeder cams run on one of three power setups: rechargeable battery, solar (usually a small panel attached to the unit or on a separate mount), or wired USB/AC. Battery-only units are easiest to place anywhere but can drain fast in cold weather or with frequent detections. Solar is appealing but only works reliably in full-sun locations with 4 or more hours of direct light daily. Wired power is the most reliable but limits placement. If you're considering a solar-powered option, there's a deeper breakdown on what to look for over in the best solar bird feeder with camera guide.
Weatherproofing
Look for an IP65 rating or higher. IP65 means the camera is dust-tight and protected against low-pressure water jets from any direction, which covers rain and garden hose splash but not submersion. Some budget cameras list 'weatherproof' without an IP rating, which is essentially meaningless. In practice, the lens cover and seals around the cable entry point are where cheap units fail first. Check user reviews specifically for winter or monsoon-season performance.
Best bird cam feeder picks by use case and bird type
No single feeder cam wins every category, so here's how I'd match them to real backyard scenarios.
| Use Case / Bird Type | Recommended Pick | Why It Fits | Key Trade-off |
|---|---|---|---|
| Best overall / mixed species (cardinals, jays, finches) | Birdfy Cam | AI species ID, 1080p, wide-angle view, motion alerts | App subscription for full AI features |
| Best for beginners / simple setup | Bird Buddy | Easy app, great still photos, charming UI | 720p video only, 5MP photos |
| Best for close-up feeders / window mount | BeakView Camera Feeder | 1080p/30fps, 8 IR LEDs, activity zones | AI is human-detection focused, not species ID |
| Best for woodpeckers / suet feeders | Birdfy Cam (suet attachment) | Vertical mount options, solid motion trigger speed | Suet cage attachment sold separately on some models |
| Best for hummingbirds | Any wide-angle 1080p cam set to continuous clip mode | Hummingbirds move too fast for motion triggers; continuous recording works better | Higher storage use |
| Best for winter / cold climates | Wired/USB-powered cam with IP65 rating | Battery drain in sub-freezing temps is a real problem | Placement limited by cable run |
| Best for squirrel/pest resistance | Camera feeder on a baffled pole mount | Cam feeder + pole baffle combo beats built-in deterrents | Requires pole setup investment |
For orioles, bluebirds, and doves, the feeder style matters as much as the camera. Orioles prefer open platform or nectar feeders, and a wide-angle camera positioned above the tray captures their full display. Bluebirds are shy and rarely use feeders unless you're offering mealworms on a low, open platform, so place the cam at feeder height rather than above. Doves feed on the ground or on wide platform feeders, which means a downward-angled camera setup works better than the standard eye-level mounting most smart feeders default to.
Placement and setup for clear footage (angle, lighting, Wi-Fi)
Camera angle and distance
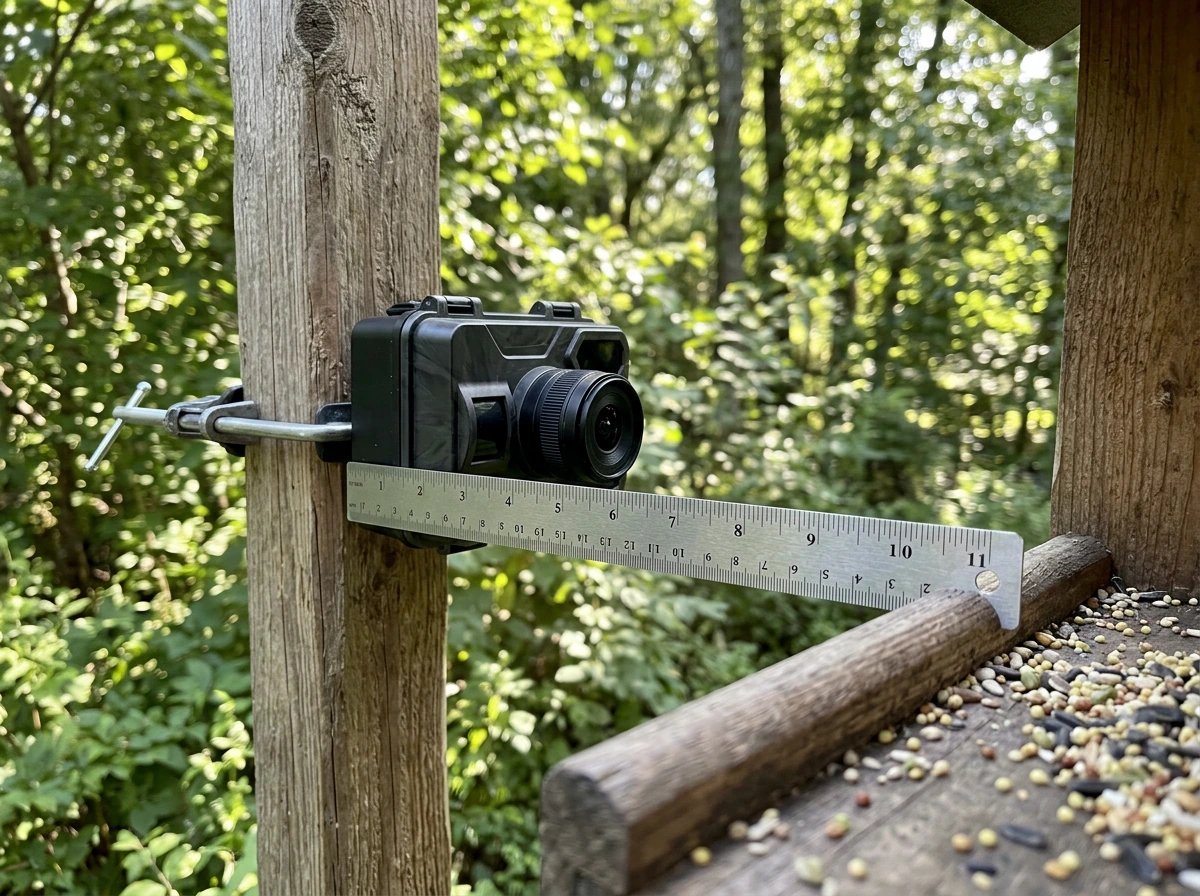
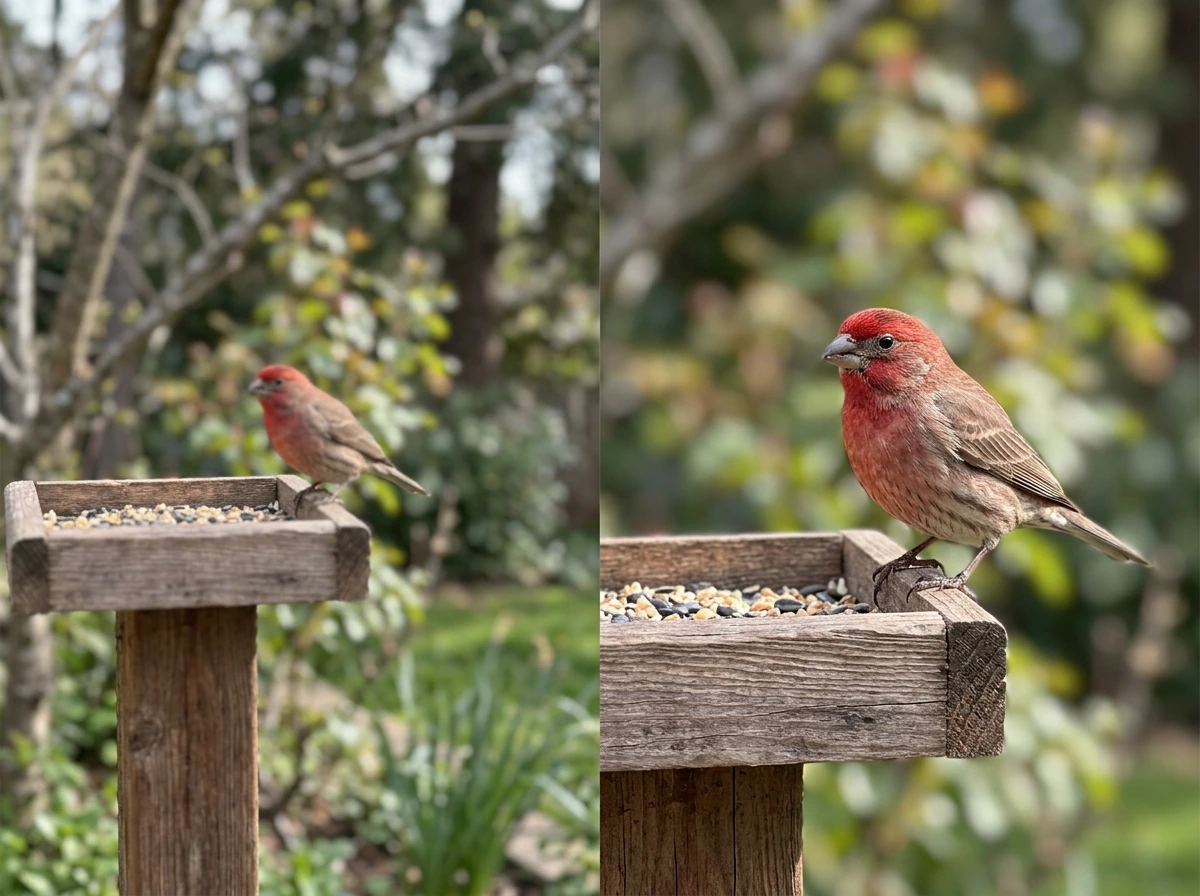
The camera lens should sit 8 to 14 inches from the main feeding port or perch. Too close and you'll get a blurry, cropped view of a bird's chest. Too far and the bird appears tiny against the background noise. The BeakView's lens is an M12 format at f:3.3mm with an F2.0 aperture, which gives a reasonably wide field of view at close range and decent low-light gathering. Most built-in camera feeders are designed so the camera faces the perch directly, but check the product images carefully. Some cameras are offset to one side, which means one perch is perfectly framed and others are at the edge of frame.
Lighting direction
Place the feeder so the camera faces away from direct sun. A camera pointing east with morning sun behind the birds will produce silhouettes and washed-out footage for the first few hours of the day, which is often peak bird activity. North-facing or shade-side placement gives more consistent, even lighting. If you're working with a fixed location, consider adding a small roof extension or shade hood over the lens to cut glare.
Wi-Fi signal at the feeder location
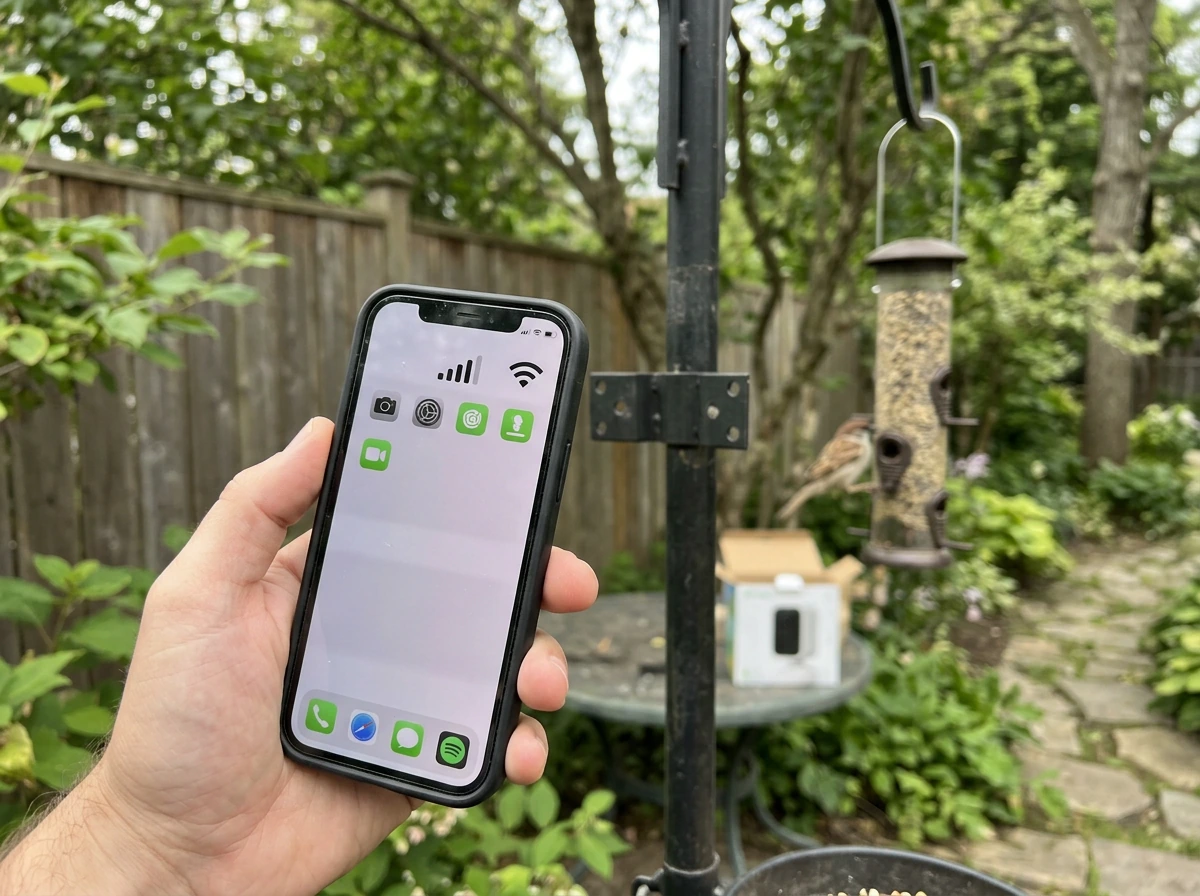
Before mounting anything, walk to your intended feeder spot with your phone and check the Wi-Fi signal strength. You want a strong connection, not just 'connected.' If your feeder is more than 50 feet from the router or has a masonry wall, thick hedge, or metal fence in the signal path, plan on a Wi-Fi extender or a mesh node. Wyze also explains that mesh systems use multiple nodes to improve Wi-Fi coverage and stability for connected devices mesh node systems can improve coverage and stability. Most feeder cameras connect during setup via a QR code scan from the app, and a weak signal at that exact moment will cause the pairing to fail even if the camera eventually connects afterward.
Power, weather durability, and seasonal performance
Battery performance is the most misunderstood spec in this category. A camera rated for '6 months on one charge' is usually tested in mild conditions with minimal detections. In real backyard use, with 20 to 50 daily motion events and winter temperatures below 32°F (0°C), expect that number to drop by 50 to 70 percent. Lithium batteries handle cold better than alkaline or NiMH, so check what cell type the camera uses before assuming the rated battery life applies to your climate.
Solar-assisted cameras are a genuine solution for high-traffic feeders in sunny locations, but a tiny built-in solar strip (common on budget models) often only trickle-charges the battery rather than sustaining the camera through a full day of use. Effective solar setups use a separate panel with at least 3 to 5 watts and a direct, unshaded south-facing exposure. More detail on this is covered in the best solar bird feeder with camera article if you're going that route.
For winter birding, which is actually when cameras are most rewarding (bare branches mean unobstructed views and birds are more feeder-dependent), prioritize wired power or a high-capacity battery with USB-C charging. Keep the lens clear of snow and ice with a roof overhang. Suet feeders are especially active in winter, so if you're adding a camera to an existing suet cage, make sure the camera's IR night vision is rated to work down to at least -4°F (-20°C) if you're in a cold-weather region.
Pest prevention and keeping birds (not rodents) on camera
Smart feeder cameras capture a lot of footage you didn't ask for. Squirrels, rats, raccoons, and starlings will happily take over your frame and your seed supply. The camera itself doesn't deter pests, so you need to solve that problem at the feeder and mount level, not with settings.
- Mount the feeder on a smooth metal pole with a squirrel baffle (either a dome baffle above or a cone baffle below). This is the single most effective squirrel deterrent.
- Keep the feeder at least 10 feet from any horizontal surface a squirrel can jump from (fence, deck rail, tree branch).
- Use a weight-sensitive perch on hopper or tube feeders. These close seed ports when a squirrel's weight triggers them, but most small birds are light enough to feed freely.
- For rat problems, switch to no-waste seed (hulled sunflower, shelled peanuts) to eliminate ground spillage. Rats are almost always attracted by seed drop, not the feeder itself.
- Use a feeder with a cage surround for starlings and large nuisance birds. The cage allows small songbirds through but blocks bigger species.
- Set activity zones in your camera app to focus alerts on the feeder itself rather than the ground below, which cuts down on rodent alert noise without turning off notifications entirely.
If you're getting a lot of pest footage, don't just increase the sensitivity threshold on your motion detection. That approach also causes you to miss quick bird visits. Instead, fix the physical pest problem first, then tune the camera.
Troubleshooting: missed detections, poor video, app/connection issues
Birds visiting but no alerts firing
This usually comes down to one of three things: the motion detection sensitivity is set too low, the activity zone doesn't cover the perch area, or the camera's detection lag is too long. Start by checking the activity zone in the app and make sure it covers the full perch, not just the seed tray. Then bump sensitivity up one notch and watch what happens over a day. If you start getting wind-triggered false alerts, you've gone too far and can back off slightly.
Blurry, washed-out, or grainy video
Daytime blur is almost always a focus distance issue. If the camera is farther than 18 inches from the subject at close-focus range, small birds will be soft. Move the camera closer or reposition the feeder. Washed-out footage during sunny hours is a lighting direction problem (see the placement section above). Grainy night footage usually means the IR range is being pushed too hard or there's a film of moisture or condensation on the lens cover. Wipe the lens with a dry microfiber cloth and check for fogging inside the lens housing, which signals a failing weatherproof seal.
App disconnects and connection drops
If the camera repeatedly drops from the app, the most common cause is Wi-Fi signal instability at the feeder location rather than a camera firmware problem. In a Birdfy user thread, people who cannot connect to Wi-Fi describe connection issues and share practical troubleshooting steps, which can help with real-world setup problems like signal instability Wi‑Fi signal instability at the feeder location. Check the signal with your phone at that exact spot. Also check whether your router is on a 2.4 GHz/5 GHz auto-switching network: many cameras struggle when the SSID switches bands mid-connection. If that's the case, create a dedicated 2.4 GHz SSID on your router for IoT devices and connect the camera to that one only. For Bird Buddy 2 users who have 5 GHz support, make sure the router and the camera are negotiating the right band during initial setup.
AI identification getting species wrong
AI bird ID in current models is good but not perfect, especially for juvenile birds, females of dimorphic species, or species with regional plumage variation. If you're getting misidentifications, check whether the app allows you to submit corrections, as most do. Those corrections feed back into the model and improve accuracy over time. Also make sure the camera is positioned so the bird is facing the lens rather than presenting its back or tail, since profile and back views are harder for AI models to ID confidently.
DIY alternatives and smart upgrades if you already have a feeder
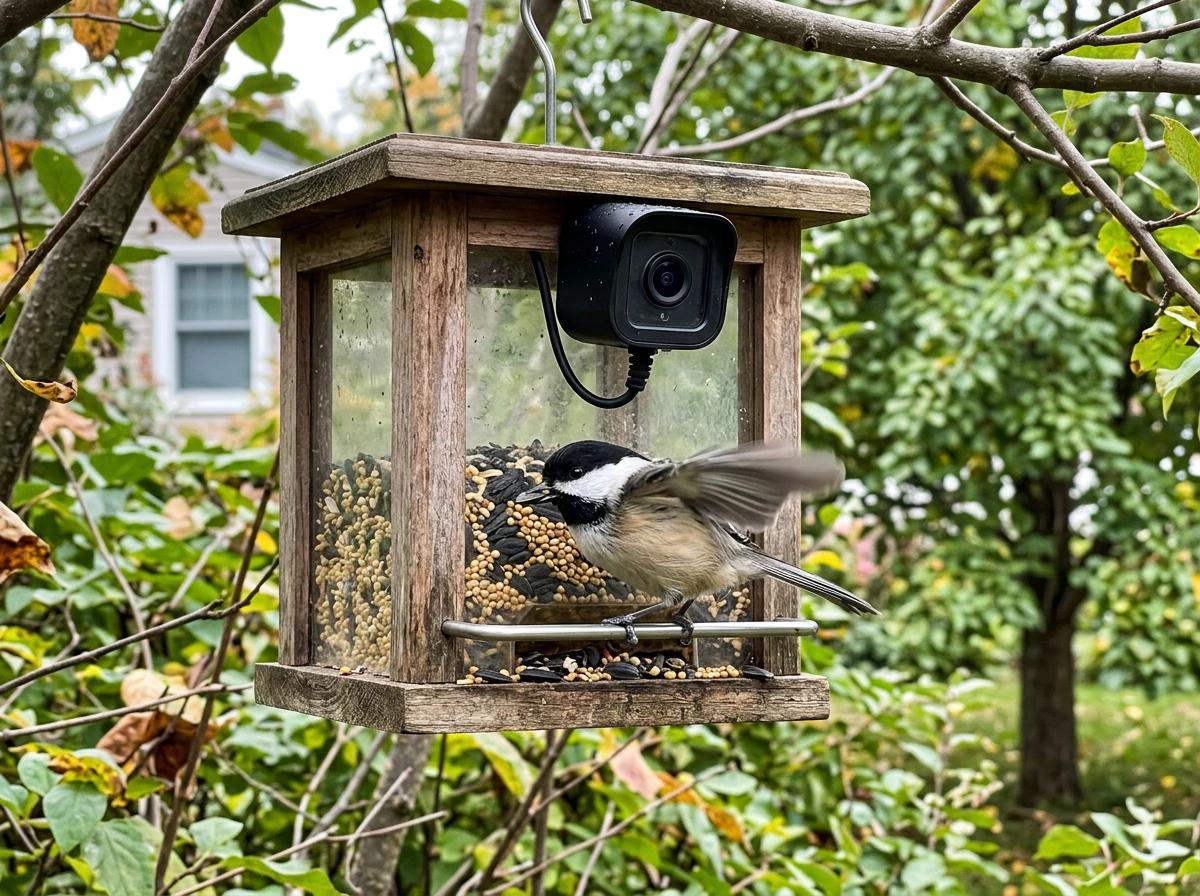
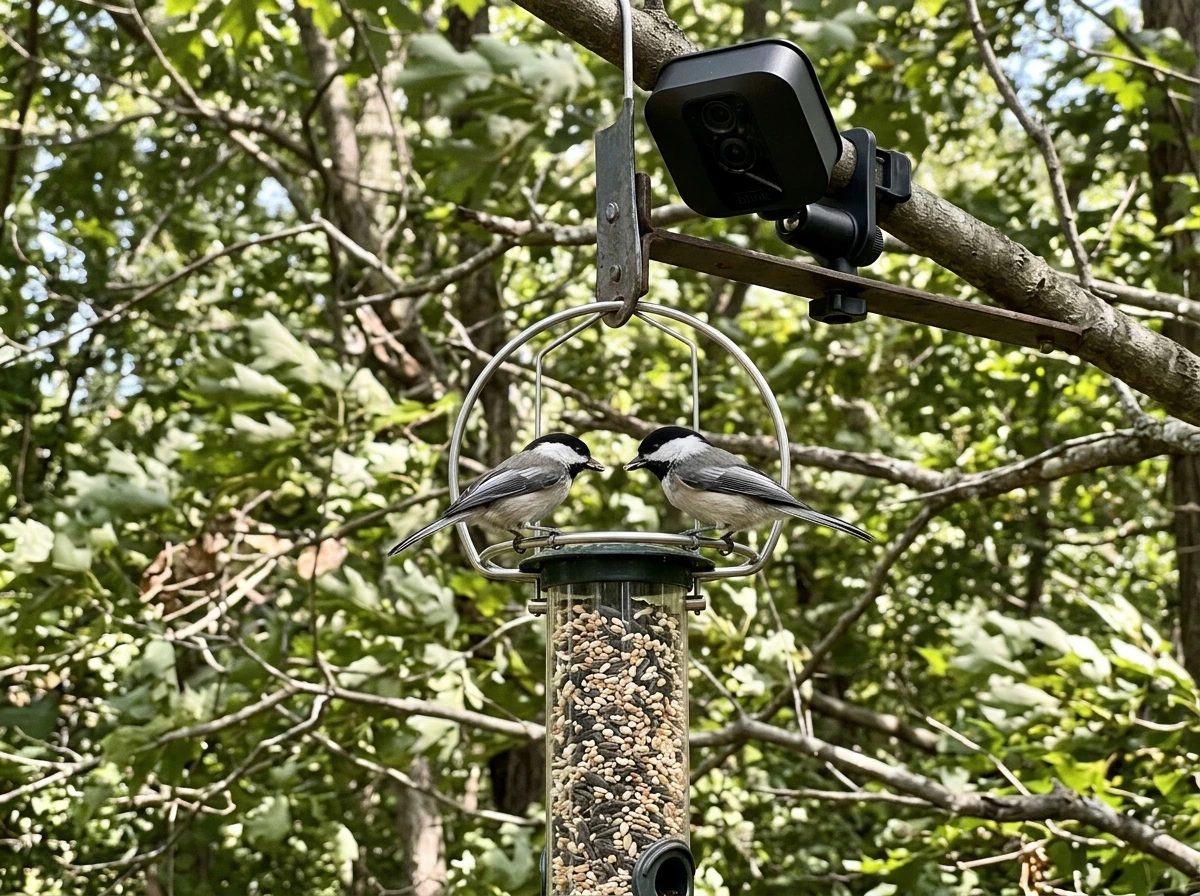
If you already have a feeder you love, you don't have to replace it with a purpose-built camera feeder. A small 1080p Wi-Fi camera (standard security cube cam or a dedicated outdoor wildlife cam) mounted on a stake or bracket 12 to 18 inches from the feeder can deliver comparable footage. Look for models with an F2.0 or wider aperture for good low-light performance and an adjustable mount so you can dial in the exact angle.
For window feeders, a suction-cup mounted camera aimed at a clear acrylic window feeder gives extremely close, sharp footage and eliminates the Wi-Fi range problem since you're mounting everything right at the house. The lighting can be tricky (interior reflections), but a polarizing filter over the lens cuts most of that. This setup works especially well for chickadees, nuthatches, and small finches that take to window feeders readily.
If you want AI species ID without buying a new smart feeder, the Birdfy Cam can be ordered as a camera-only accessory and positioned near an existing feeder rather than as an integrated unit. Birdfy advertises the Birdfy Cam as a standalone bird-watching camera with 1080P resolution and a wide-angle view, along with night vision modes blank" rel="noopener noreferrer">Birdfy Cam with 1080P resolution and a wide-angle view plus night vision modes. That gives you the AI recognition software and app experience without replacing a feeder that's already attracting good traffic. If you want the full picture, compare options in the best smart bird feeder camera guide before you decide. It's worth checking the best smart bird feeder camera and best camera bird feeders comparisons for more detail on camera-only versus integrated options, since the trade-offs in mounting flexibility and detection angle are worth understanding before you commit.
One last practical tip: whatever setup you choose, run it for two full weeks before judging the results. Birds are cautious around new objects near their food source. It's common for a feeder cam that seems to be capturing nothing to suddenly become very active once local birds accept it as part of the landscape. Patience and correct placement will get you further than any spec upgrade.
FAQ
Will a bird feeder cam work if I have a hidden Wi-Fi network (or a nonstandard router setup)?
Many feeder cams need to discover the network during QR pairing, they often fail when SSID is hidden or when captive portal settings exist. If your router hides SSIDs, temporarily enable broadcast for setup, then switch back afterward. Also confirm the router allows IoT devices on the LAN (some guest-network modes block camera app discovery even though the camera can “connect” to Wi-Fi).
How far from the feeder can the camera mount be and still get sharp identification?
For most small birds, staying within about 8 to 14 inches of the main perch or feeding port is where focus and framing usually work best. If you must mount farther, use a model with a wider aperture (around F2.0 or wider) and test daytime footage during peak sun, because small-bird blur usually shows up as soon as the camera cannot achieve close-focus clarity.
What should I do if night vision looks washed out or too bright, even though the IR spec seems strong?
First check for moisture film, dust, or condensation on the lens cover, it can cause IR reflection and “haze.” Next, reduce false-bright triggers by making sure the camera faces away from open sky glare, then verify the night mode actually engages with an optical day/night filter. If your camera supports it, try a night sensitivity or motion-IR setting that prioritizes short bursts instead of continuous high-IR exposure.
Can I use a bird feeder cam to monitor nests, and will it disturb nesting birds?
Often it can, but you should minimize disturbance by keeping the camera angle stable and avoiding frequent repositioning or loud detection alerts. Use an activity zone that focuses on the perch or feeding area, not the nest entry, and avoid mounting too close to active nest sites. If birds repeatedly abandon or hesitate, adjust placement farther away or switch to a less intrusive detection sensitivity.
How do I prevent squirrels or bigger birds from constantly triggering motion alerts?
Don’t rely only on lowering sensitivity. Instead, combine physical control (baffle, cage/squirrel guard, or weight-activated perches where appropriate) with an activity zone that includes the perch but excludes the seed tray edges and feeder supports. If your camera has separate zones, set the “bird zone” tightly, then watch a day’s worth of events to fine-tune.
What’s the best way to test signal strength before I buy, given pairing is where most people fail?
Walk your exact planned mount location with your phone and check that Wi-Fi signal is strong at that spot, not just in the yard generally. Since setup usually happens right at pairing time, if the phone drops to weak bars there, plan a Wi-Fi extender or mesh node beforehand. Also test whether your router uses band steering or auto band switching, because mid-connection SSID changes can break camera sessions even after initial setup.
My camera reports “connected” but video drops or buffers, what should I troubleshoot first?
Treat it as a connection stability problem before blaming the camera. Verify the camera stays on the intended band (2.4 GHz is typical for range), then check if your router switches bands during the session. If it keeps dropping at the feeder, reposition the extender/mesh node closer to the feeder line of sight or reduce nearby interference sources (other IoT devices on the same channel).
Does battery life depend on battery type, and how can I estimate real runtime for my climate?
Yes. Cold weather can cut claimed battery life dramatically, and frequent detections increase power draw. When the spec says “months,” it typically assumes light activity and mild temperatures. If you expect 20 to 50 motion events daily and winter below freezing, plan on roughly half or less of the advertised runtime, and prioritize cameras that use lithium-based cells and offer USB-C charging or swappable battery access.
If my camera feeder is in a bright sunny spot, how can I reduce glare and silhouettes?
Aim the lens so the sun is not behind the birds when they feed. North-facing or shade-side placement usually produces more even lighting, and a small shade hood over the lens can help if you cannot change feeder direction. After mounting, check the first two hours of morning light, because silhouettes and washed-out frames often appear before birds fully adapt.
How can I improve AI species accuracy when the app keeps mislabeling birds?
Misidentifications are common with juveniles, female dimorphic birds, and local plumage variations. If the app allows it, submit identification corrections, since many systems retrain over time. Also make sure the bird is facing the lens more often, because profile and back views are harder for AI to classify reliably.
Is a camera-only Wi-Fi unit worth it if I already have a feeder that works well?
It can be, especially when your current feeder already attracts the right species. Mount a small outdoor or cube-style camera 12 to 18 inches from the feeder port, and ensure the activity zone matches the perch area rather than the whole frame. This avoids replacing a feeder you know works, but you may need extra angle testing because camera-only setups can end up slightly off-axis compared with integrated feeders.
What should I do if my camera seems “inactive” for the first days, then suddenly gets busy?
Birds often take time to accept new objects near the feeder. Run the setup for at least 10 to 14 days before concluding it is underperforming, because early visits can be brief or cautious and then increase once birds normalize the camera presence. During that period, avoid changing sensitivity or mounting angle every day, instead make one adjustment at a time after observing a full day’s events.
Next Articles
Best Camera Bird Feeders: Top Picks, Setup, and Reviews
Top camera bird feeders with window and smart options, plus setup tips and how to choose for clear footage

Best Buy Bird Feeder Camera: What to Choose and Where to Mount
Choose the best buy bird feeder camera setup: mounting tips, feeder types, key features, and reliable troubleshooting.

Best Smart Bird Feeder Camera: 2026 Guide and Top Picks
2026 guide to the best smart bird feeder camera, comparing video, detection, Wi‑Fi, feeder fit, power, and outdoor durab