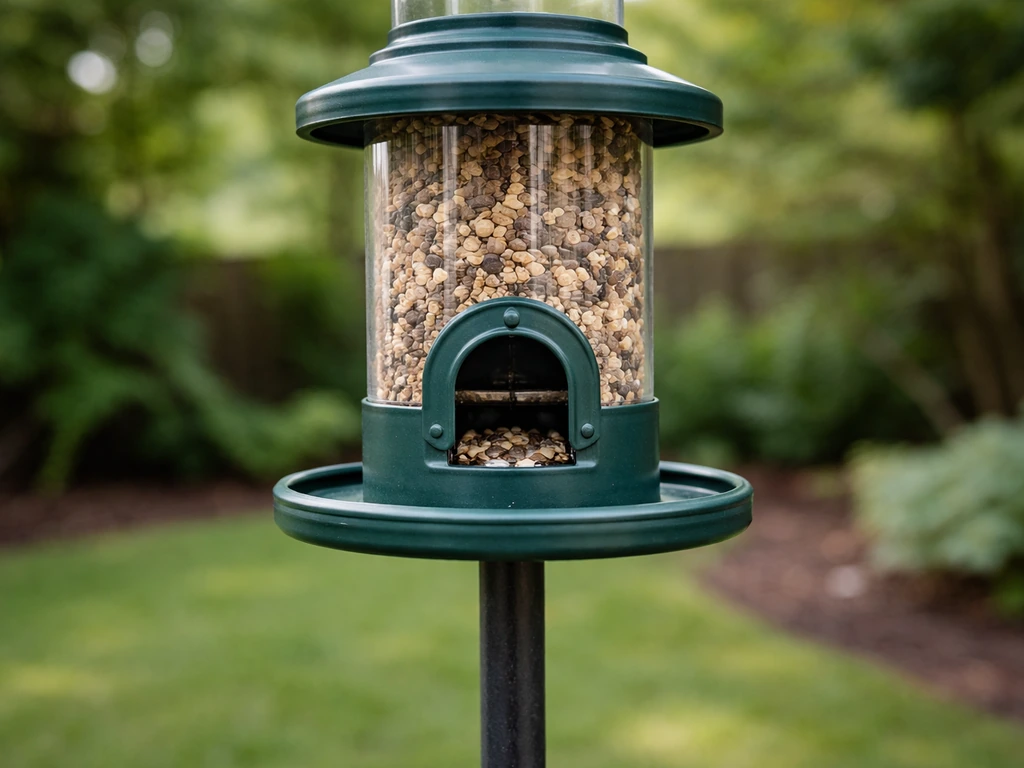
An aluminum can bird feeder is exactly what it sounds like: a repurposed beverage can (soda, beer, or similar) converted into a seed dispenser for backyard birds. Done right, it costs almost nothing, uses a material that would otherwise go in the recycling bin, and can attract chickadees, finches, nuthatches, and sparrows within a day or two of hanging. For a sustainable option, consider a recycled can bird feeder as an easy, eco-friendly alternative that keeps cans out of the recycling bin while attracting backyard birds. Done carelessly, it creates sharp metal edges, potential liner contamination, and a feeder that falls apart in the first rainstorm. This guide walks through every decision you need to make, from picking the right can to finishing it safely, so you end up with something birds actually use.
Aluminum Can Bird Feeder: DIY Plans, Safety & Buying Tips
What an Aluminum Can Bird Feeder Actually Is
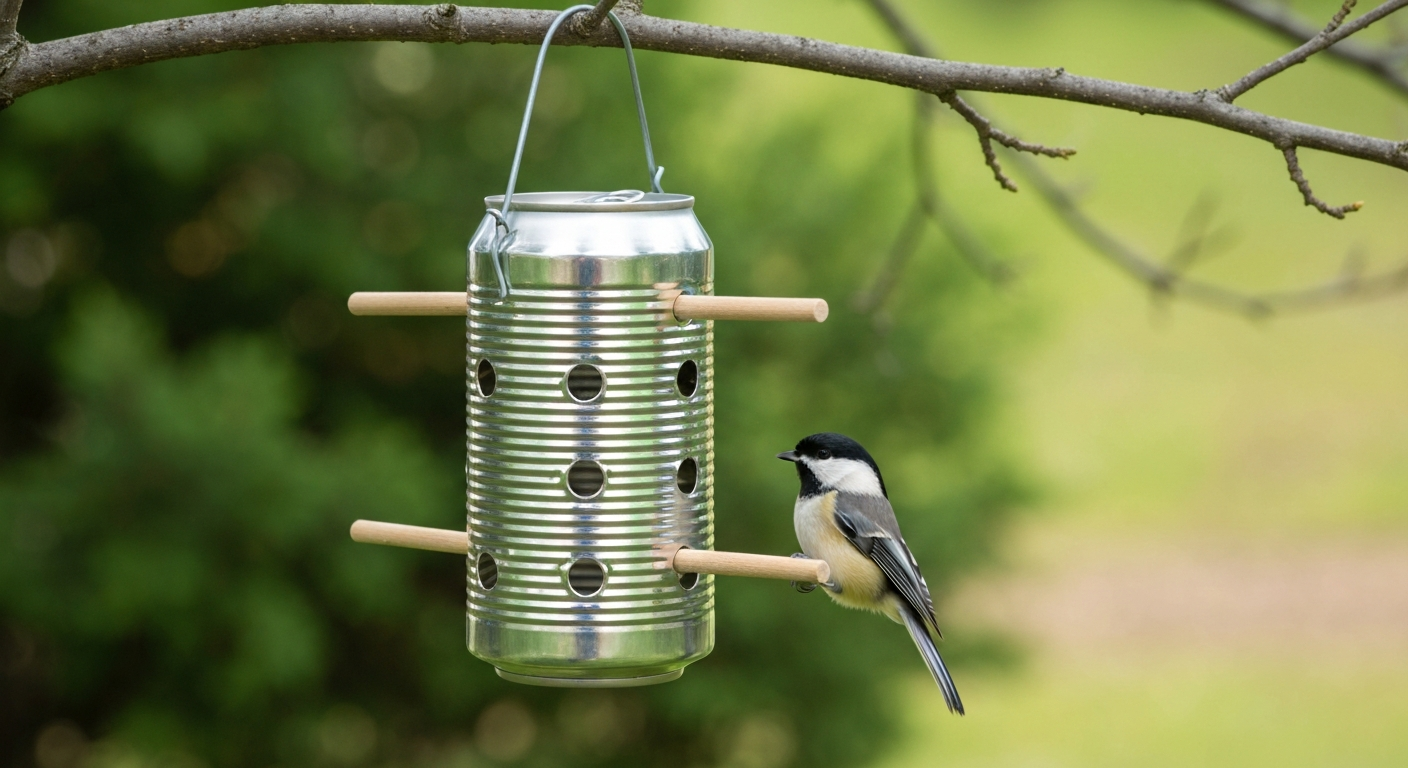
At its core, an aluminum can feeder is a DIY tube or platform dispenser built from a thin-walled drawn-and-ironed aluminum alloy can. Standard 12 oz or 16 oz soda and beer cans are the most common starting point, and their cylindrical shape naturally lends itself to a tube-feeder form. For a simple, step-by-step example, see a soda can bird feeder build that shows the basic tube-style conversion using a standard 12 oz can. For detailed plans and variations, see the beer can bird feeder guide for step-by-step instructions and safety tips. You cut seed ports near the bottom, add perches (wooden dowels, bamboo skewers, or bolts), cap or seal the top, and hang it from a wire or cord. The result functions just like a commercial tube feeder, only smaller, lighter, and cheaper. Some builders stack two or three cans to increase seed capacity. Others flatten or roll the material into a tray-style platform feeder. The design options are genuinely broad, which is part of the appeal for DIYers.
Who should consider one? Beginners who want to attract birds without spending money upfront, anyone testing a new yard location before committing to a permanent mount, families with kids who want a weekend project, and experienced birders who just want a secondary quick feeder for a new spot. It is not the right permanent solution for someone who wants a high-capacity, low-maintenance setup or who is feeding through a harsh winter season. Think of it as a practical starter feeder or a temporary addition, not a replacement for a well-built commercial hopper or tube feeder.
Build It or Buy It: A Quick Decision Guide
The most useful thing I can tell you here is that the decision is not really about skill level. It is about what you actually need the feeder to do. If you are testing a new spot in the yard to see which species show up before you invest in a pole-mounted setup, building a can feeder makes perfect sense. If you need something that holds two pounds of black-oil sunflower seed through January in Minnesota, buy a feeder.
| Situation | Build a Can Feeder | Buy a Permanent Feeder |
|---|---|---|
| Budget | Under $2 in materials (or zero) | $15 to $80+ for quality |
| Timeline | Ready in 1 to 2 hours | Ready immediately out of box |
| Seed capacity | 1 to 3 oz (small, needs daily refills) | 8 oz to 5 lbs depending on model |
| Expected lifespan | 1 to 3 seasons with care | 5 to 15+ years |
| Weather durability | Fair in dry climates, poor in wet winters | Good to excellent depending on material |
| Pest resistance | Low (light feeder, no baffle) | High with weight-activated ports or cages |
| Best use case | Test location, kids project, emergency feeder | Year-round primary feeding station |
| Cleaning ease | Moderate (small interior, sharp edges) | Easy with wide-mouth commercial designs |
Build one if: you want to attract birds to a new garden bed, you are doing a school or family project, you need a feeder within hours, or you want to recycle cans into something functional. Buy one if: you are feeding birds through winter, you have significant squirrel pressure, you want to attract larger birds like cardinals or jays, or you need a feeder that does not require daily attention.
Soda and Beer Cans vs. Soup and Oil Cans: What the Materials Actually Mean
This is where most DIY guides skip important details, and it genuinely matters for safety. Soda and beer cans are made from thin aluminum alloy (typically 3000-series alloys), drawn and ironed to a wall thickness of roughly 0.097 mm on the sidewall. They are lightweight, easy to cut, and widely available. Soup cans, by contrast, are typically tinplate steel (electrolytic tin-coated low-carbon steel) or sometimes tin-free steel. Oil cans used in automotive contexts are usually steel too. These are meaningfully different materials with different corrosion behaviors, cutting characteristics, and interior coatings.
Interior Linings and the BPA Question
Almost all beverage cans have an interior polymer lining, historically based on epoxy resins that may contain bisphenol A (BPA). The FDA has reviewed migration data for these coatings and acknowledged that small amounts of BPA can migrate from can linings into contents, particularly under heat or acidic conditions. For a bird feeder, the concern is different from human food exposure: wet or fermented seed creates an acidic, potentially chloride-containing leachate that sits in contact with the can interior. Research on aluminum beverage can corrosion confirms that damaged liners accelerate pitting and crevice corrosion, and that organic acids from decomposing seed would accelerate metal release. For detailed electrochemical and SEM studies on coated vs uncoated aluminum can corrosion, see Corrosion Behavior of Aluminium-Coated Cans - MDPI Materials. The practical takeaway: remove or neutralize the interior lining before use, or treat the inside with a food-safe, BPA-free coating. More on that in the DIY build section below. Soup cans present a similar issue because their steel bodies are also typically lined with epoxy or other polymer coatings. For step-by-step guidance on converting a soup can into a safe, weather-resistant feeder, see the soup can bird feeder reference. Oil cans often have no food-contact lining at all, and residual petroleum contamination makes them unsuitable for seed contact without thorough cleaning and relining.
| Can Type | Material | Interior Lining | Corrosion Risk | Suitability for Seed Contact |
|---|---|---|---|---|
| Soda can (12 oz) | Aluminum alloy (3004) | Epoxy/polymer (may contain BPA) | Moderate (pitting under acidic/wet conditions) | Fair after prep and relining |
| Beer can (12-16 oz) | Aluminum alloy (3004) | Epoxy/polymer (may contain BPA) | Moderate | Fair after prep and relining |
| Soup can (steel) | Tinplate or tin-free steel | Epoxy or enamel lining | Lower base corrosion, but liner failure causes rust | Fair after prep; heavier and harder to cut |
| Oil can (steel) | Steel | None or petroleum residue | High without treatment | Poor; requires extensive cleaning and relining |
For purely outdoor seed-holding purposes where birds peck through ports rather than licking the interior, the migration risk is lower than in a food container humans eat from directly. But I still recommend relining or sealing the interior of any repurposed can with a food-safe sealant, especially if you are in a wet climate or using the feeder in summer when seed spoils quickly. Projects like oil can bird feeders and soup can bird feeders follow similar logic but carry specific material quirks worth reading up on separately.
Honest Pros and Cons of Can-Based Feeders
- Cost: effectively free if you save cans, or under $2 even if sourced specifically. No other feeder type comes close on price.
- Recyclability: aluminum is one of the most recyclable materials on the planet. When the feeder reaches end of life, the can goes back in the recycling bin.
- Build time: a basic tube feeder takes 30 to 60 minutes with common household tools.
- Customization: you can size ports for specific seeds, add multiple perches, paint the exterior for camouflage or aesthetics, and adapt the design freely.
- Low stakes: if you get the placement wrong or birds ignore it, you have lost almost nothing.
- Educational value: great for introducing kids to birding and basic tool use.
- Sharp edges: thin aluminum shears into dangerous burrs that must be deburred thoroughly before handling by birds or people.
- Short lifespan: even with prep, expect 1 to 3 seasons outdoors before corrosion, UV degradation of paint or sealant, or physical damage ends the feeder's useful life.
- Low seed capacity: a standard 12 oz can holds maybe 1.5 to 2 oz of black-oil sunflower seed. In active yards, that means daily refills.
- Poor pest resistance: a lightweight aluminum can feeder has no weight-activated closure, no cage, and is easy for squirrels to manipulate or knock down.
- Weather vulnerability: standing water inside a can feeder accelerates corrosion and seed mold. Rain-exposed designs without a roof or overhang fail quickly.
- Liner and coating concerns: the interior polymer lining requires attention before use, especially in wet conditions or summer heat.
- Not suitable for large birds: the small diameter and light construction make can feeders impractical for cardinals, blue jays, or doves.
Which Birds Will Actually Use a Can Feeder
Can feeders are small-bore tube feeders by nature, and that drives which species will visit. Cornell Lab's species-to-feeder mapping is clear on this: tube feeders attract birds that can cling or use small perches, which rules out ground-feeding and large-bodied species. The good news is that many of the most common and enjoyable backyard birds fall squarely into that category.
| Bird Species | Feeder Suitability | Best Seed for Can Feeder | Notes |
|---|---|---|---|
| Black-capped Chickadee | Excellent | Black-oil sunflower, safflower | Clings easily, works with small ports |
| House Finch / Purple Finch | Excellent | Black-oil sunflower, nyjer (thistle) | Prefers tube feeders; nyjer requires smaller ports (~1/8 inch) |
| American Goldfinch | Excellent | Nyjer (thistle) | Needs very fine ports; sock feeder or fine-port tube works best |
| Tufted Titmouse | Good | Black-oil sunflower, safflower | Slightly larger than chickadee but still manages tube feeders |
| White-breasted Nuthatch | Good | Black-oil sunflower, safflower | Climbs head-down; a simple perch below the port works well |
| Dark-eyed Junco | Fair (platform better) | White proso millet | Prefers ground or platform; will use can if platform-style build |
| House Sparrow | Good | Millet, sunflower chips | Prolific visitors; may monopolize a small feeder |
| Northern Cardinal | Poor | Safflower, sunflower | Too large and heavy for most can-feeder designs; needs platform or hopper |
| Blue Jay | Poor | Sunflower, peanuts | Too large; needs a sturdy platform or hopper feeder |
| Mourning Dove | Poor | Millet, safflower | Ground or open platform feeder only |
If your primary target birds are cardinals, blue jays, or doves, a can feeder is the wrong tool entirely. For chickadees, finches, and nuthatches, it works genuinely well. The nyjer/thistle point is worth emphasizing: the seed is so fine that you need very small ports (around 1/8 inch diameter), which is actually easier to achieve with a nail punch on aluminum than with most commercial feeder port designs.
Three Common Can Feeder Designs Compared
There are really three practical design directions for a can feeder: tube, platform, and slow-release. Each has a different set of strengths and limitations, and which one makes sense depends on the species you want and how much maintenance you are willing to do.
Tube Design
A tube feeder leaves the can in its original cylindrical form, punching 2 to 4 seed ports around the lower half of the can and threading perches through the body just below each port. The top is sealed (with the original lid, a rubber cap, or silicone) and a hanging wire goes through the sealed top. This is the most weather-resistant of the three designs because the seed is enclosed. The main limitation is seed bridging: with a single can and no agitation, black-oil sunflower seeds can clump near the bottom and block the ports, especially after rain. Using sunflower chips or nyjer largely eliminates this problem. Best for: chickadees, finches, nuthatches in a yard with moderate rainfall. Weakest at: high capacity, large birds, heavy rain without a roof.
Platform Design
For a platform design, you flatten or cut the can into a tray and mount it on a base (a small wooden board, a jar lid, or a second can base). You can also cut the top off a can entirely and leave it as an open tray hung by wires through the rim. Platform designs attract a wider species range including juncos and sparrows, but they expose seed directly to rain, which accelerates mold. In dry climates or under a covered area (porch overhang, garden arbor), a platform design works well. Best for: mixed species, millet-feeding birds, sheltered locations. Weakest at: wet weather, pest resistance, seed conservation.
Slow-Release and Slow-Feeder Variants
A slow-release design uses a smaller port opening, a gravity-fed internal screen or divider, or a slinky-style spacer around the can to meter seed flow and reduce waste. For buying guidance and specific models that work well as a slinky-style spacer, see the best slinky for bird feeder. Learn more about building a slow bird feeder to reduce seed waste and discourage pest birds. These designs are worth building if you have heavy House Sparrow pressure or if you want to minimize daily refills. The tradeoff is added complexity in the build and a slightly higher risk of clogging with larger seeds. Best for: nyjer and fine seeds, busy feeders with many visitors, reducing seed scatter. Weakest at: coarse seeds like whole sunflower, very cold climates where freezing blocks small ports.
| Design | Seed Protection | Species Range | Pest Resistance | Build Complexity | Best Season |
|---|---|---|---|---|---|
| Tube | Good (enclosed) | Clinging birds only | Low to moderate | Low | All seasons with roof |
| Platform/tray | Poor (exposed) | Wide (ground feeders too) | Very low | Very low | Dry seasons, sheltered spots |
| Slow-release tube | Good (enclosed) | Clinging birds | Moderate | Moderate | All seasons; best in spring/fall |
Slow-Release and Slow-Feeder Methods Explained
Slow feeding is a concept more familiar to commercial feeder buyers, but it translates well to DIY can builds. The goal is to control how fast seed exits the feeder, which reduces waste, discourages bulk-feeding pest birds, and stretches your refill intervals. There are four practical methods worth understanding.
- Gravity feed with port sizing: the simplest method. A smaller port diameter slows the rate at which seed falls out. For nyjer, a 1/8-inch hole works well. For sunflower chips, try 5/16 inch. Whole black-oil sunflower needs at least 3/8 inch or it will bridge. Seed flow research on bulk grains confirms that orifice diameter relative to seed size determines whether flow is continuous or bridged: aim for at least 6 to 8 times the seed width for reliable gravity flow without clogging.
- Internal screen or mesh divider: cut a small piece of aluminum window screen or hardware cloth and fit it as a false floor 1 to 2 inches above the port level. Seed falls through the mesh in small quantities rather than all at once. This requires a slightly wider can (a 16 oz beer can or stacked design works better than a 12 oz soda can).
- Slinky spacer baffle: wrapping a metal slinky around the outside of the can body and hanging wire is primarily a squirrel deterrent (the slinky collapses under weight), but it also creates a visual barrier that slows small birds slightly and prevents perching for larger, greedier species like starlings. This is a close cousin to the standalone slinky-on-a-pole trick many experienced birders already use.
- Adjustable port covers: a small piece of aluminum cut as a rotating tab over each port, held by a rivet or bolt, lets you open or close ports partially. This is the most adjustable slow-feeder method and the most complex to build. It works well if you want to switch between nyjer and sunflower chips without building a new feeder.
For most backyard DIYers, port sizing alone (method 1) is sufficient and easiest. The internal mesh (method 2) adds maybe 15 minutes of build time and meaningfully improves the feeder's performance with fine seeds. The slinky approach is worth adding if squirrels are already a problem in your yard. These principles also apply to slow-release designs in commercial feeders, which use similar gravity-metering logic at a larger scale.
DIY Plan: Basic Soda or Beer Can Tube Feeder
This is the most beginner-friendly can feeder design and the one I recommend starting with. It uses a single 12 or 16 oz aluminum beverage can, produces a feeder roughly comparable in function to a small commercial tube feeder, and takes about 45 minutes to complete safely. The 16 oz can is preferable because the larger diameter reduces seed bridging and gives you more room to work with ports and perches.
Materials and Tools
- 1 empty aluminum beverage can (12 oz or 16 oz), thoroughly rinsed and dried
- Wooden dowel, 1/4-inch diameter, cut to 5 inches (for perches, 2 needed)
- 18-gauge galvanized wire or heavy nylon cord for hanging (24 inches)
- Rubber or silicone end cap to fit the can's open top, OR a wooden disc cut to fit
- Food-safe waterproof sealant or non-toxic interior liner (Rust-Oleum NeverWet, food-safe silicone sealant, or food-grade epoxy)
- Exterior-grade non-toxic paint (optional, for UV protection and aesthetics)
- Small nail or 1/8-inch drill bit for pilot holes
- Rotary tool (Dremel) with small cutting wheel OR sharp nail punch and hammer
- Metal file and fine-grit sandpaper (220 grit) for deburring
- Pop rivet tool and 1/8-inch aluminum pop rivets (for perch anchoring, optional but stronger than tape)
- Safety glasses (ANSI Z87.1-rated)
- Cut-resistant gloves (ANSI/ISEA 105 Level A4 or higher)
- Small funnel for filling with seed
Safety First: Before You Touch a Blade to Aluminum
Thin aluminum shears into edges sharp enough to cut skin without any pressure at all. OSHA's eye and face protection standard and metalworking safety guidance are explicit on this: flying metal particles from cutting and punching operations require ANSI Z87.1-rated safety glasses at minimum, and cut-resistant gloves are essential whenever you handle cut edges. Work on a stable surface. Keep children and pets away from the work area during cutting and deburring. If you are using a rotary tool, the disc can shatter at high speed, which is another reason to wear eye protection. Once you have finished deburring, run a cotton ball slowly along every cut edge: if it catches any fibers at all, that edge needs more filing. This test sounds fussy but has saved more than a few cuts on my hands over the years.
Step-by-Step Build
- Clean the can thoroughly: rinse with warm water, allow to dry fully overnight. If you want to remove the interior polymer lining (recommended for extended use in wet climates), fill the can with a baking soda and water solution (1 tablespoon per cup) for 30 minutes, then rinse and dry. This slightly neutralizes residual acidity but does not fully remove the liner coating.
- Mark your seed ports: using a permanent marker, mark 2 to 4 port locations around the lower third of the can, spaced evenly (for 4 ports, 90 degrees apart). Each port should be about 3/4 inch from the bottom seam. For black-oil sunflower, mark a circle 3/8 inch in diameter. For nyjer, 1/8 inch. For sunflower chips, 5/16 inch.
- Mark perch holes: directly below each port, mark two opposing holes (through the can body) for the dowel perches. The dowel should pass completely through the can, protruding about 1.5 inches on each side.
- Put on your safety glasses and gloves before the next step and keep them on until all deburring is complete.
- Punch or drill seed ports: for small ports (1/8 inch), a sharp nail and hammer work fine. For larger ports (3/8 inch), use a 3/8-inch drill bit at low speed, or mark and punch with a leather punch. Work on a piece of scrap wood underneath the can to prevent deformation.
- Drill perch holes: use a 1/4-inch drill bit at the marked perch locations. Drill slowly through both sides of the can simultaneously by pushing the bit straight through.
- Deburr all openings: use a small metal file, then 220-grit sandpaper, to smooth every edge inside and outside each hole. Run your cotton ball test on every opening. This step takes 10 to 15 minutes and cannot be skipped.
- Apply interior sealant: using a small brush or the tip of the sealant tube, coat the interior bottom 2 inches of the can (the area seeds will contact most) with food-safe silicone sealant or food-grade epoxy. Allow to cure fully per the manufacturer's instructions, typically 24 hours. This protects against the acidic leachate from wet seed contacting the bare or damaged liner.
- Install perches: thread your 1/4-inch dowels through the perch holes. If the fit is snug, that may be enough. For a more secure hold, add a small drop of waterproof wood glue or use a 1/8-inch aluminum pop rivet through the dowel and can wall on each side.
- Seal the bottom seam: apply a small bead of waterproof silicone sealant around the exterior of the bottom seam. This prevents water from entering from below and sitting in the base.
- Add hanging wire: use an awl or nail to punch two small holes through the top rim of the can, 180 degrees apart. Thread 18-gauge galvanized wire through both holes, twist to secure, and form a hanging loop at the top. Alternatively, thread cord through a small hole punched in the center of a wooden disc cap.
- Cap the top: fit your rubber cap, silicone cap, or wooden disc over the open top of the can. If using a wooden disc, drill a small drainage notch on one side to prevent trapped water.
- Optional exterior finish: spray or brush with exterior-grade non-toxic paint (water-based acrylic is fine). Avoid any paint that contains heavy metals (lead, cadmium). Allow to cure fully before filling with seed.
- Fill and hang: use a small funnel to pour seed through the top before capping, or fill through the seed ports using a spoon. Hang at a height of at least 5 feet from the ground and at least 10 feet from the nearest shrub or fence to reduce squirrel access. Check the feeder after the first rain to confirm water is not pooling inside.
Photos and Diagrams to Include
- Overhead diagram showing port and perch hole placement around the can circumference with measurements
- Cross-section diagram showing seed level, port position relative to can base, and perch dowel orientation
- Close-up photo of deburred port edge before and after filing (cotton ball test visible)
- Photo of interior sealant application along the lower can interior
- Photo of finished feeder hanging with perches installed and seed visible through ports
- Photo showing scale: finished feeder next to a hand or common bird (chickadee if possible) for context
Finishing, Painting, and Food-Safety Rules
A few firm rules on finishing that I have learned from building these and watching what goes wrong. First, never use soldering or brazing to join can pieces without removing the interior lining first. Aluminum's natural oxide layer makes standard soldering practically impossible without special aluminum-specific flux, and heating a polymer-lined can releases fumes from the coating. It is more trouble than it is worth for a feeder this size. Pop rivets and structural epoxy adhesives (such as those based on Loctite EA formulations for aluminum bonding) are far safer and simpler for any joins you need.
Second, on paint: stick to water-based exterior acrylics with no heavy-metal pigments. The exterior of the can never contacts seed directly, so the main concern is UV durability and non-toxicity if chips of paint fall into the seed tray area. Avoid spray paints with strong solvent carriers inside enclosed spaces, and let any painted feeder off-gas completely for 48 hours outdoors before filling with seed.
Third, adhesives: if you are using structural epoxy or silicone for interior sealing, confirm the product is rated food-safe or has a low-migration certified cure. Most two-part structural epoxies cure to an inert solid that poses minimal risk after full cure, but follow the manufacturer's stated cure time, typically 24 to 72 hours, before seed contact.
Pest-Proofing a Can Feeder
Squirrels will find a can feeder fast, and a lightweight aluminum can offers almost no resistance. The best pest-proofing approaches for a can feeder follow the same logic as for any tube feeder: placement, baffles, and seed choice. University extension guidance from Nebraska and similar programs consistently identifies physical barriers and placement as more effective than any feeder design modification alone.
- Placement: hang at least 5 feet off the ground and 10 feet from the nearest launchpad (fence, tree, building edge). Squirrels can jump roughly 5 feet horizontally from a standing position.
- Pole mount with baffle: if you can hang the can feeder from a thin wire attached to a squirrel-baffled pole, that is far more effective than hanging from a branch. A stovepipe or dome baffle 4 feet up the pole blocks climbing access.
- Slinky wrap: thread the hanger wire through a metal slinky so it hangs around the can. Under the weight of a squirrel, the slinky collapses and deposits the squirrel on the ground. This has worked reliably in my own yard for two full seasons.
- Seed choice: safflower seeds and nyjer are both significantly less attractive to squirrels than black-oil sunflower or mixed seed with millet. If squirrel pressure is severe, switching seed type reduces the incentive to bother with the feeder.
- Starlings and House Sparrows: these species are attracted to open platform designs and millet. A tube design with small ports (under 5/16 inch) naturally excludes starlings, which are too large to access small tube ports effectively.
- Rats and rodents: fallen seed beneath any feeder attracts rodents. Use a tray or catchment below the feeder and clean it daily in summer. Rodent-attracting feeders are a known concern in suburban settings; keeping the area clean under the feeder is more effective than any feeder modification.
Winter Feeding and Cold-Weather Adaptations
Aluminum can feeders are not ideal for hard winters, and I want to be honest about that. Freeze-thaw cycles accelerate corrosion at any point where water has entered a seam or port. Wet snow can clog ports entirely. The light weight of a can feeder means it spins and swings in winter wind, which birds find off-putting. That said, if you are in a mild winter climate or using the feeder in a sheltered spot (under an overhang, on a covered porch), an aluminum can feeder can work through winter with a few adaptations.
- Add a roof: a small wooden disc or plastic lid with a 1-inch overhang over the can top keeps snow and rain out of the top cap and off the ports.
- Use high-fat seeds in winter: black-oil sunflower has a higher oil content than striped sunflower and is the go-to cold-weather seed for the species a can feeder attracts. Chickadees in particular rely heavily on calorie-dense food in winter.
- Inspect sealants monthly in winter: freeze-thaw cycling cracks silicone sealants over time. Reapply at the first sign of separation.
- Consider a second permanent feeder for winter: even if the can feeder is your creative project, having a durable hopper or tube feeder as the primary winter feeding station takes the pressure off the less robust DIY build.
Maintenance, Longevity, and When to Retire the Feeder
Cornell Lab recommends cleaning tube feeders every 1 to 2 weeks to prevent mold and bacterial growth on wet seed. For a can feeder, cleaning means emptying the seed, rinsing the interior with a dilute bleach solution (1 part bleach to 9 parts water), rinsing thoroughly with clean water, and allowing to dry fully before refilling. The small interior of a can feeder makes this slightly fiddly compared to a wide-mouth commercial feeder, but a bottle brush handles it fine.
Expect an honest lifespan of one to three seasons for a well-built, well-maintained can feeder in a temperate climate. The first failure mode is usually corrosion at cut edges where the interior coating was removed during drilling, especially at the bottom of the can where seed moisture accumulates. The second is sealant failure at seams in climates with freeze-thaw cycles. When you see rust discoloration, persistent corrosion pitting, or structural deformation around the ports, retire the feeder. The can is still recyclable.
When to Stop Tinkering and Buy a Proper Feeder
If you have tried an aluminum can feeder and enjoyed the birds it attracted, the logical next step is a durable tube or hopper feeder that holds more seed, survives more seasons, and requires less frequent maintenance. Here is a simple checklist to guide that decision.
- You are refilling your can feeder every day or more: move to a feeder with at least 1 lb seed capacity.
- Squirrels are defeating your baffles: look for weight-activated port feeders (Squirrel Buster style) or a feeder with a built-in cage.
- You want to attract cardinals, jays, or doves: choose a hopper, platform, or large-tray feeder. No can feeder design will work reliably for these species.
- Your feeder is showing corrosion after less than one season: upgrade to a UV-stabilized polycarbonate tube feeder or powder-coated steel hopper feeder with a longer service life.
- You are in USDA Hardiness Zone 4 or colder: invest in a weather-sealed commercial feeder for winter feeding. Can feeders are summer and shoulder-season tools in cold climates.
- You want to attract goldfinches specifically: a dedicated nyjer sock or commercial nyjer tube feeder with fine mesh ports outperforms any can build for this purpose.
The aluminum can feeder is a genuinely useful project and a real feeder, not just a craft activity. But the best feeders are the ones birds visit reliably and you maintain consistently. If a can feeder is getting you to pay attention to your yard and your birds for the first time, that is a good trade. When you are ready for something more permanent, you will have a much better sense of exactly what you need.
FAQ
What primary materials and metallurgy questions must be researched for a safe, accurate guide to aluminum can bird feeders?
Investigate alloy and fabrication differences (drawn‑and‑ironed aluminum beverage cans vs. thicker steel/tin food cans), typical wall thicknesses, mechanical strength, and how surface treatments (anodizing, lacquers) affect cutting/fastening. Source categories: peer‑reviewed materials science, packaging industry datasheets, manufacturer metal spec sheets.
Which corrosion and environmental‑aging research is required to evaluate outdoor longevity and safety?
Study aluminum corrosion modes (pitting, crevice corrosion) under outdoor conditions, effects of salt, organic acids from seed leachate/fermentation, wet/dry cycles, and accelerated aging protocols. Source categories: corrosion journals, accelerated‑weathering studies, materials testing labs.
What must be known about interior can liners, food‑contact coatings, and chemical migration risks?
Determine typical liner chemistries used in beverage vs. soup/oil cans (epoxy/BPA historic usage, BPA‑free alternatives), migration testing data, regulatory approvals, and potential for coating failure when cans are cut or abraded. Source categories: FDA guidance/FCS notices, food‑packaging research, regulatory Q&As.
Which food‑safety and toxicology questions are essential before recommending recycled cans for bird seed?
Ask whether liner breakdown or metal ion leaching (Al, coatings) can contaminate seed at concentrations of concern for birds or humans, how moisture and fermentation alter migration, and acceptable reuse scenarios (temporary vs permanent). Source categories: toxicology studies, migration testing papers, bird health literature, regulatory food‑contact reports.
What mechanical‑safety and workshop‑PPE issues must be addressed for DIY builds?
Identify hazards of cutting/punching thin can sheet (sharp edges, flying shards), recommended PPE (cut‑resistant gloves, eye protection), tool choices (shears, rotary cutters, deburrers), and safe disposal of waste. Source categories: OSHA standards/guidance, university workshop safety notes, metalworking handbooks.
What joining and finishing method research is needed (rivets, adhesives, soldering, paint)?
Compare rivets/pop‑rivets, mechanically crimped joints, adhesives/structural epoxies (suitability for coated aluminum), and the feasibility/safety of soldering/brazing aluminum. Also examine paint/adhered coating compatibility, outdoor durability, and low‑VOC/food‑safe options. Source categories: adhesive/epoxy technical datasheets, rivet manufacturer catalogs, brazing/soldering manuals, paint TDS/SDS.
Slow Bird Feeder Guide: Types, Setup, Troubleshooting
Guide to slow bird feeders: types, setup, slow-feeding mechanisms, and troubleshooting to deter squirrels