Bird feeder cameras are worth it for most backyard birders, but only if you pick the right type for how you actually watch birds. If you want effortless species ID and a polished app experience, a smart integrated feeder like the Bird Buddy 2 genuinely delivers. If you already own a feeder you love and just want footage, a dedicated webcam or security camera pointed at it is cheaper, more flexible, and often more reliable. The value is real either way, the main trap is paying for features you will never use.
Are Bird Feeder Cameras Worth It? A Practical Buyer's Guide
Marcus Hendricks
4 Aug 2026
Who this guide is for
This guide is written for homeowners and backyard birding enthusiasts who are deciding whether to add a camera to their feeding setup, and which route to take. That includes people shopping for their first smart feeder, birders who already have a hopper or tube feeder and want to add a camera without replacing everything, and Canadian shoppers navigating a smaller retail market with real winter weather to contend with. If you have been sitting on the fence about whether a camera feeder is a gimmick or a genuine upgrade, this is the article for you. I will walk you through the actual use cases, the camera types that serve them, the specs that matter, and the budget ranges where things make sense.
Why people actually add cameras to their feeders
The most common reason is species identification. A feeder brings birds close, but a quick glance through a window often is not enough to distinguish a house finch from a purple finch, or to catch the field marks on a warbler passing through during migration. A camera gives you a still frame you can study later. The Bird Buddy line leans into this hard, using onboard AI to name the species for you in the app. That alone converts a lot of casual observers into engaged backyard birders.
Behavior study is the second big draw. Slow-motion video (the Bird Buddy 2 captures at 95 fps) reveals things you simply cannot see in real time: how a nuthatch grips the feeder, the wing beats of a hummingbird, or which bird in a flock is dominant at the port. For anyone interested in amateur ornithology or nature photography, this footage is genuinely useful and entertaining.
Remote watching matters more than people expect. Being able to glance at a live feed from your phone while you are at work, or getting a push notification when something lands, keeps you connected to your yard in a way that a stationary window feeder never could. This is especially satisfying if you travel, work long hours, or want to share bird sightings with a partner or kids who are not always home.
Security and pest monitoring are underrated use cases. A camera on your feeder will quickly reveal whether squirrels are emptying it overnight, whether a raccoon is tipping it, or whether neighborhood cats are keeping birds away. Solving a feeder problem you could not quite diagnose is genuinely satisfying, and the footage is often the fastest way to figure out what is going on.
Finally, education is a strong driver for families with children, teachers running nature programs, or anyone building a window feeder setup for a classroom or care facility. A camera feeder makes the birds interactive and gives kids something to look up, screenshot, and talk about.
Which camera type is right for you?
There are four main approaches, and they suit different priorities. Here is how they compare across the factors that matter most to a backyard birder. See our guide to the best camera for watching bird feeder setups for a concise comparison of the main options.
| Camera Type | Best For | Typical Cost (USD) | App / AI ID | Install Complexity | Weather Resistance |
|---|---|---|---|---|---|
| Smart integrated feeder cam (e.g. Bird Buddy 2) | Plug-and-play species ID, casual birders | $150–$250+ | Yes, built-in AI | Low — one unit | IP67 (Bird Buddy 2) |
| Dedicated webcam / security cam (e.g. Wyze Cam v3) | Flexible mounting, existing feeder users, budget setups | $30–$80 | With third-party apps | Moderate — needs power run | IP65 (Wyze Cam v3) |
| Trail / camera trap (e.g. Bushnell CORE S-4K) | Fast trigger, no-glow IR, wildlife monitoring | $100–$400+ | No | Low — battery + strap | Typically IPX4–IP66 |
| Window cam / suction-mount cam | Close-up feeder views, apartment/rental setups | $20–$100 | Rarely built-in | Very low | Typically indoor-rated only |
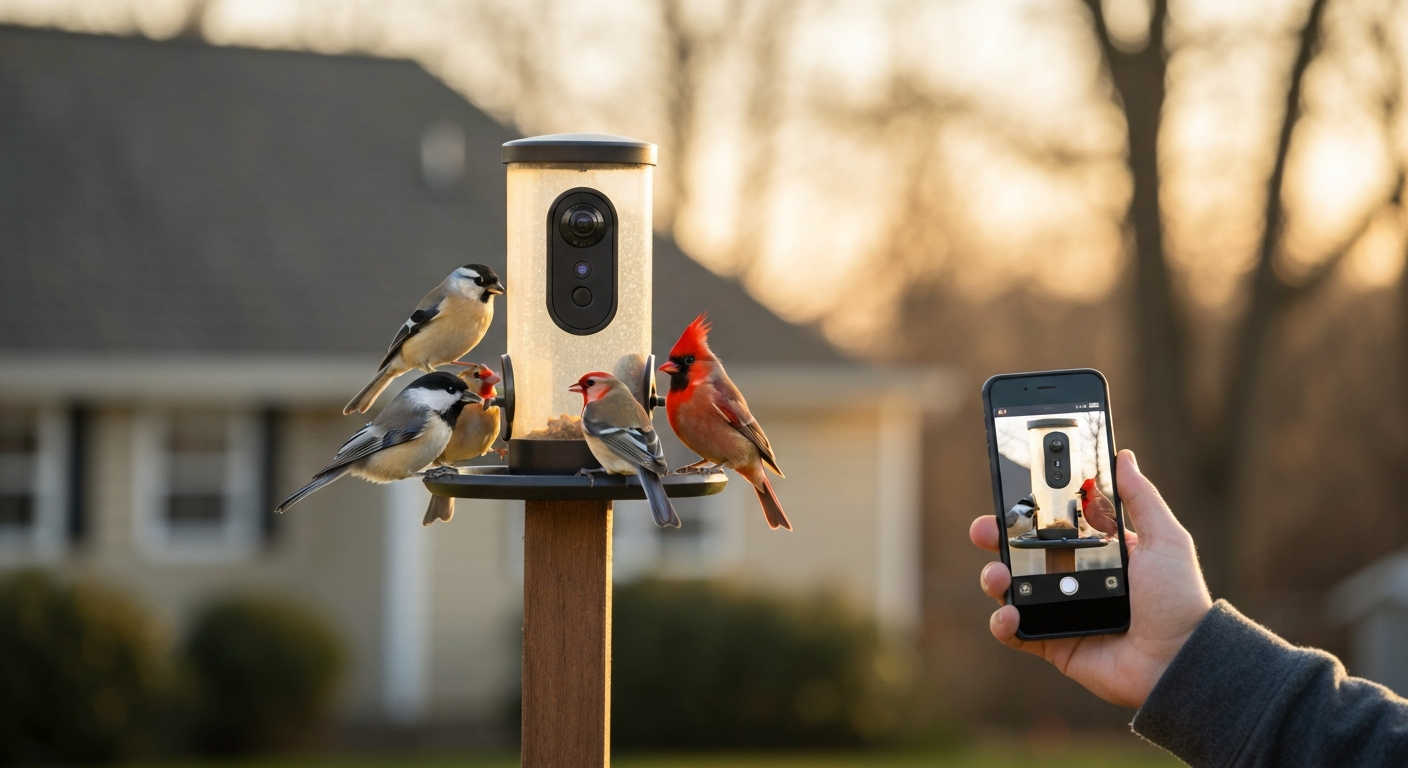
Smart integrated feeders are the easiest path if you want a finished, out-of-the-box experience. The Bird Buddy 2 is the clearest example: one unit handles the feeder, the camera, and the AI identification. The tradeoff is that you are locked into that feeder's form and capacity, and the app or subscription model can change over time. Tom's Guide notes that the Bird Buddy's core experience does not require a mandatory subscription, which is reassuring, but it is worth keeping an eye on.
Security cameras like the Wyze Cam v3 are the modular workaround. At around $35 USD (listed at roughly CA$175 on Best Buy Canada), you point the camera at whichever feeder you already own, a tube feeder full of nyjer for finches, a platform feeder for cardinals, a suet cage for woodpeckers. You get 1080p video, color night vision, local microSD recording, and flexible mounting. Reddit's birding and feeder communities frequently report that this kind of setup outperforms all-in-one feeders in reliability and total cost, especially when paired with a quality conventional feeder.
Trail cameras are worth considering if trigger speed and night performance are your top priorities, and you do not need live streaming. For specific recommendations optimized for feeders and close-range bird activity, see our guide to the best trail camera for bird feeder. The Bushnell CORE S-4K advertises a 0.2-second trigger and 4K video with a 110-foot night range at a list price of US$149.95. Reconyx cameras (HyperFire line) are the professional benchmark, with documented 0.20-second triggers and no-glow IR, though at a much higher price. The downside is that trail cameras are bulky, do not stream live, and are not designed to sit two feet from a feeder on a pole, mounting them well takes thought. If trail cameras are your priority, the dedicated guides on this site cover that angle in more depth.
Window cams and suction-mount cameras are the budget entry point for window feeders. They work best in sheltered, controlled environments and almost always lack weatherproofing, so they belong inside the glass or in covered areas only.
Optics and capture: what the specs actually mean
Resolution and sensor size
Resolution matters, but sensor size matters more. The Bird Buddy 2 uses a 1/2.8-inch sensor with 5-megapixel stills and Full HD video. That sensor is large enough to produce genuinely good images in daylight. Most budget security cameras use smaller sensors, which struggle in low light even if the megapixel count sounds competitive. For bird photography where you want to zoom in on a feather pattern, prioritize sensor size over raw resolution numbers.
Frame rate and slow motion
Standard 1080p at 30 fps is adequate for most behavior watching. If you want to study wing beats or catch hummingbirds in detail, slow motion is transformative. The Bird Buddy 2's 95 fps slow-motion mode is a genuine differentiator, hummingbird wing beats average around 50–80 per second, so you need at least 60 fps to start resolving them, and 95 fps gives you real margin. Wyze Cam v3 records at 1080p/20fps or 360p/15fps, which is fine for perching birds but not for flight detail.
Trigger speed
For motion-triggered cameras, trigger speed determines how often you get full-frame shots of birds rather than a blur entering or leaving frame. Trail cameras like the Bushnell CORE S-4K and Reconyx HyperFire document trigger speeds of 0.2 seconds, which is fast enough to catch most passerines landing on a feeder. Integrated smart feeders and security cameras typically use passive infrared or pixel-change detection with slightly longer effective triggers, which is usually fine when birds are perching rather than flying through.
Field of view and mounting distance
Field of view (FOV) and how far back you mount the camera work together. A wide FOV (90–120 degrees) from 12–18 inches back gives you the whole feeder in frame and room to capture birds landing. A narrower lens from further back gives better subject magnification but risks missing birds at the edges. For tube feeders, window feeders, and small platform feeders, a wide-angle lens close up usually works better. For platform feeders and open-ground setups, a moderate telephoto angle from 3–5 feet gives you better image scale on individual birds. If you are using a separate camera, test your framing before committing to a permanent mount.
Low-light performance and night options
Dawn and dusk are peak bird activity times, and they are also the hardest lighting conditions for cameras. There are two technologies competing here: traditional infrared (IR) illuminators and newer color low-light sensors.
Standard IR LEDs emit near-infrared light that is invisible to humans but reflects back to the camera, producing black-and-white night images. The tradeoff is that the red glow from cheaper cameras can be visible and may startle some birds, particularly when the LEDs are positioned close to the feeder. True no-glow IR (used in premium trail cameras like the Reconyx HyperFire) uses longer-wavelength illuminators that are genuinely invisible, which matters if you are watching species that are skittish or if you simply prefer not to light up your yard.
Color low-light sensors, like the one used in the Wyze Cam v3, work differently. They amplify ambient light, moonlight, streetlights, porch lights, to produce color images at dusk and dawn without any additional illumination. Wyze's color night vision performs well in suburban yards with any ambient light source. In truly dark rural settings it fades to standard IR. For dawn and dusk bird activity in a typical backyard, color low-light sensors give you more useful, natural-looking footage than IR alone.
If your primary goal is nighttime monitoring (checking which animals visit after dark, tracking raccoon or opossum activity), no-glow IR trail cameras are the stronger choice. If you mainly care about the first and last hours of daylight when birds are most active, a good color low-light sensor beats IR for image quality.
Connectivity and data: Wi-Fi vs. cellular vs. local SD
How your camera gets its footage to you is one of the most practically important decisions, and it is easy to underestimate until you are standing in your backyard trying to run Ethernet to a bird feeder pole. Here is a straightforward breakdown of each mode.
| Connection Mode | Live Streaming? | Needs Home Wi-Fi? | Ongoing Cost | Reliability | Best For |
|---|---|---|---|---|---|
| Wi-Fi (home network) | Yes | Yes, strong signal needed | None or low (cloud plan optional) | Drops if signal is weak outdoors | Backyard within router range, live app watching |
| Cellular (LTE/4G) | Yes (with latency) | No | Monthly data plan required | Excellent in coverage areas | Remote locations, rural Canada, no home Wi-Fi reach |
| Local SD card (no network) | No | No | None after hardware | Very reliable, no upload gaps | Trail cam style, batch review, off-grid setups |
Wi-Fi cameras are the default choice for most backyard setups, and they work well if your router signal reaches your yard. The practical issue is that feeders placed at the far end of a yard, on a pole away from the house, or around a corner from the router often get marginal signal. A Wi-Fi extender or a mesh network node positioned near the back door fixes most of this. The Wyze Cam v3 runs on a standard 2.4GHz Wi-Fi network and supports Wyze's cloud plans: Cam Plus at $2.99 per camera per month, Cam Unlimited at $9.99 per month for all cameras, and Cam Unlimited Pro at $19.99 per month with 60-day cloud retention and additional AI features. For casual bird watching, the free tier with local SD recording is often enough.
Cellular cameras are the right call when you cannot run a reliable Wi-Fi signal to the feeder location, or when you are setting up at a remote property. They work by inserting a SIM card and connecting to the nearest cell tower. The ongoing cost of a data plan is the main friction. Canadian shoppers should pay particular attention here: data plan pricing and carrier availability vary by province, and rural coverage can be inconsistent. It is worth confirming the cellular band compatibility of any camera with your Canadian carrier before buying.
Local SD card storage is the most reliable and cost-free option, but it requires you to physically retrieve or remotely access the card to review footage. The Wyze Cam v3 supports a microSD card and can record continuously, Wyze's own documentation states a 128GB card provides approximately 28 days of continuous recording. Reconyx HyperFire cameras, by contrast, support SD cards only up to 32GB (per the manual), so storage planning matters more there. SD-only setups suit people who do not need live alerts and just want a reliable record of who visited the feeder.
Power options: battery, solar, and wired
The Bird Buddy 2 runs on a 3,900 mAh rechargeable lithium-ion battery with USB-C charging. In mild weather that provides reasonable run time, but cold significantly reduces it. Published research on lithium-ion cells, backed by Department of Energy technical data, shows usable capacity drops by roughly 20–40% at subzero temperatures, with sharply increased internal resistance making the problem worse under load. In practical terms, a Bird Buddy 2 rated to -20.5°C (its stated operating minimum) will drain faster in a Canadian January than in a mild autumn. Plan to recharge more frequently from November through March, or consider a wired power solution if you can run a cable.
Solar-assisted cameras are an appealing middle ground for Canadian winters, in theory. The problem is that short winter days, snow cover on panels, and reduced solar irradiance at northern latitudes mean solar rarely provides full power independence below about 49°N from October to March. Solar works best as a trickle-charge supplement to a larger battery or a wired backup, not as a standalone power source in winter. GoPro's Enduro battery, designed to improve cold-weather performance down to about -10°C, illustrates the broader point: managing battery chemistry in the cold requires either heated enclosures, larger capacity, or external power. Plan your power setup before you commit to a camera placement.
Wired cameras like the Wyze Cam v3 (which uses a micro-USB power adapter) eliminate battery anxiety entirely. Running a weatherproofed outdoor extension cord or a low-voltage power cable to your feeder pole is a one-time install that pays off over years of worry-free operation. It is the setup I personally rely on in winter because I would rather spend two hours on cable management once than remember to bring in a battery every other week in February.
Feeder type compatibility
Not every camera works equally well with every feeder type. Here is how the main feeder categories pair with camera options.
- Window feeders: suction-mount cams or a webcam on a tripod inside work great here. The glass is close, lighting is controlled, and birds are literally inches from the lens. The Bird Buddy is also designed partly with this proximity in mind.
- Tube feeders and hopper feeders: a separate camera mounted on the same pole 12–18 inches back and slightly elevated is usually the cleanest setup. Wide-angle security cams work well here.
- Platform and tray feeders: these have the most open sightlines, making trail cameras mounted on a stake or fence post 3–5 feet away a natural fit. The open platform also gives you the best backdrop for photography.
- Suet cage feeders: woodpeckers cling and stay, making trigger speed less critical. A security cam or smart feeder cam mounted at the side of the suet cage captures the full bird in frame.
- Pole-mounted feeders: any camera type can work here; the key is co-mounting the camera on the same pole or a nearby stake so both remain stable in wind.
- Hummingbird feeders: the Bird Buddy's slow-motion capability is particularly valuable here. Alternatively, a fast security cam with good frame rate aimed at the feeding port from 6–8 inches captures impressive detail.
Weatherproofing and winterization
IP ratings are the standard measure of weather protection, and they matter a lot for anything living outdoors year-round. IP67 means the Bird Buddy 2 can be submerged up to one meter of water for 30 minutes, more than adequate for rain and snow. IP65, which the Wyze Cam v3 carries, means it is dust-tight and can handle sustained water jets, which is enough for any weather a backyard throws at it. Trail cameras typically carry similar or higher ratings for their sealed housings.
Beyond the rating, lens condensation is a real-world nuisance in cold climates. When a camera warms up from overnight cold to a sunny morning, moisture can condense inside the lens housing. Products with good gasket seals and internal desiccants handle this better. If you notice foggy footage in the morning, check whether the camera housing seal is intact, and consider adding a silica gel packet in any accessible housing compartment.
For Canadian winters specifically, the operating temperature floor of your camera matters. The Bird Buddy 2 is rated to -20.5°C, which covers all but the most extreme cold snaps in most Canadian cities. Wyze Cam v3 is rated to -20°C as well, which is the same practical floor. Trail cameras vary; always check the spec before deploying anything in Saskatchewan or northern Ontario winters.
False triggers, squirrels, and pest noise
One of the most persistent complaints in the r/birding and r/birdfeedercams communities is camera spam from false triggers. Wind-blown branches, sun glare moving across the sensor, insects landing on the lens, and squirrels raiding the feeder generate dozens of alerts per hour and quickly make push notifications useless. Here are the practical fixes.
- Adjust PIR sensitivity: most cameras let you dial down motion sensitivity, which cuts insect and leaf triggers without missing actual bird landings.
- Use AI filtering where available: the Bird Buddy's onboard AI is specifically designed to filter non-bird triggers. Wyze's Cam Plus tier adds AI person/animal detection that substantially reduces false alerts.
- Mount away from branches: position the camera so no moving vegetation sits within the detection cone. Even a leaf at the edge of frame can cycle the trigger in a breeze.
- Use recovery time settings: trail cameras have adjustable recovery times between triggers. A 5-second recovery prevents a squirrel from filling your SD card in one afternoon.
- Squirrel baffles help both problems: fitting a pole baffle below your feeder reduces squirrel visits and therefore reduces both seed theft and camera spam from large mammal triggers.
Installation and mounting tips
Mounting height and angle determine more of your footage quality than almost any other factor. For a camera pointed at a standard tube or hopper feeder on a 5-foot pole, position the camera lens at roughly feeder-port height, angled slightly downward. This gives you a clean background (sky or vegetation) rather than an upward shot of the bird's belly. For platform feeders, a slightly elevated angle from the side is ideal, capturing the bird's back and head coloring, which is usually what you need for identification.
Think about the sun's path before fixing your mount. A camera pointed east will be backlit in the morning; one pointing west will be washed out in the afternoon. North-facing or northeast-facing mounting positions give the most consistent light throughout the day in the Northern Hemisphere. This is not always possible depending on your yard layout, but even shifting the angle 30 degrees can dramatically reduce glare artifacts.
Vibration from wind is the enemy of sharp images. If you are co-mounting a camera on the same pole as the feeder, use a pole with some mass to it, lightweight thin-walled poles sway and blur footage. A separate stake or fence mount for the camera, decoupled from the feeder itself, gives you cleaner images in windy conditions.
Maintenance, battery life, and troubleshooting
Camera lenses in outdoor feeder setups get dirty fast. Seed dust, spider webs, bird droppings, and rain spots accumulate on the lens and degrade image quality long before you notice it during casual viewing. A quick wipe with a microfiber cloth every time you refill the feeder keeps footage sharp. Do not use standard glass cleaner on plastic lens covers, it can cloud the coating. A dry or slightly damp microfiber cloth is enough for most cleaning.
Battery life troubleshooting usually comes down to temperature and upload activity. If your battery-powered camera is dying faster than expected, the first check is ambient temperature, cold weather, as described earlier, can cut usable capacity by a quarter to nearly half. The second check is data upload frequency. Cameras set to upload every trigger event to the cloud use significantly more power than those recording to local SD. Reducing cloud upload frequency or switching to SD-only in winter extends run time considerably.
App or firmware issues are a known irritant with integrated smart feeders. The WIRED review of the original Bird Buddy noted limitations in early firmware, and community threads routinely flag that app updates can temporarily break pairing or notification features. Keeping firmware current, using the official app rather than third-party integrations, and checking the manufacturer's support community before assuming hardware failure solves the vast majority of these issues.
Cost vs. value: what you actually get for your money
Here is a realistic picture of what different budget levels deliver.
| Budget (USD) | Setup Type | What You Get | What You Give Up |
|---|---|---|---|
| Under $50 | Repurposed webcam or basic security cam + existing feeder | Live streaming, basic motion recording, local SD storage | AI species ID, weatherproofing, slow-motion, clean app experience |
| $50–$120 | Quality security cam (e.g. Wyze Cam v3) + existing feeder | 1080p, color night vision, IP65, microSD, app alerts, optional cloud plans | AI species ID, integrated feeder design, slow-motion capture |
| $150–$250 | Smart integrated feeder cam (e.g. Bird Buddy 2) | 5MP sensor, 95fps slow-motion, IP67, AI ID, polished app, USB-C rechargeable | Modular flexibility, camera can't be reused on a different feeder |
| $150–$400+ | Trail camera (Bushnell CORE S-4K, Reconyx HyperFire) | 4K/30MP, 0.2s trigger, no-glow IR, excellent cold weather housing | No live streaming, no AI ID, bulky form factor, single-purpose |
The ROI question comes down to what you value. If you spend $180 on a Bird Buddy 2 and it turns a passive hobby into an active daily ritual, that is excellent value. If you spend $35 on a Wyze cam, mount it on a feeder you already love, and get equally engaging footage with the flexibility to repurpose the camera if you move house or change feeders, that is also excellent value. The setups that disappoint are usually the result of a mismatch: buying an expensive smart feeder when you just wanted motion-triggered footage, or buying a cheap uncovered webcam for an outdoor pole feeder in a rainy climate.
Canada-specific notes
Canadian shoppers face three practical hurdles that do not apply south of the border. First, retail availability is narrower: the Wyze Cam v3 appears on Best Buy Canada at roughly CA$175 (compared to around US$35 direct in the US), reflecting the typical import and distribution premium. It is worth checking Amazon Canada, Canadian Tire, and manufacturer direct-to-Canada shipping for better pricing. For curated buying recommendations and availability comparisons, see our best bird feeders Canada guide. Second, cold weather battery management is not optional north of most provincial capitals from November through March. Build your setup around wired power or plan for aggressive battery maintenance. Third, cellular cameras require a Canadian SIM and a data plan from a Canadian carrier; band compatibility and rural coverage are not guaranteed to match US reviews, so verify before purchasing. For more detail on specific models available through Canadian retailers, the dedicated Canadian buyer guides on this site are worth reading alongside this article.
DIY and lower-cost alternatives
A basic webcam mounted inside a window, pointed at a window feeder pressed against the glass, costs almost nothing if you already own a laptop or desktop with a spare USB port. The image quality from a modern 1080p webcam at 6 inches from the feeding port is surprisingly good, and you do not need any weatherproofing. If you want specific model recommendations and setup tips, see best webcam bird feeder. This is the right starting point if you are genuinely unsure whether you will use a camera feeder regularly, try the free version before spending $200.
Time-lapse is an underused option. Many trail cameras and security cams offer interval-based capture rather than motion triggering. Setting a camera to shoot one frame every 30 seconds produces a full day of bird activity compressed into a few minutes of video, which is a useful way to study visit patterns, peak activity times, and seasonal changes without generating hundreds of triggered clips to sort through.
A repurposed older smartphone in a weatherproof case, running a motion-sensing app, is also a legitimate feeder camera rig. Apps like Alfred or IP Webcam (Android) turn old phones into capable streaming cameras. The limitation is battery life and weatherproofing, but for a sheltered porch or window setup it works well at zero camera cost.
Legal and privacy considerations
Bird feeder cameras almost always capture parts of your yard and, depending on placement, portions of neighboring properties or public spaces. In most jurisdictions, recording video on your own property is legal, but capturing images of neighbors' private spaces (backyards, windows) without consent can cross legal and ethical lines. Position cameras so the field of view stays within your own property boundary. This is also good practice for keeping neighbor relations friendly. If you are using a cellular or cloud-connected camera, check the manufacturer's data privacy policy, footage uploaded to a cloud server is governed by that company's terms, which can change. For local SD setups, your footage stays on your hardware.
Your buying checklist
- Decide on your primary use case: species ID, behavior footage, remote watching, pest monitoring, or education.
- Choose your camera type: integrated smart feeder, security cam on existing feeder, trail cam, or window cam.
- Check the IP weather rating: IP65 minimum for any exposed outdoor installation; IP67 if the camera is directly under the feeder.
- Match power to your setup: wired for winter reliability, battery with USB-C for warm-weather flexibility, solar only as a supplement.
- Confirm Wi-Fi signal reaches your planned camera location before buying a Wi-Fi-only camera.
- Check operating temperature minimums if you are in Canada or a cold-winter region (aim for -20°C or lower).
- Decide on storage: local SD for cost-free reliability, cloud plan for remote access and alerts.
- Budget for ongoing subscription costs if you want AI filtering or cloud video retention.
- Plan your mount position relative to sun angle to avoid backlit or glare-washed footage.
- Consider false-trigger mitigation before installing: adjust PIR sensitivity, clear vegetation from the detection zone, and use AI filtering if available.
FAQ
Quick verdict: Are bird feeder cameras worth it for backyard bird watchers and shoppers (including buyers in Canada)?
Short answer: Yes — but it depends on your goals. Bird feeder cameras are worth it when you want reliable photo/video of visitors, remote watching, species documentation, or behavior study. They’re less worthwhile if you just want occasional sightings or don’t want ongoing maintenance, subscriptions, or winter power solutions. For Canadian buyers consider cold-weather battery loss and local availability/prices; wired or heated options increase reliability in cold climates.
Practical use cases for a feeder camera
Common, practical uses: 1) Species ID and documentation — capture clear photos for records. 2) Behavior study — record feeding order, nest building cues, courtship, feeding rates. 3) Remote watching — livestreams or push notifications so you don’t miss rare visitors. 4) Security and monitoring — deter vandalism or identify squirrels/pests. 5) Sharing and citizen science — submit photos to eBird or social media. Choose camera type and features by prioritizing which use case matters most.
What camera types are used at bird feeders and tradeoffs for each?
1) Smart all‑in‑one feeder cameras (e.g., Bird Buddy): designed for feeders with integrated optics and app/AI ID. Pros: simple setup, built for feeder angles, AI features. Cons: limited flexibility, potential vendor lock‑in, battery/temperature limits. 2) Security/ Wi‑Fi cameras (e.g., Wyze Cam v3): pros: high resolution, continuous recording, local SD, inexpensive; cons: usually need power, visible mounting, false motion triggers. 3) Trail/camera‑trap cameras (e.g., Bushnell, Reconyx): pros: very fast trigger, excellent night IR/no‑glow, long battery life; cons: designed for trails (bulkier), lower daytime image framing options for close feeders. 4) Window cams & webcams: pros: minimal disturbance, stable mounting, good for close-ups; cons: limited field of view outside window reflections, require indoor power. Choose by balancing image quality, trigger speed, power and mounting constraints.
Feature-by-feature guidance (what matters and recommended targets)
Resolution: 1080p is the practical baseline for clear photos; 2–4K gives better crop/ID capability but uses more storage. Trigger speed: <0.3 s for action shots (trail cams/Reconnx excel). Field of view (FOV): narrow/medium FOV for feeder close‑ups; very wide FOV catches approach behavior but reduces subject size. Low‑light/IR: no‑glow IR or color night vision helps nocturnal detection without disturbing wildlife. Connectivity: Wi‑Fi for home networks (cheap, live view); cellular for remote sites (higher cost/data). SD vs cloud: SD offers no‑subscription local storage; cloud gives remote access and backups (may require monthly fees). Power: wired (most reliable), battery (portable), solar + battery (good for pole feeders), heated/powered enclosures are useful in cold climates. Storage/data plans: budget for microSD (32–256 GB) or monthly cloud fees; continuous recording needs large cards or paid cloud. Prioritize: power stability, trigger speed and local storage if you want consistent captures without subscription surprises.
Compatibility with common feeder types (window, pole, platform, suet, tube, hopper)
Window feeders: window‑mount cams or indoor cams work best; minimal weatherproofing needed. Pole‑mounted feeders: security cams or trail cams mounted on a pole give flexible angles — use weatherproof housings. Platform feeders: ideal for camera framing; both security cams and trail cams perform well. Suet feeders: small perches make close‑up framing tighter — choose narrow‑FOV or mount camera slightly back. Tube feeders: birds cluster around ports — position camera for side view or use narrow FOV for port focus. Hoppers: larger birds and multiple visitors — wide or medium FOV helps capture interactions. Always consider mounting distance to avoid oversaturation and frame multiple perches where possible.
Weatherproofing and winterization advice
Check IP ratings: IP65+ for splash resistance; IP66–IP67 recommended for exposed feeders. For Canadian winters plan for: external power or larger battery capacity, heated enclosures or insulated housings to reduce Li‑ion capacity loss, and UV‑resistant cables. Condensation prevention: use camera venting, desiccant packets in housings or anti‑fog coatings on internal windows. Position cameras under small eaves when possible. Avoid metal housings that get extremely cold; allow airflow to reduce moisture buildup. For all devices verify operating temperature ranges and consider supplemental heat for Li‑ion batteries below −10°C.