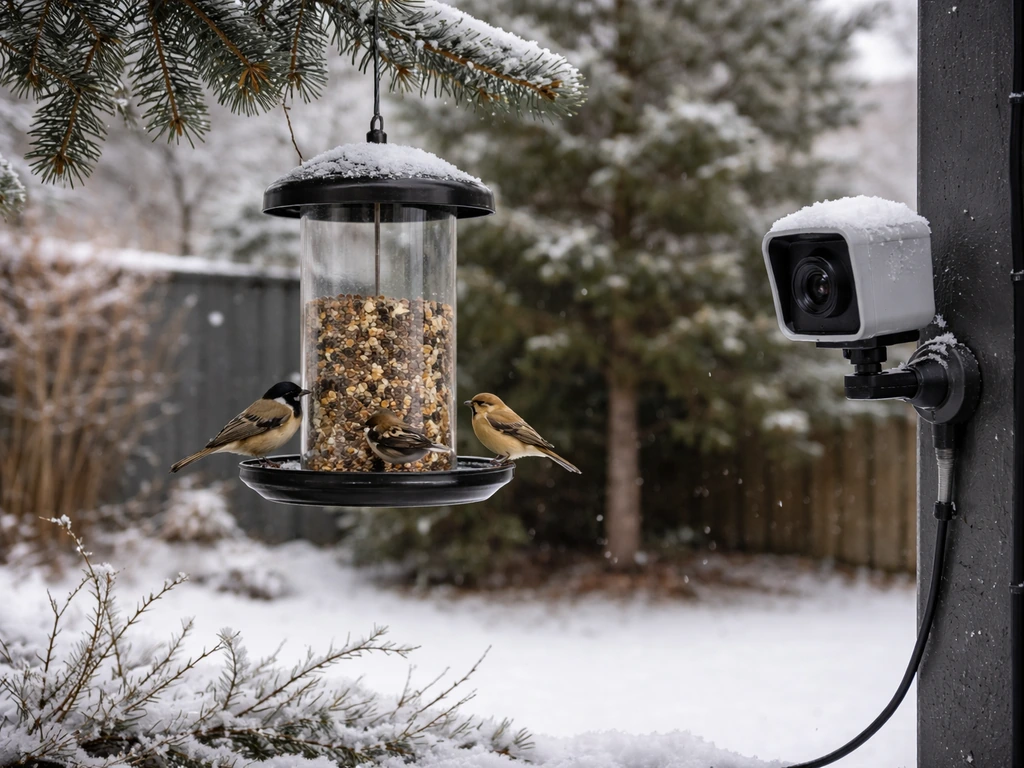
The best all-round camera for watching a bird feeder in 2026 is the Reolink Argus 3 Pro for most backyard setups: it shoots 2K color video, runs on a solar panel or rechargeable battery, connects over Wi-Fi, stores footage locally on a microSD card or in the cloud, and costs well under $100. If you want motion-triggered stills and the flexibility to place a camera anywhere without power or Wi-Fi, a mid-range trail camera like the Browning Strike Force Pro or Bushnell Core S-4K is a better fit. For a fully integrated experience where the camera is built into the feeder itself, the Birdfy Feeder Cam (also sold as Netvue Birdfy) is the most polished option available right now. This guide ranks specific picks, explains which type of camera suits your goals, and covers everything from resolution to storage costs so you can stop second-guessing and start watching birds.
Best Camera for Watching Bird Feeder: Top Picks & Guide
Who this guide is for
Whether you've just hung your first tube feeder and want to see what's visiting overnight, or you're a seasoned birdwatcher trying to ID a mystery species on camera, the phrase 'best camera for watching bird feeder' covers a surprisingly wide range of setups. A retired couple who want a relaxing live stream on the TV at home needs something completely different from a wildlife photographer chasing sharp stills of a pileated woodpecker. This guide is organised to serve both. It covers live-stream webcams, motion-triggered trail cameras, smart feeder-integrated cameras, and DIY builds. It includes buying notes for US, UK, and Canadian readers, plus storage and connectivity details that most reviews gloss over.
Top picks at a glance
The table below summarises the ranked recommendations before we go deeper into each one. Prices are approximate retail as of mid-2026 and will vary by region and retailer.
| Rank | Model | Best for | Resolution | Power | Connectivity | Approx. price (USD) |
|---|---|---|---|---|---|---|
| 1 | Reolink Argus 3 Pro | Best overall Wi-Fi camera | 2K (2560x1440) | Solar/battery | Wi-Fi | ~$80 |
| 2 | Birdfy Feeder Cam (Netvue) | Best feeder-integrated smart cam | 1080p | Wired/battery | Wi-Fi | ~$100–130 |
| 3 | Browning Strike Force Pro XD | Best mid-range trail camera | 20MP / 4K video | AA batteries | None (SD card) | ~$80–100 |
| 4 | Bushnell Core S-4K | Best image quality trail cam | 30MP / 4K video | AA batteries | None (SD card) | ~$130 |
| 5 | Reconyx HyperFire 2 | Best research-grade trail cam | 8MP / 1080p | AA batteries | None/optional BT | ~$600–700 |
| 6 | Moultrie Edge Solar | Best cellular trail camera | 33MP / 1080p | Solar/AA | Cellular (LTE) | ~$130 + plan |
| 7 | Reolink E1 Outdoor Pro | Best wired/PoE option | 4K (8MP) | PoE/AC | Wi-Fi or wired LAN | ~$70 |
| 8 | Wyze Cam v4 | Best budget Wi-Fi camera | 2K (2560x1440) | USB-C / wired | Wi-Fi | ~$35 |
The Reconyx HyperFire 2 is six to eight times the price of the Browning, but if you want the most reliable trigger speed for fast-moving small birds, it's the benchmark: published ecology studies cite its trigger speed at around 0.2 seconds versus 0.3 to 0.7 seconds for consumer models. For most backyard birders, the Browning or Bushnell is plenty fast and far easier to justify on cost.
Best cameras by use case
Best budget camera: Wyze Cam v4
At around $35, the Wyze Cam v4 punches well above its price. You get 2K color video, color night vision, two-way audio, motion detection with app alerts, and microSD recording. The catch is that it's a wired camera requiring a USB-C power source, which limits placement unless you run an outdoor extension cord. It's IP65 rated, so light rain and splashing are fine. For a covered porch feeder or a window feeder with an indoor camera pointed through the glass, this is the easiest and cheapest live-view setup you can build.
Best high-resolution camera: Bushnell Core S-4K
The Bushnell Core S-4K captures 30-megapixel stills and genuine 4K video. For birdwatchers who want to zoom into a frame and actually identify a bird's leg band or plumage markings, this resolution matters. It runs on AA batteries, stores everything to a microSD card, and uses Bushnell's No Glow IR (940 nm) for night shots, which avoids visible disturbance at the feeder. Trigger speed is listed at 0.3 seconds, which is fast enough to catch most perching birds in the act. It's a pure offline camera, so there's no app or live view, but the image quality justifies it for photography-focused birders.
Best night-vision and IR camera: Browning Strike Force Pro XD
Browning's Strike Force Pro XD uses an 850 nm 'low-glow' IR array, which shows a faint red glow but delivers better image quality in low light than 940 nm no-glow cameras. It shoots 20-megapixel stills and records 4K video clips with a 0.3-second trigger time. The casing is rugged, weatherproofed for year-round outdoor use, and the camera runs for months on a set of AA lithium batteries. If you're trying to find out what's raiding your feeders after dark (raccoons, opossums, the neighbour's cat), this is the camera I'd reach for first.
Best solar or battery-powered camera: Reolink Argus 3 Pro
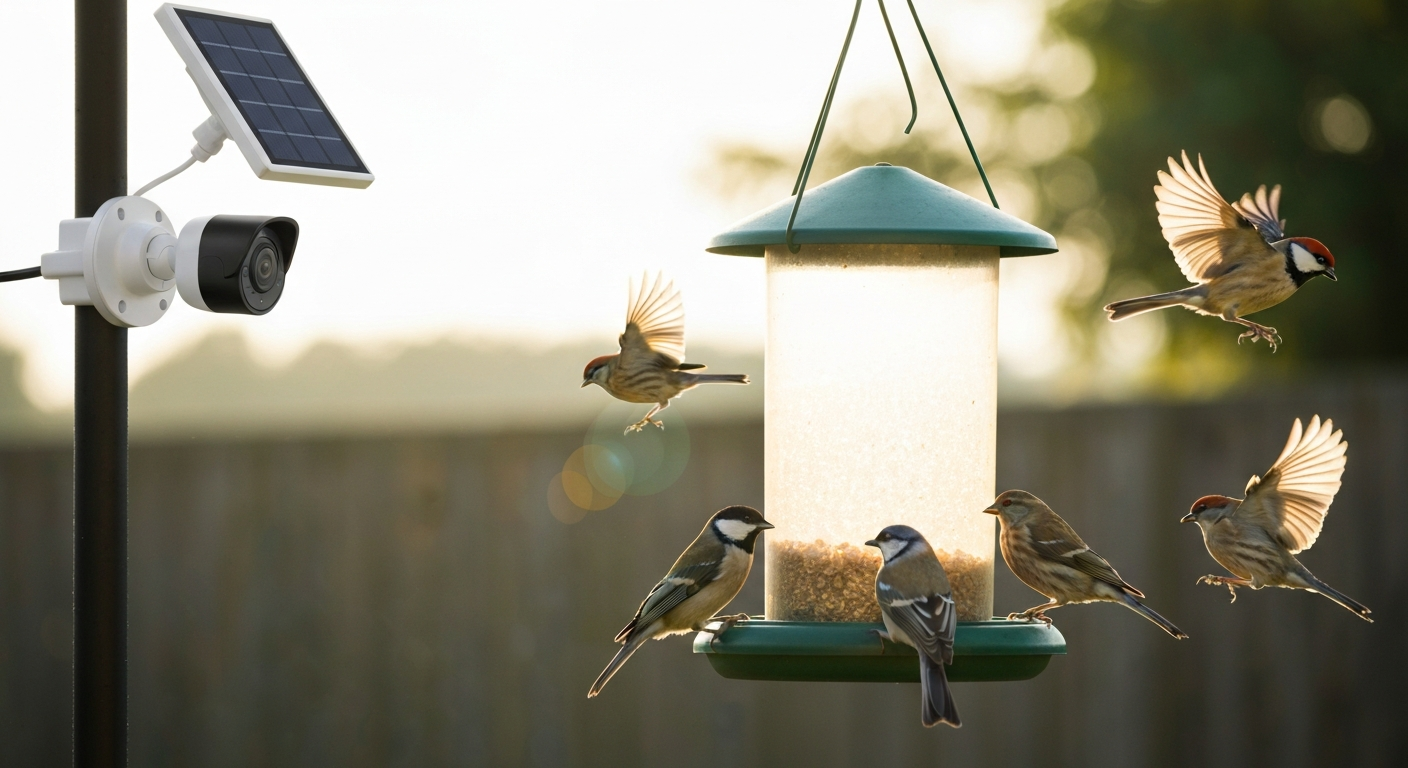
The Argus 3 Pro is genuinely wire-free when paired with Reolink's solar panel, which keeps the 5,200 mAh battery topped up in most climates. It records in 2K color, includes a spotlight and color night vision, sends push alerts to the Reolink app, and stores locally to a microSD card or remotely to Reolink's cloud. Wi-Fi range can be a limiting factor if your feeder is at the back of a large garden, but for most setups within 30 to 40 feet of your router, it works reliably. Worth noting: solar performance drops in winter at UK and Canadian latitudes, so a south-facing mount and occasional top-up charging are worth planning for.
Best Wi-Fi camera: Reolink E1 Outdoor Pro
If you can run power to the feeder location, the Reolink E1 Outdoor Pro is the sharper, more stable upgrade. It shoots 4K, supports both Wi-Fi and wired PoE connection, and handles continuous recording without the battery anxiety of solar cameras. The PoE option is especially useful for a permanent feeder pole setup where you can run a single ethernet cable from a PoE switch and get both power and a rock-solid network connection in one cable.
Best cellular camera: Moultrie Edge Solar
Cellular cameras are the answer when your feeder is far from your home network. The Moultrie Edge Solar uses an integrated solar panel and LTE to send images directly to the Moultrie Mobile app, no Wi-Fi required. Image delivery isn't real-time live video, it's triggered stills and short clips pushed to your phone, typically within seconds to a minute of the trigger event. Cellular plans start around $7. Industry reports and vendor surveys indicate cellular camera subscription tiers commonly range from about $5 to $30 per month, with many consumer plans beginning under $10/month to cover basic image allowances. 99 per month for Moultrie's multi-camera unlimited tier, though pricing changes frequently. This is the pick for birders with feeders in a remote garden, a woodland edge, or a holiday property. Canadian and UK buyers should check regional LTE band compatibility before purchasing, as some US-market cameras don't support all bands used by local carriers.
Best feeder-integrated camera: Birdfy Feeder Cam
The Birdfy Feeder Cam (marketed under the Netvue brand in some regions) is a hopper-style feeder with a 1080p camera built into the front face. It connects via Wi-Fi, sends motion-triggered clips to the Birdfy app, and uses AI species identification to label visitors. The species ID is genuinely impressive for common garden birds, though it occasionally misfires on less common species. It runs on a rechargeable battery or AC adapter, and a solar lid accessory is available. For someone who wants a single purchase that does both feeding and watching without any mounting, wiring, or separate camera setup, this is the cleanest solution. If you're already invested in a quality feeder you love, a separate camera is more flexible.
Types of feeder cameras explained
Webcams and IP cameras
Standard IP cameras and repurposed webcams are designed for continuous live video streaming. They need a constant power source, connect over Wi-Fi or ethernet, and let you watch a live feed on your phone, tablet, or TV at any time. Latency on a good home Wi-Fi network is typically under two seconds. The downsides: they aren't purpose-built for outdoor wildlife use, so you need to verify IP weatherproofing ratings carefully, and the continuous stream consumes battery power fast if you go wire-free. They're the best choice when live viewing and real-time watching are your priority over triggered stills.
Trail cameras and game cameras
Trail cameras are motion-triggered, battery-powered, and designed to survive months outdoors unattended. They shoot stills or short video clips when a PIR (passive infrared) sensor detects movement and heat. They don't stream live video and require you to pull the SD card or, on cellular models, check an app for delivered images. What they do brilliantly is capture fast, unexpected visits without any continuous power draw. A good consumer trail camera running AA lithium batteries can last two to four months between changes. They're the practical choice for anyone who wants to see what's visiting without actively monitoring a screen, or who wants to place a camera somewhere with no power source. The trade-off between trail and webcam approaches is covered in more depth in our guide to the best trail camera for bird feeder setups.
Smart and IoT feeder cameras
Smart feeder cameras like the Birdfy, the Wasserstein Squirrel Proof feeder with camera, and similar products combine feeding and observation in one device. They typically offer app connectivity, AI species ID, motion-triggered clips, and optional cloud storage. They're the easiest entry point for beginners and are improving rapidly in software quality. The limitations are that you're locked into the manufacturer's ecosystem, subscription fees may apply for full features, and if the feeder design doesn't suit your target birds, you can't swap it out without replacing the whole unit.
DIY camera and feeder setups
DIY setups are popular with technically minded birdwatchers who want maximum control. The most common approach is a Raspberry Pi with a camera module mounted inside a weatherproof enclosure, running continuous recording or motion-triggered software like MotionEyeOS. Some birders repurpose older GoPros or action cameras mounted on custom brackets attached to existing feeders. A DIY build can match or beat commercial camera image quality for less money, but it requires time to set up, maintain, and troubleshoot. For a detailed look at webcam-specific builds and software, see our best webcam bird feeder guide.
How to match camera type to your goals
Before picking a model, answer three questions: Do you want to watch live, or review recordings later? Do you need continuous video, or are triggered stills enough? Is this primarily for wildlife observation and enjoyment, or does security (who's tampering with the feeder, pest identification) also matter? Your answers almost entirely determine which type you need.
| Goal | Best camera type | Key requirement |
|---|---|---|
| Live viewing on phone or TV | Wi-Fi IP camera or smart feeder cam | Stable Wi-Fi within range, consistent power |
| Triggered stills of all visitors | Trail/game camera | Fast trigger (<0.5 s), motion detection sensitivity |
| No Wi-Fi at feeder location | Cellular trail camera or battery IP cam | LTE coverage or extended battery life |
| Night identification (owls, possums, rats) | Trail cam with no-glow IR (940 nm) | IR range >40 ft, fast trigger |
| Species identification / photography | High-res trail cam or 4K IP camera | High megapixel count, good lens, fast shutter |
| Beginner, simplest setup | Smart feeder-integrated cam | Single-unit purchase, app-based |
| Remote / off-grid location | Solar + cellular trail cam | Solar panel accessory, cellular plan |
One thing I've learned from testing these setups: don't buy a live-stream camera and then feel disappointed that it drains a battery in three days, and don't buy a trail camera expecting to watch birds in real time on your TV. Getting this match right saves a lot of frustration.
Key specs that actually matter
Resolution
For live streaming to a phone or TV, 1080p is the practical minimum and 2K is noticeably better for detail. For still photography aimed at identification, megapixel count matters: 12MP is acceptable, 20MP to 30MP lets you crop significantly without losing detail. 4K video is useful for slowing footage down or extracting still frames, but it generates large files and higher data use. A 4,000 kbps 1080p stream uses roughly 1.8 GB per hour; a 4K stream can consume three to four times that. For casual watching, 1080p or 2K is more than enough.
Frame rate
30 fps (frames per second) is the standard for smooth video playback. 60 fps is useful for birds in flight or quick species with fast wing movements, as it produces clearer slow-motion footage. Many trail cameras cap at 30 fps in video mode, which is fine for perching birds at a feeder. If hummingbirds are your target, 60 fps or higher makes a real difference in recording usable footage of their wings.
Field of view
A wider field of view (FOV) captures more of the feeder and surrounding area but reduces apparent subject size. For a close-mounted camera pointing at a single tube or platform feeder, 60 to 90 degrees FOV is usually ideal. Trail cameras often have 40 to 60 degree FOV, which works well at 3 to 6 feet from the feeder. Extremely wide-angle lenses (120 degrees or more) introduce distortion and make birds look smaller than expected. Match FOV to your camera's intended mounting distance.
Low-light performance and IR night vision
Low-light performance is largely determined by sensor size and aperture. A wider aperture (lower f-number, like f/1.6 versus f/2.0) lets in more light. For night vision specifically, trail cameras use either 850 nm low-glow IR (faint red glow visible to humans, better image quality) or 940 nm no-glow IR (invisible, but slightly dimmer images). White LED flash produces the highest quality night images but is visibly bright and can disturb birds and neighbouring properties. Research supports using no-glow IR at feeders to avoid disrupting bird behaviour, especially given what we know about artificial light at night affecting bird activity and timing.
Trigger speed and motion detection sensitivity
Trigger speed is the time between a PIR sensor detecting movement and the camera capturing the first image. For small, fast birds at close range, you want 0.5 seconds or less. Research-grade trail cameras like the Reconyx HyperFire 2 achieve around 0.2 seconds; most consumer models are 0.3 to 0.7 seconds. PIR sensitivity settings also matter: too high and you get hundreds of false triggers from leaf movement or sunlight shifts; too low and quick-visiting birds are missed. Most cameras have adjustable sensitivity settings, and it's worth spending time tuning this for your specific feeder location and surroundings.
Weatherproofing: IP ratings
Outdoor cameras should carry a certified IP (Ingress Protection) rating under IEC 60529. IP65 means the unit is dust-tight and protected against direct water jets, which covers normal rain. IP66 and IP67 offer higher resistance to strong jets and brief immersion respectively. Most outdoor trail cameras and IP cameras meet at least IP65, but it's worth checking the actual certified rating rather than vague 'weatherproof' marketing language. This is especially relevant in the UK and Canada where cameras face prolonged damp, frost, and freezing rain across many months.
Latency
Latency is the delay between what's happening at the feeder and what you see on screen. For Wi-Fi IP cameras on a local network, latency is typically under 2 seconds, often under 500 milliseconds for cameras with RTSP support. Cellular cameras delivering triggered clips have a more variable delay of seconds to a minute depending on signal and network congestion. This matters if you want to react to a visiting bird in real time (to call family over, for example), but it's irrelevant if you're reviewing clips after the fact.
Connectivity options compared: Wi-Fi, cellular, and wired
Each connectivity method involves real trade-offs in convenience, cost, reliability, and flexibility. Here's how they break down for feeder use.
| Connectivity | Live video? | Range | Ongoing cost | Best for |
|---|---|---|---|---|
| Wi-Fi (2.4/5 GHz) | Yes, low latency | Typically 30–50 ft outdoors | None (home internet) | Backyard feeders within router range |
| Cellular (LTE) | Clips/stills, not true live | Anywhere with cell coverage | $5–$30/month plan | Remote feeders, no Wi-Fi available |
| Wired LAN / PoE | Yes, most stable | Up to 300 ft (Cat5e/6) | None | Permanent, high-reliability installs |
| Bluetooth only | No (config only) | ~30 ft | None | Not suitable for streaming/recording |
For most suburban backyard setups, Wi-Fi is the default choice. If your feeder is more than 50 feet from the router or behind walls and interference, a Wi-Fi extender, mesh node, or powerline adapter near the feeder location is a cheap fix before upgrading to a cellular plan. Wired PoE is the most reliable long-term option for a fixed, permanent feeder pole and is well worth the one-time cable installation effort. If you're watching feeders from a remote location or a property without broadband, cellular is the only realistic choice, and the monthly subscription is genuinely worth it.
Remote viewing apps and real-time alerts
Most Wi-Fi camera brands (Reolink, Wyze, Arlo, Eufy) have iOS and Android apps that support live view, event history, and push notifications when motion is detected. Alert fatigue is a real issue: at a busy feeder, you can receive dozens of notifications per hour. The best apps let you set time windows, minimum motion zone sizes, and sensitivity thresholds to filter out wind-blown leaves or passing insects. Cellular trail camera apps (Moultrie Mobile, Browning Defender, Spartan GoLive) send still images or short clips to your phone as each event arrives, which is less overwhelming and actually more practical for reviewing who visited.
Storage options: SD card, NAS, and cloud
How you store footage has a bigger impact on long-term usability and cost than most buyers anticipate. Each method has a distinct profile of pros, cons, and running costs.
Local microSD card
MicroSD is the simplest and cheapest storage method. Trail cameras almost universally use it; most outdoor IP cameras support it too. A 128 GB card stores roughly 60 to 70 hours of 1080p footage at moderate bitrates, or many thousands of triggered still images. The key spec to prioritize is endurance: standard cards wear out quickly under continuous write cycles. SanDisk's High Endurance microSD line is rated for up to 40,000 hours of continuous recording, which is the type of product you want for any camera in constant recording or heavy motion-triggered mode. Use a Class 10, UHS-I (U3) rated card at minimum. Cards should be reformatted in-camera every few months during long observation sessions to prevent filesystem corruption.
NAS and RTSP local network storage
Cameras with RTSP (Real Time Streaming Protocol) support can be recorded 24/7 to a NAS (Network Attached Storage) device or a computer running recording software like Blue Iris or Synology Surveillance Station. This is the most flexible setup for serious birdwatchers: you get unlimited retention, can search footage by time and date, and aren't dependent on any cloud subscription. The downside is upfront cost (a basic NAS starts at $150 to $200) and some technical setup. For someone running three or four feeder cameras year-round, it pays for itself quickly versus cloud subscription fees.
Cloud storage subscriptions
Cloud storage is the most convenient option for casual users. Wyze, Reolink, Arlo, and most smart feeder cam manufacturers offer cloud plans. Typical pricing ranges from free (with very limited clip history) to $3 to $10 per month for 30-day rolling storage on one to three cameras. Cellular trail camera plans (which include both data transmission and cloud image storage) run $5 to $30 per month depending on tier and allowance. The convenience is real, but costs accumulate over years, and you're dependent on the manufacturer keeping their cloud service running. I'd always recommend having a local SD card as a backup even if you're paying for cloud.
| Storage type | Upfront cost | Ongoing cost | Retention | Best for |
|---|---|---|---|---|
| MicroSD card | $10–$25 | None | Loops when full | Trail cams, basic IP cams, offline use |
| Cloud subscription | None | $3–$30/month | 7–30 days typical | Casual users, smart feeder cams |
| NAS / RTSP | $150–$300+ | Power only (~$5–$10/year) | Unlimited (disk space) | Multi-camera, long-term observation |
| Cellular + cloud | Camera cost | $5–$30/month | Varies by plan | Remote locations, no home broadband |
Power options: batteries, solar, and mains
Power is often the deciding factor in where you can place a camera. Trail cameras running AA alkaline batteries perform well in mild weather but lose capacity significantly below freezing, this is a well-documented characteristic of alkaline chemistry. Switching to lithium primary AA batteries is the standard fix for winter use in the UK, Canada, or the northern US: they maintain output down to -40°C where alkalines have essentially failed. Many trail camera manufacturers explicitly recommend lithium AAs for cold-weather deployments, and the price premium is easily justified versus missing weeks of winter feeder visits.
Solar-powered cameras work well in summer but require planning for winter, particularly at higher latitudes. In the UK (above 50°N) and Canada, December and January produce as little as 1 to 2 hours of effective solar charging per day. A south-facing panel mount, a larger battery buffer, and occasional USB top-up charging keep solar cameras running through winter. Cellular trail cameras like the Moultrie Edge Solar are sold with optional solar packs specifically designed for extended off-grid use, and this is a practical combination for remote feeders.
Mounting, placement, and installation tips
Camera placement makes more difference to footage quality than almost any spec on the box. For feeder cameras specifically, these placements consistently produce the best results:
- Mount the camera at feeder height or slightly above, angled slightly downward at 10 to 15 degrees. This fills the frame with the feeder perch rather than sky.
- Position 2 to 4 feet from the feeder for tight perch shots; 5 to 8 feet for wider context shots showing multiple perch positions.
- Avoid pointing the camera east or west if possible: direct sunrise or sunset light blows out the exposure. A north-facing camera (in the northern hemisphere) gets even, diffuse light for most of the day.
- Clear vegetation from the PIR detection zone on trail cameras: leaves moving in wind cause dozens of false triggers per day.
- For winter use, angle the camera slightly to avoid snow accumulating directly on the lens housing.
- Use a sturdy adjustable camera mount or tree strap rather than relying on a single screw. Wind vibration blurs footage and degrades recordings over time.
Winter feeding, seasonal use, and pest considerations
A feeder camera is uniquely useful in winter because that's when the most vulnerable species are visiting and when you're least likely to be outside observing directly. Cardinals, chickadees, nuthatches, and woodpeckers are regular winter feeder birds across North America, while UK winter visitors include redwings, fieldfares, and siskins that only appear when berries and natural food sources are exhausted. A motion-triggered camera logging all winter visits gives you a record that passive observation can't match.
For UK readers, the RSPB's current guidance recommends pausing seed and peanut feeding from 1 May to 31 October to reduce the risk of trichomonosis disease transmission (especially to finches and doves), while continuing small amounts of mealworms, fatballs, or suet year-round. This seasonal shift in what you're offering also changes which species your camera will capture, and it's worth noting in your observation logs.
Cameras are also excellent pest-monitoring tools. If your feeder is being emptied overnight, a no-glow IR trail camera will quickly tell you whether the culprit is squirrels, rats, raccoons, or possums. This is something I've found genuinely more useful than any squirrel-proof cage alone: knowing exactly when and how pests are accessing the feeder lets you make targeted adjustments to pole baffles, tray heights, and feeder positioning. For more on managing pest intrusion, the feeder types section of this site covers rat-proof and squirrel-proof feeder designs in detail.
Privacy, legal, and neighbourhood considerations
Most backyard feeder cameras point at your own garden and capture birds. That's straightforwardly fine. The legal and privacy issues arise when cameras are positioned so they also capture neighbours' properties, shared driveways, or public footpaths, even incidentally.
In the UK, the ICO (Information Commissioner's Office) publishes CCTV guidance and a checklist covering domestic and commercial camera use. Where a camera captures footage beyond your own property, the ICO recommends clear purpose documentation, appropriate signage, and data-handling measures. In practice, the simplest solution is to angle the camera tightly toward the feeder so the field of view stays within your own garden boundaries.
In Canada, the Office of the Privacy Commissioner (OPC) treats covert video surveillance as highly privacy-invasive under PIPEDA and recommends transparent, non-covert operation with clear notification where surveillance extends beyond purely private space. See Guidance on Covert Video Surveillance in the Private Sector | Office of the Privacy Commissioner of Canada for OPC recommendations that covert video surveillance is highly privacy‑invasive and that transparent notification and documented justification under PIPEDA are required when surveillance extends beyond private spaces. For a feeder camera pointed at your own backyard, this is unlikely to be a practical issue, but it's worth being aware of if you're installing cameras on a rental property, a communal garden, or a community bird-feeding station.
Notes for UK and Canadian buyers
Most US-market trail cameras and Wi-Fi cameras are available in the UK through Amazon UK, B&H Photo's international shipping, or specialist wildlife camera retailers like Bushnell UK. Cellular cameras require extra attention: confirm the LTE bands are compatible with your carrier before purchasing a US-spec model. Browning, Bushnell, and Reconyx trail cameras are widely available in Canada through major retailers and through dedicated wildlife camera suppliers. For Canadian-specific feeder and camera buying guidance, our best bird feeder camera Canada guide covers regional availability and carrier compatibility in detail. Whether a camera subscription is worth the ongoing cost is a question worth thinking through carefully, and our dedicated guide on whether bird feeder cameras are worth it works through that decision honestly. See our dedicated guide 'Are bird feeder cameras worth it' for a short walkthrough of the subscription and cost trade-offs.
Buying checklist before you order
Run through these before finalising your choice. Answering yes to all of them means the camera actually fits your setup rather than just looking good in a spec comparison.
- Does the camera's power source match what's available at your feeder location? (Mains, solar, battery, PoE)
- Is the connectivity method (Wi-Fi, cellular, wired) compatible with your garden layout and internet setup?
- Is the IP weatherproofing rating at least IP65, certified under IEC 60529, not just described as 'weatherproof'?
- If using AA batteries in winter, have you budgeted for lithium primary cells rather than alkalines?
- Is trigger speed under 0.5 seconds for the trail camera you're considering?
- Does the camera's field of view match your planned mounting distance from the feeder?
- Have you chosen an appropriate storage method (SD, cloud, NAS) and confirmed the camera supports it?
- If using cloud or cellular storage, have you factored the monthly subscription into the total cost of ownership?
- Does the camera's IR type (850 nm, 940 nm, or white LED) match your needs for night imaging without disturbing birds?
- If the camera's FOV captures beyond your property, have you checked local privacy guidance and considered repositioning?
FAQ
What types of cameras are best for watching a backyard bird feeder?
Common options: 1) Trail/wildlife cameras (PIR motion, rugged, battery/solar, good for short‑range captures and night IR), 2) Wi‑Fi smart home/security cameras (continuous/live stream, two‑way audio, cloud storage), 3) Feeder‑integrated cameras (designed around feeder mounting), and 4) USB/webcams or PoE IP cams (high resolution, low latency on mains power). Choice depends on power availability, whether you want live streaming, night imaging, and how exposed the device is to weather and pests.
Which camera models or categories should I consider for different use cases (budget, high‑res, night vision, battery/solar, cellular)?
By use case: Budget: consumer trail cams from mid‑range brands or entry Wi‑Fi cams; High‑res/streaming: 1080p–4K Wi‑Fi/IP cams (mains powered); Night vision: trail cameras with no‑glow 940 nm IR or security cams with IR or low‑light sensors; Battery/solar: cellular trail cams or trail cams with solar accessory; Cellular (remote feeders): purpose‑built cellular trail cams with subscription options. For research‑grade reliability (fast trigger, durability) Reconyx‑class trail cams are known in the literature; for live HD streaming, mainstream Wi‑Fi/IP cams with good upload bandwidth perform best.
How do trigger speed, PIR sensitivity and recovery time affect capturing small fast birds?
Trigger speed (time from motion to image), PIR sensitivity and recovery time (delay before re‑arming) determine whether quick approaches and departures are captured. Faster trigger (e.g., ~0.2–0.3 s) and short recovery times increase capture probability for small/fast birds. Research and camera‑trap tests show higher‑end trail cameras have lower trigger times and better detection of small animals.
Should I use visible (white) flash, 850 nm IR, or no‑glow (940 nm) IR at a bird feeder?
Visible/white flash yields the best colour night images but can disturb birds and alter behaviour (artificial light at night effects). 850 nm IR often produces brighter night images but emits faint red glow. No‑glow 940 nm IR is invisible to most birds/people and minimises disturbance but gives lower contrast. For feeders where disturbance matters, choose no‑glow IR or rely on low‑light sensors rather than white flash.
What's the tradeoff between trail cameras and Wi‑Fi/security cameras for feeder monitoring?
Trail cameras: pros—designed for outdoor exposure, battery/solar power, low power consumption, PIR motion detection, good night IR; cons—limited live streaming, often lower continuous video quality, possible latency via cellular plans. Wi‑Fi/security cams: pros—real‑time streaming, higher continuous video quality, two‑way audio, cloud services; cons—require mains power or robust battery/solar setup, Wi‑Fi range and latency limits, less rugged in some models. Choose trail cams when remote/no mains power or simple motion snaps are fine; choose Wi‑Fi for live observation and high‑quality video.
How do storage options (SD card vs cloud) compare for feeder cameras?
SD card storage: no recurring fees, simple loop recording, but vulnerable to theft/failure and requires physical retrieval. Use high‑endurance microSD (dashcam/CCTV grade) for continuous recording. Cloud storage: remote access, off‑site backups, searchable clips, but usually subscription fees and data usage (especially for cellular). For cellular cameras, budget for monthly data/subscription; for Wi‑Fi cams, cloud plans often have free limited tiers and paid upgrades.