The best buy bird feeder camera in 2026 is not a single product, it's the right combination of camera, feeder type, mounting position, and power setup for your specific yard and the birds you want to watch. If you get that combination right, you end up with a system that reliably captures sharp footage, sends you useful alerts, and actually holds up through summer heat and winter cold. Get it wrong and you're dealing with constant false triggers, blurry night footage, or a dead battery every three days. This guide walks you through exactly how to make that call with confidence.
Best Buy Bird Feeder Camera: What to Choose and Where to Mount
Marcus Hendricks
23 Mar 2026
What a bird feeder camera actually does (and what to expect)
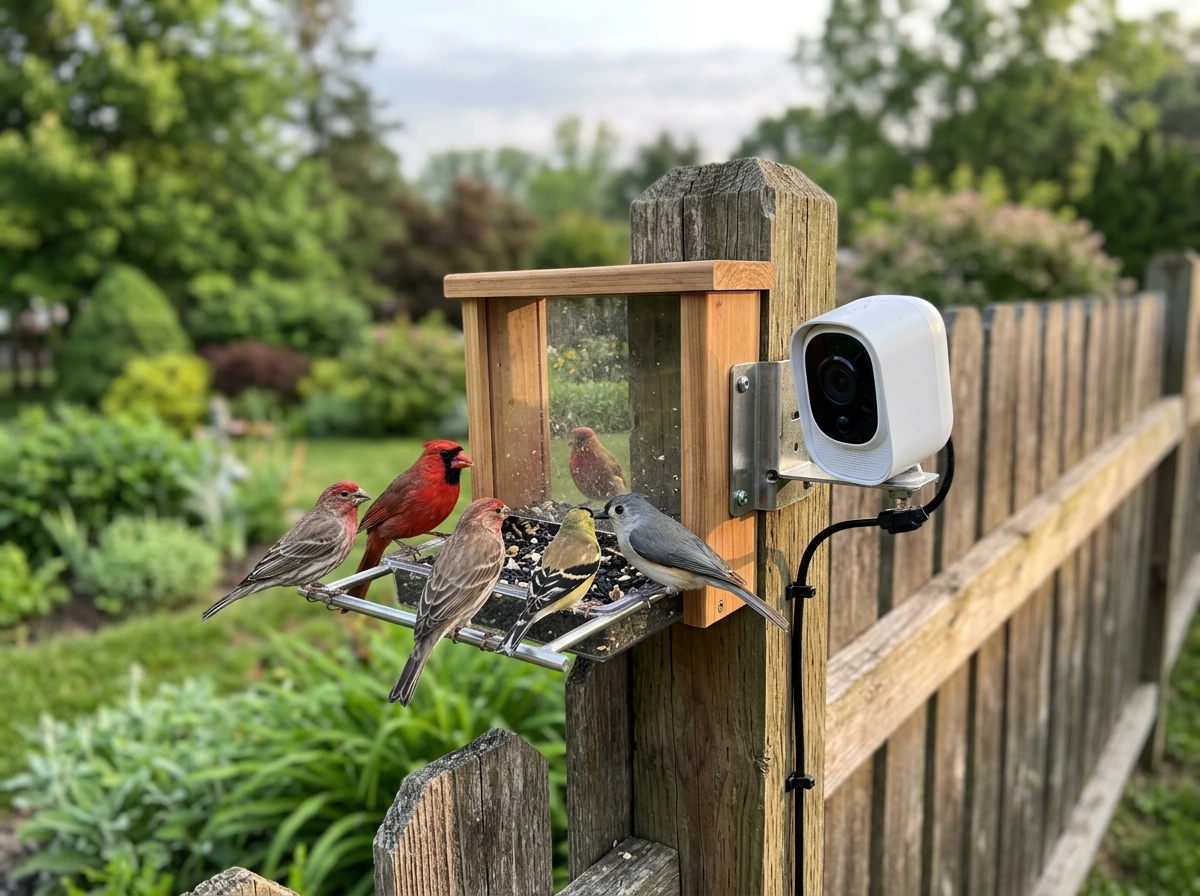
A bird feeder camera is not a security cam pointed at a bird feeder. It's a camera system designed to sit at or near the feeder itself, close enough to capture individual birds in detail, feather patterns, beak color, eye rings, rather than just a blurry shape landing on a perch. Most modern setups pair a dedicated camera module with a smart feeder housing, or mount a compact wildlife camera within a few feet of a traditional feeder.
The core function is motion-triggered recording. When a bird lands, the camera wakes up, records a short clip (typically around 20 seconds, as with Birdfy's default behavior), and sends you a notification. There's usually a cooldown between recordings, Birdfy uses a 2-minute gap by default, which means if you have heavy feeder traffic, you won't capture every single visit, but you also won't fill your storage in a day. That cooldown is configurable, so once you understand your feeder's traffic patterns you can dial it in.
Here's the realistic expectation-setter: these cameras detect motion in front of the lens whenever they're online, not just birds. Leaves blowing near the feeder, a squirrel charging through the frame, even strong sunlight shifting shadows, all of it triggers a recording. That's not a flaw, it's just how motion detection works. The smarter systems add AI species recognition on top of motion detection, so you can filter your library to show only actual bird visits. Birdbuddy and Birdfy both offer this, though Birdfy ties some AI features to a subscription tier depending on the model.
Live viewing is also available on most modern smart feeders, meaning you can open the app and watch the feeder in real time without waiting for a motion alert. This is genuinely useful early in the morning during peak feeding hours, or when you spot activity through a window and want a closer look. Just don't expect this to work perfectly at the edge of your Wi-Fi range, more on that shortly.
Match the camera to your feeder type and mounting spot
The feeder type you're using shapes everything about where and how a camera can work. Not all feeders are equally camera-friendly, and some combinations are much more practical than others.
Tube feeders
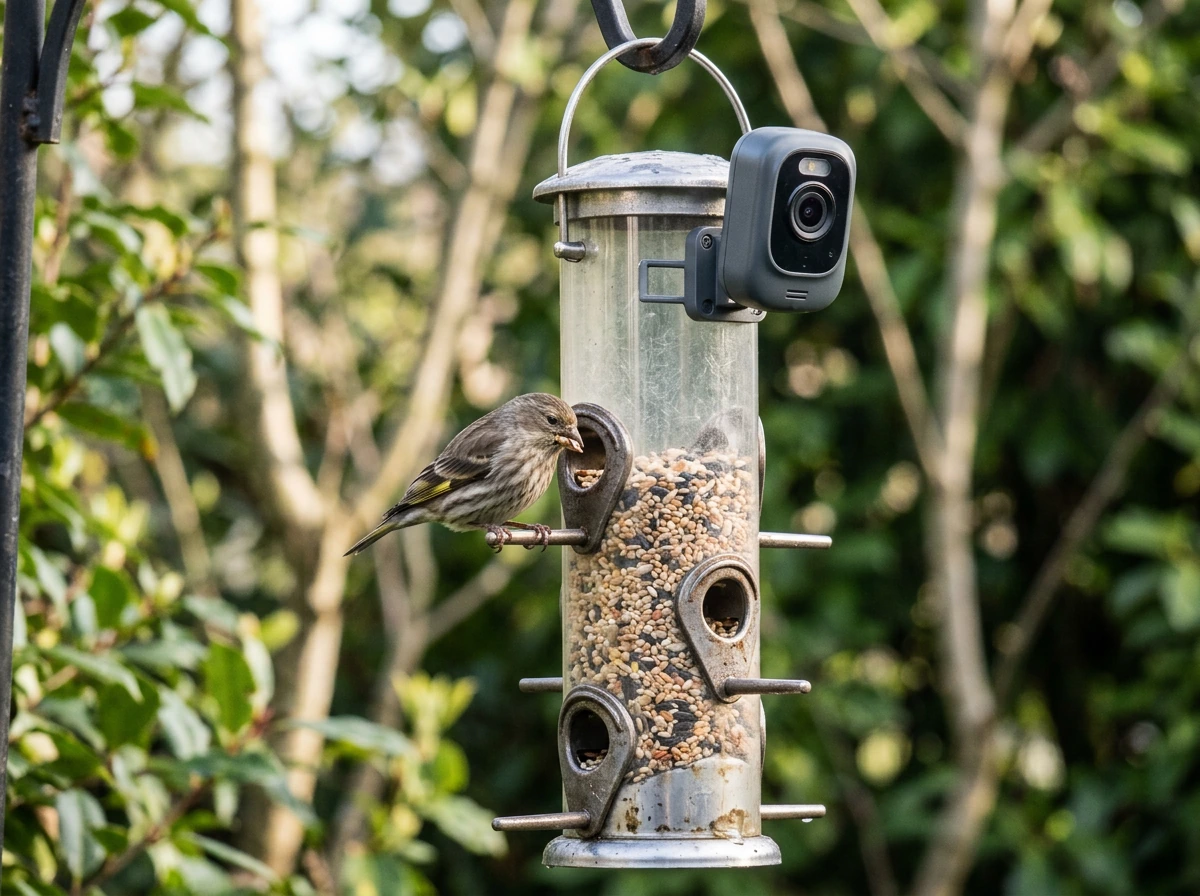
Tube feeders are narrow and vertical, which makes them good for finches, chickadees, and nuthatches but tricky for cameras. The feeding ports are spaced around the tube, so birds show up on multiple sides. A single camera mounted to one side of the feeder captures maybe 30 to 40 percent of visits. If you're serious about coverage, mount the camera slightly above and angled down at the dominant port, or look for an integrated smart feeder that has the camera built into the housing.
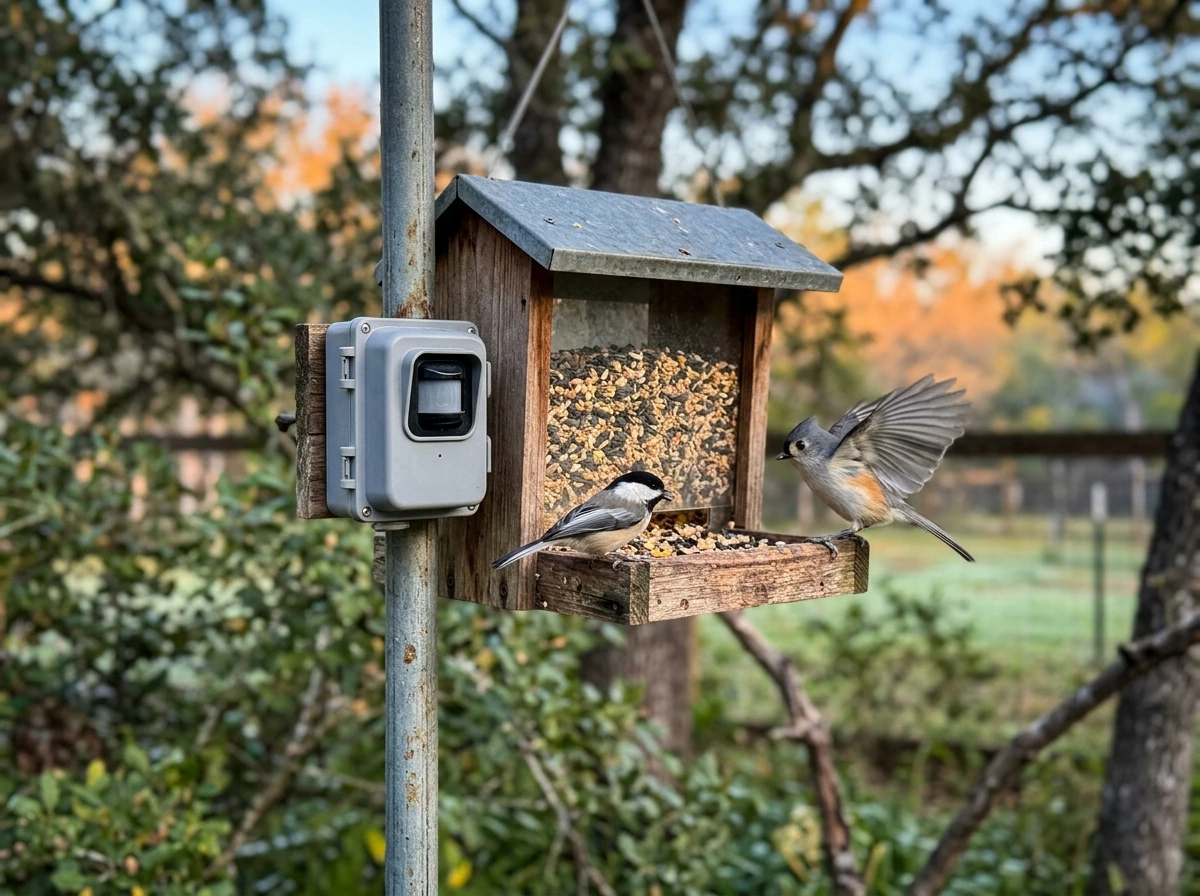
Hopper feeders
Hopper feeders are probably the most camera-friendly traditional style. Birds land on a flat tray or perch rail and face forward, which gives you a natural portrait orientation. A camera mounted at perch level, angled slightly upward, puts visiting cardinals, blue jays, and mourning doves right in the center of the frame. Integrated smart feeders like the Birdfy Feeder 2 Pro use this positioning as their baseline design.
Platform and tray feeders
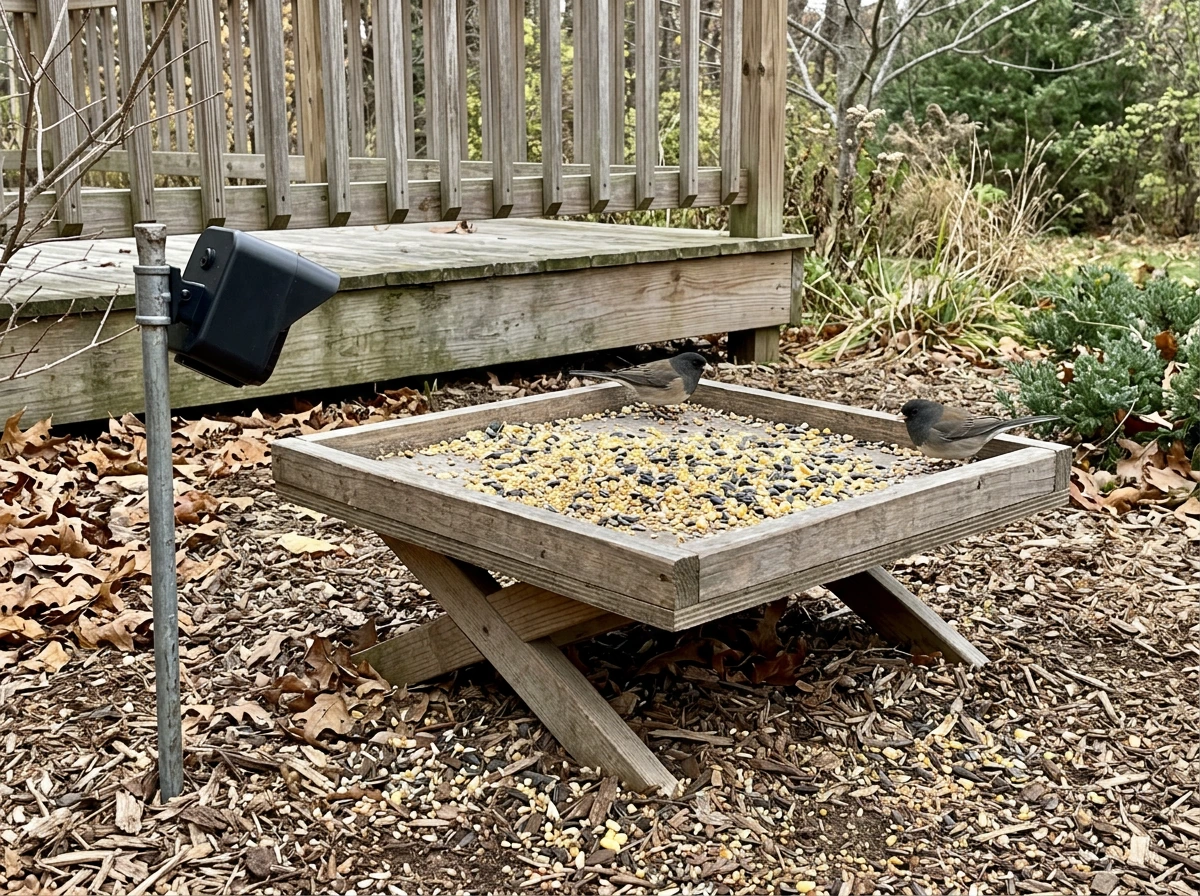
Open platform feeders attract ground-feeding species like doves, juncos, and sparrows. They also give squirrels and raccoons easy access, which means your camera will capture plenty of pest footage too. A camera mounted directly above or at a low angle from one end gives a wide field of view over the whole platform. This is one of the better setups for capturing multiple birds in a single frame, but the open design means exposure to weather is a real issue.
Suet feeders
Suet feeders are where woodpeckers, nuthatches, and creepers show up, and they're surprisingly good camera subjects because birds cling vertically and stay put for several seconds. Mount the camera level with the suet cage, slightly offset so you get a profile view of the bird rather than a straight-on beak shot. The downside is that suet feeders are often hung from tree branches, which makes finding a stable, weatherproof camera mounting point harder.
Window feeders
Window feeders suction-cup to the glass and give you close-up views from inside the house, but mounting an external camera on a window feeder is almost always impractical. The better approach here is to use a small camera inside the room pointed outward through the glass, though reflections and glare will be a constant battle. If close-up bird identification is your goal, a smart feeder placed near a window (within 3 to 5 feet) with a wide-angle lens works better than trying to camera-mount a window suction feeder directly.
Pole-mounted feeders
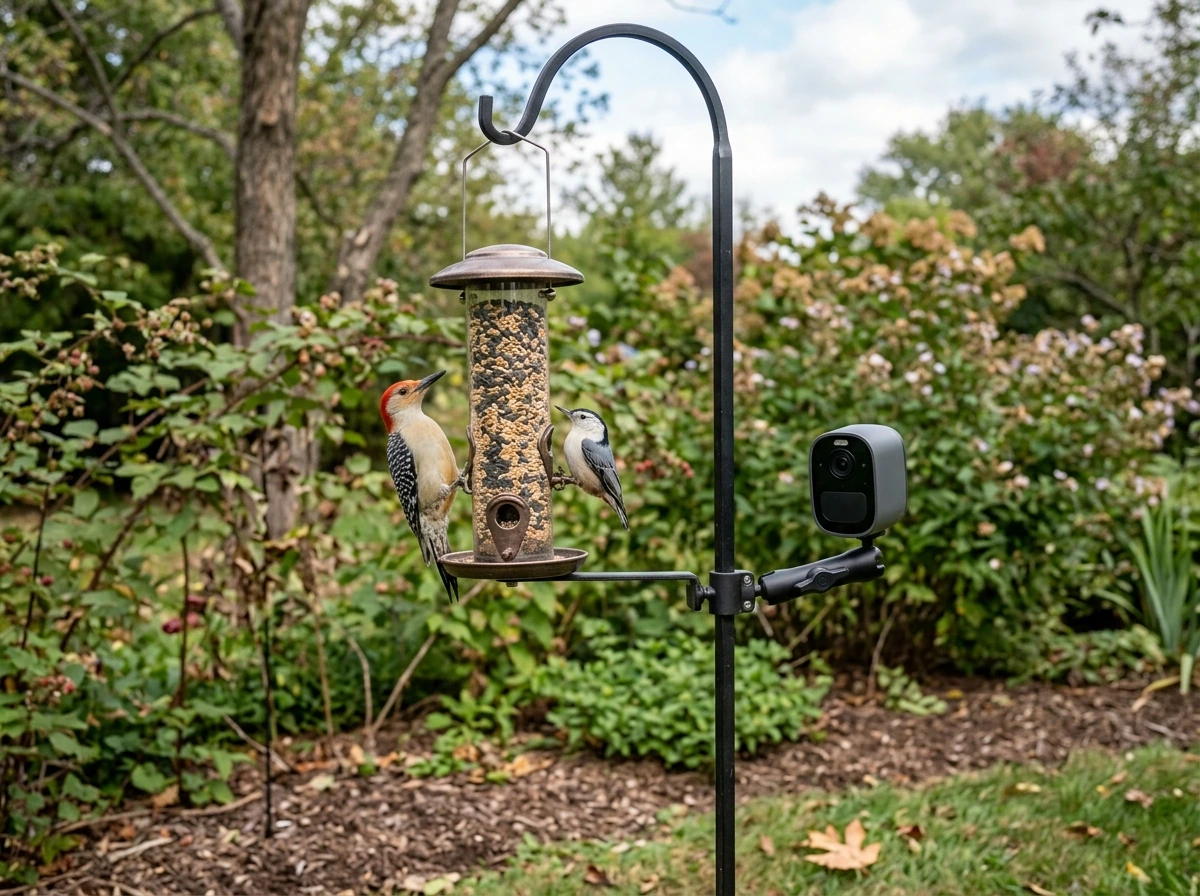
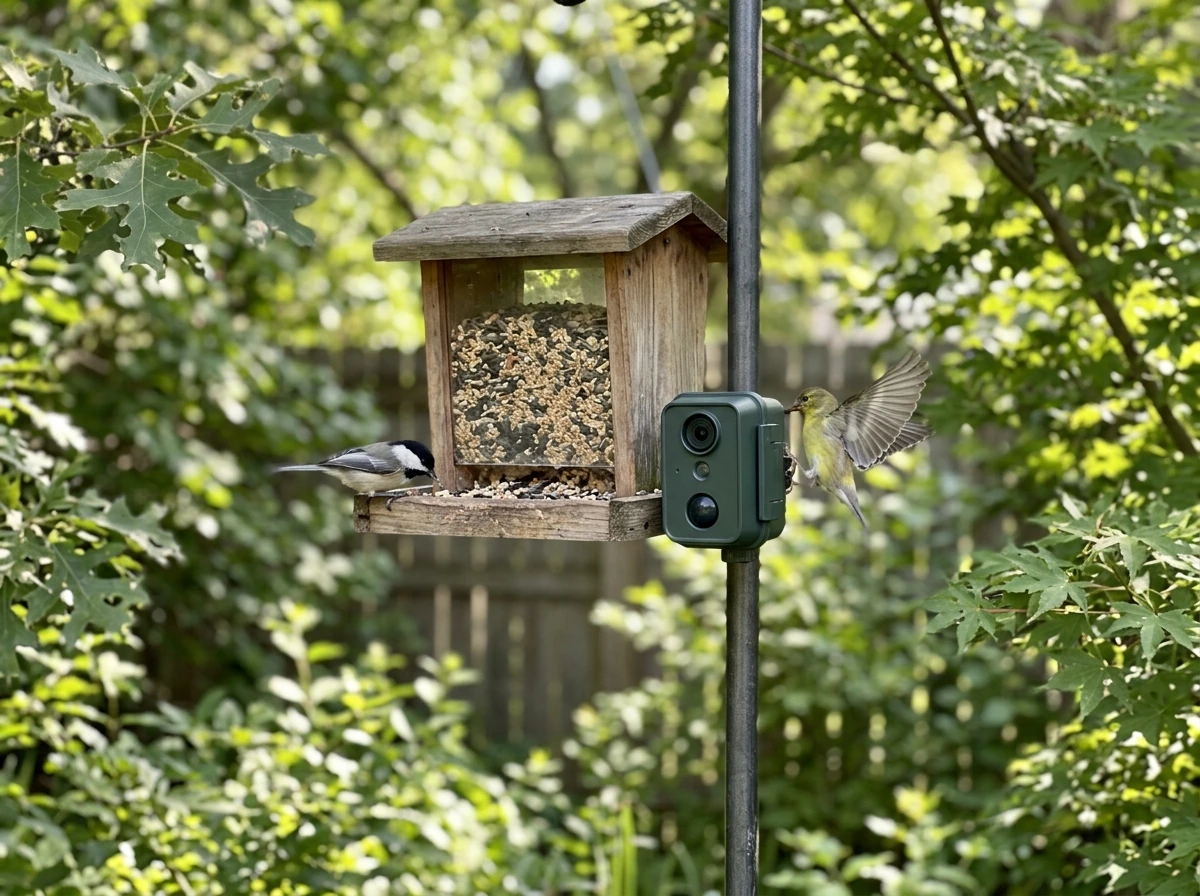
A shepherd's hook or dedicated pole system is the most flexible mounting option. You can add a camera arm to the pole itself, position the camera at any height, and swap feeders seasonally without losing your camera setup. Pole mounts also let you position the whole system away from trees and structures, which reduces squirrel access and gives the camera a cleaner background behind visiting birds.
Key specs that make or break outdoor performance
When you're comparing smart feeder cameras side by side, the specs that actually matter for long-term outdoor use are not always the ones marketed most aggressively. Here's what to focus on.
| Spec | Minimum to look for | Why it matters |
|---|---|---|
| Resolution | 2K (1080p minimum) | Bird plumage detail requires high resolution at close range |
| Field of view | 110° to 130° | Wider angles capture birds from multiple approach directions |
| Night vision / IR | Infrared with at least 5m range | Dawn and dusk are peak feeding times, not full daylight |
| Weatherproofing | IP65 or higher | Rain, snow, and humidity degrade unrated cameras within one season |
| Wi-Fi band | 2.4 GHz (required) | 5 GHz struggles at outdoor distances; 2.4 GHz has better range |
| Power source | Solar or rechargeable with solar option | Wired is inconvenient outdoors; battery-only needs frequent charging |
| Storage | SD card + cloud option | SD-only risks data loss if card fails; cloud-only has ongoing costs |
Resolution deserves a closer look. Birdbuddy Pro shoots 5MP photos with HDR and records up to 2K video with a 122-degree field of view, that's a genuinely wide lens that catches birds arriving from the side, not just those hovering directly in front. At that resolution and field of view, you can identify a bird's species from a single still frame most of the time, which is exactly what you want if your goal is building a personal sighting log.
Night vision is more important than most buyers realize. Even if you think of bird watching as a daytime activity, birds visit feeders at first light, well before sunrise in winter, and some species like owls or migrating thrushes may pass through after dark. A camera with solid IR night vision at a 5-meter range will capture those low-light visits without washing out the image. Avoid cameras that only list 'night mode' without specifying IR range, that usually means poor performance below ambient light.
For Wi-Fi, stick with 2.4 GHz. Birdbuddy Pro, for example, uses 802.11 b/g/n at 2.4 GHz (plus Bluetooth for initial setup), and that's the right call for outdoor use. The 5 GHz band has more bandwidth but walls, fences, and distance cut its range dramatically. Most backyard setups put the feeder 30 to 80 feet from the router, and 2.4 GHz handles that much more reliably.
Weatherproofing is non-negotiable. IP65 is the standard you want, it means the camera is fully dust-tight and protected against water jets from any direction. Anything rated below IP65, or not rated at all, is gambling with your investment. If you're in a region with freezing winters, also check the operating temperature range. Many cameras are rated to around -4°F (-20°C), but cheaper models may have their minimum temperature at 14°F (-10°C) or higher, which means they can fail or produce degraded footage during cold snaps.
Smart features, storage, and app reliability
The 'smart' in smart bird feeder cameras comes down to three things: AI species ID, app reliability, and how the system stores and presents your footage. All three matter, and they're where there's the most variation between brands.
AI species identification
This is the feature that separates a bird feeder camera from a generic outdoor security cam. When it works well, the camera analyzes each video clip or photo, identifies the bird species, and logs it to your app with a species name, range map, and sometimes behavioral notes. Birdfy offers this via their app with a subscription option depending on the model tier. Birdbuddy has built its entire product identity around this feature. The accuracy is genuinely impressive for common backyard species, chickadees, cardinals, goldfinches, house sparrows, and somewhat less reliable for juvenile birds, birds in unusual lighting, or partially obscured shots. It's a useful tool, not a field guide replacement.
Storage options
Most smart feeder cameras offer some combination of local SD card storage and cloud storage. Local SD is free and doesn't require a subscription, but if the card fills up or fails, you lose footage. Cloud storage keeps your clips accessible from anywhere, lets you review a week's worth of visits on your phone, and is safer if the camera is stolen or damaged. The practical middle ground is to use an SD card as the primary storage for raw clips and cloud as your backup and highlights library. Look for cameras that support at least a 64GB SD card, at 2K resolution and 20-second clips, you'll fill a 32GB card faster than you'd expect during peak migration season.
App reliability and slow motion
The app is where many smart feeder systems fall short. If the app crashes during initial setup, takes 10 seconds to load a live feed, or sends duplicate notifications for the same clip, it gets frustrating fast. Before buying, check recent app store reviews, not the star rating average, but the most recent 30 to 50 reviews. App quality can change dramatically with updates, and a system that worked well in 2024 may have introduced a buggy firmware version by early 2026. Slow motion is a nice-to-have that becomes a real feature when it works properly. Birdbuddy 2 records at up to 95 fps for slow-motion capture, which is genuinely useful for watching wing beats and landing behavior in detail, things you simply cannot see at normal speed.
Best-use cases by target birds and backyard situations
Your target birds should drive your feeder type, camera angle, and even the seeds or food you use. Here's how to match the system to what you actually want to film.
| Target birds | Best feeder type | Camera placement | Notes |
|---|---|---|---|
| Cardinals, blue jays, mourning doves | Hopper or platform | Perch-level, slightly angled up | Bright plumage photographs well; wide FOV captures larger birds |
| Finches, chickadees, nuthatches | Tube feeder | Mounted at dominant port, same height | Multiple ports mean you'll miss some visits; consider integrated smart feeder |
| Woodpeckers, brown creepers | Suet cage | Side-angled, level with cage | Birds cling and stay still — great footage even at slower shutter speeds |
| Orioles, hummingbirds | Nectar or oriole feeder | Close-up, front-facing | Fast movement — prioritize high frame rate (60fps+) and bright, sunny placement |
| Bluebirds | Mealworm tray or bluebird box | Low angle, front-facing | Shy species; keep camera housing low-profile and minimize disturbance |
| Winter feeding (all species) | Hopper with weather guard | Sheltered angle, avoid north-facing | Prioritize IR night vision and cold-rated hardware for pre-dawn winter visits |
| Pest monitoring | Any feeder | Wide angle, slightly elevated | AI identification helps distinguish birds from squirrels in alert logs |
Winter feeding deserves its own note. This is when cameras earn their keep most clearly, because birds visit feeders more frequently and at more predictable times when natural food sources are scarce. But winter also stresses cameras hardest. Battery-only cameras can drain in days in freezing temperatures. Solar panels underperform in short, cloudy winter days. If you're setting up primarily for winter use, a wired power option or a large-capacity solar panel (5W or more) paired with a battery backup is the most reliable configuration. Make sure the camera's operating temperature floor matches your local winter lows before you commit.
Setup tips and common problems
Dealing with false motion alerts
False alerts are the number one frustration with feeder cameras, especially in the first week. Wind-blown branches, shifting light patterns, and passing insects all trigger motion detection. The fix is usually a combination of adjusting the motion sensitivity setting in the app (go lower than default to start), repositioning the camera so nearby foliage is out of the detection zone, and setting activity schedules if the app supports them (for example, only alerting during daylight hours). If the camera has an AI filter, enabling it to only notify you for detected birds cuts false alerts dramatically, though you'll still get squirrel and raccoon alerts, which are sometimes exactly what you want.
Wi-Fi range and connectivity drops
If your feeder is more than 50 to 60 feet from your router, or separated by a wall, a fence, or garden structures, you will likely experience intermittent connectivity drops. The camera will still record to its SD card during dropouts, but live viewing won't work and you may miss notifications. The most practical solution is a Wi-Fi extender placed near an exterior wall or window facing the feeder, not a mesh node on the far side of the house. Some users run a dedicated 2.4 GHz network just for their feeder cameras to avoid interference from busier household networks.
Camera angle and composition mistakes
The most common angle mistake is mounting the camera too high and pointing straight down. You end up with a top-of-head view of every bird, which makes identification almost impossible. Mount the camera at or just slightly below the feeding level, angled upward a few degrees. This gives you the side-and-front view that shows plumage, beak shape, and eye markings. If you're using a wide-angle lens (120 degrees or more), you can afford to move the camera back 12 to 18 inches from the feeder without losing detail, and that distance helps prevent birds from being scared off by the camera housing.
Night vision performance in practice
Infrared night vision works by flooding the scene with IR light that the camera can see but birds cannot (IR is invisible to most birds, so it doesn't disturb them). The resulting footage is black and white but surprisingly detailed at close range. Problems arise when the IR LEDs reflect off the feeder's glossy surfaces or back off a window behind the camera, creating a washed-out blob in the center of the frame. Test your night vision setup at dusk on the first night, before you're trying to identify a mystery bird at 3 a.m. Adjust the angle slightly if you're getting glare, and if possible choose a feeder with a matte or natural wood finish rather than a shiny lacquered one.
Power management
If you're running on battery, check the stated battery life against your expected motion trigger frequency. A camera claiming 6-month battery life is typically calculating based on a small number of daily triggers. If you have a busy feeder with 50 to 100 daily visits, that same battery might last 3 to 4 weeks. A solar panel adds meaningful charging capacity in spring and summer, but in winter it's often supplemental rather than sufficient on its own. The most reliable long-term setup for high-traffic feeders is a solar panel paired with a large rechargeable battery pack, or a weatherproof outdoor extension cord if your feeder is within reach of an outlet.
Quick buying checklist for your best buy choice
Before you finalize any bird feeder camera purchase, run through this checklist. It takes 5 minutes and saves you the frustration of returning a system that doesn't fit your yard or your goals.
- Identify your primary target birds and match the feeder type to their feeding behavior (perch, cling, or platform).
- Measure the distance from your router to your planned feeder location. If it's over 50 feet or involves walls and fences, plan for a Wi-Fi extender.
- Check the camera's operating temperature range against your local winter low. If your area hits below 14°F (-10°C), confirm the camera is rated for it.
- Confirm the weatherproofing rating is IP65 or higher. If it's unrated or listed only as 'weatherproof,' treat that as a red flag.
- Decide on your power strategy: wired, battery-only, solar-supplemented battery, or solar-primary. Match it to your feeder location and seasonal sunlight.
- Choose a storage setup: local SD card (minimum 64GB) for raw footage, plus cloud if you want accessible highlights and a backup.
- Decide whether AI species ID matters to you. If yes, confirm whether it's included free with the product or requires an ongoing subscription.
- Check the camera's field of view — 110 to 130 degrees is ideal for most feeder types. Narrower than 90 degrees and you'll miss a lot of side approaches.
- Look at recent app store reviews for the specific camera system, not just overall ratings. Focus on reviews from the last 3 months.
- Plan your mounting angle before the camera arrives. Confirm you can position the camera at or below feeder level with a clear, unobstructed view of the main perch or feeding surface.
If you want a practical starting recommendation: If you want a practical starting recommendation: a 2K smart feeder camera with AI species ID, a 120-degree field of view, IP65 weather rating, and solar-supplemented battery power mounted on a pole-system hopper feeder covers the widest range of backyard situations and bird species reliably. A well-rounded pick that many backyard keepers consider when they search for the best camera bird feeders is a smart feeder camera with strong AI species recognition, reliable weatherproofing, and dependable power 2K smart feeder camera with AI species ID. , a 120-degree field of view, IP65 weather rating, and solar-supplemented battery power mounted on a pole-system hopper feeder covers the widest range of backyard situations and bird species reliably. That configuration handles everything from identifying winter finches at dawn to flagging a rare migrant passing through in May. It's the combination that earns the 'best buy' label not because it's the cheapest option, but because it delivers the most value over a full year of outdoor use without requiring constant maintenance or workarounds.
If you're focused on a specific niche, solar-powered smart feeders, or solar-powered smart feeders, or finding the best camera bird feeder for a particular bird species, those topics go deeper on individual product comparisons and species-specific placement strategies. But if your goal is to make a confident, well-matched purchase today, the checklist above and the feeder-type guidance in this article give you everything you need to choose right the first time.
FAQ
Do bird feeder cameras record all day, or only when birds land?
Most bird feeder cameras cannot record continuously, they record short clips on motion triggers. If you want “continuous” behavior, look for systems that support longer clip lengths or configurable trigger schedules (like only recording during specific hours), and confirm storage capacity (SD size plus whether cloud is incremental or overwrites).
What should I do if my bird feeder camera keeps sending alerts but I never see birds?
If you see frequent clips with no birds, reduce sensitivity first, then eliminate nearby triggers like swaying branches or loose feeder parts. Also check whether the camera is trained on the feeder ports or the ground area, wide-angle lenses can capture more “background motion,” so small repositioning often fixes more than app settings.
How can I improve bird species detection accuracy with a feeder camera?
For species recognition to work well, ensure birds are usually fully in frame when they trigger motion. Avoid mounting so high that you get top-of-head views, and keep the lens within the camera’s stated effective detection range for low light, since AI accuracy typically drops when the bird is partially obscured or backlit.
Why does my night-vision footage look washed out or blurry even though the camera says it has IR?
Use the camera’s IR night vision only as a backup for identification, because glossy feeder materials and windows behind the camera often cause glare. The practical step is to test at dusk, adjust the angle by a few degrees, and if possible switch to feeders with matte finishes or place the camera so the IR LEDs are not reflecting straight back into the lens.
What Wi-Fi setup actually works best for a best buy bird feeder camera at 50 to 80 feet?
2.4 GHz is usually best for backyard reliability, but you can also reduce issues by using a Wi-Fi extender mounted near an exterior wall or window facing the feeder. Avoid adding a mesh node deep inside the house, and consider a separate SSID for just the feeder cameras to reduce interference from other devices.
If live view disconnects, will I still get the motion clips on my SD card?
If live viewing fails but the camera still records to SD, your connection range is the issue. The next step is to confirm whether the camera supports dual recording (local first, upload later), then move the access point or extender closer, or shorten the distance by switching to a pole mount closer to the Wi-Fi signal.
How close should I mount the camera to the feeder to avoid distorted or unusable images?
Many cameras struggle when the bird is right next to the lens or the feeder is very close, especially with wide-angle models. Mount so the feeder sits near the center of the frame with a slight upward angle, then do a quick daytime test clip and check for headroom, not just field of view.
How do I estimate battery life for a busy feeder camera during winter and migration season?
Don’t rely on advertised battery life alone, it’s usually based on low trigger counts. Estimate triggers from your feeder traffic (for example 50 to 100 visits per day in peak season), then check whether the camera allows “low power” or optimized recording settings, so the battery calculation matches your real world usage.
What storage approach should I use, SD card, cloud, or both, and how do I avoid losing footage?
Cloud storage practices vary, some services store full clips for a set period, others save a limited amount. The safest approach is to treat SD as primary for raw recordings, and use cloud for recent highlights, then verify whether the app lets you download clips before they expire.
Can I stop squirrel and raccoon alerts without missing real bird activity?
Yes, but it depends on how the camera filters alerts. If the system has AI bird-only notifications, enable them and also set an activity schedule so nights and very windy hours don’t flood your notifications. For pest-heavy feeders, you may intentionally keep animal alerts on, then review clips manually.
Is solar enough for winter bird feeder camera use, or do I need wired power?
Winter setups usually need power reliability more than extra resolution. If you are battery-only, confirm the camera’s minimum operating temperature and whether the battery type is rated for cold. If you are using solar, expect reduced winter charging and plan either wired power or solar plus battery backup sized for low light periods.
What is the most common mounting mistake with feeder cameras, and what angle should I use instead?
The “best” mounting height depends on feeder style, but the common failure is aiming too high. Use a side-and-front angle around feeding level, and if you use a wide-angle lens you can step back 12 to 18 inches, which often reduces spooking while still keeping plumage detail.
Next Article
Best Smart Bird Feeder Camera: 2026 Guide and Top Picks
2026 guide to the best smart bird feeder camera, comparing video, detection, Wi‑Fi, feeder fit, power, and outdoor durab