A license plate bird feeder is a platform or hopper-style feeder that uses a real (or replica) license plate as the roof, giving it a rustic, folk-art look while actually serving a practical function: keeping seed dry and birds comfortable. You can buy one ready-made or build your own in an afternoon with basic tools. Either way, the design works best as an open platform tray with a low-profile license-plate roof overhead, and it's one of the more approachable DIY feeder projects you'll find. This guide covers both paths: how to pick the right version for your birds, and how to build, mount, and maintain one that actually performs.
License Plate Bird Feeder Guide: Buy or DIY Plans
Marcus Hendricks
23 Apr 2026
What a license plate bird feeder is (and why people build them)

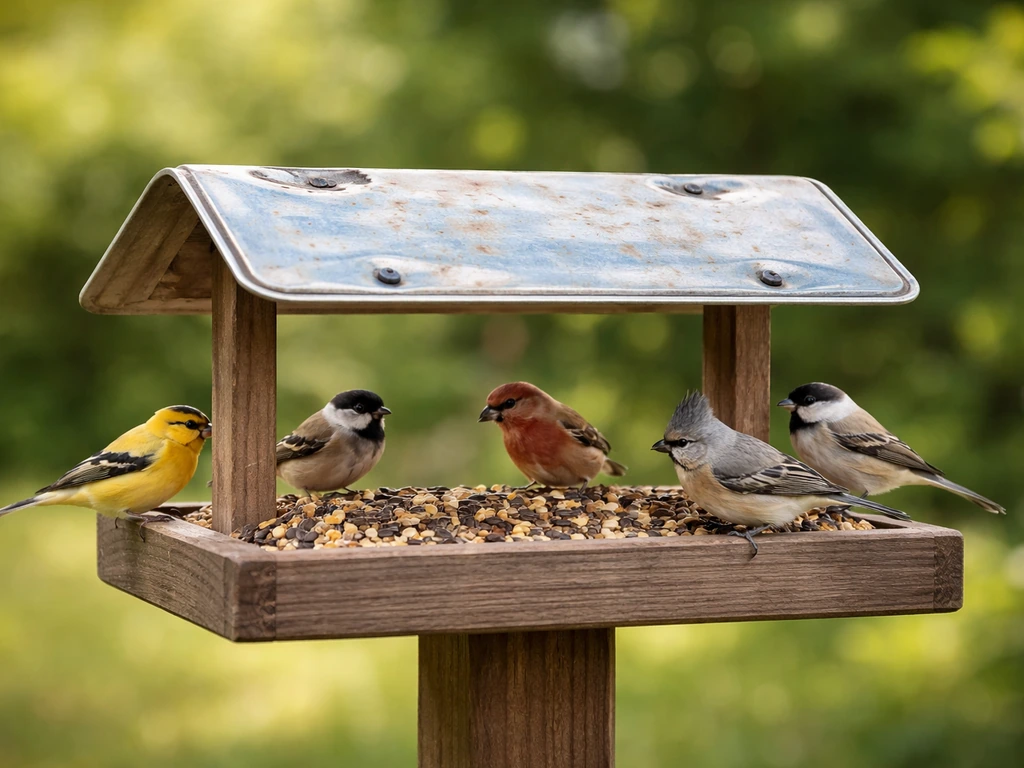
At its core, a license plate bird feeder is a platform feeder with a roof made from a repurposed license plate. Platform feeders are flat, raised surfaces where you spread seed openly, and they attract one of the widest variety of birds of any feeder style. Add a roof and you're closer to hopper-feeder territory: the roof shields seed from rain and snow, slows soiling from bird droppings, and keeps food fresher longer. The license plate is the roof panel in this design, and it's what gives the feeder its personality.
People build them for a few overlapping reasons. First, there's the novelty factor: a license plate from your home state, a vintage plate, or a plate from a meaningful place makes the feeder a conversation piece in a way a plastic tube feeder never will. Second, it's genuinely practical: license plates are flat, rigid, weatherproof metal that costs almost nothing at a thrift store or flea market. Third, the project is achievable. You don't need welding skills or a full woodshop. A simple version can be built with a drill, a handsaw, and hardware store lumber in a couple of hours.
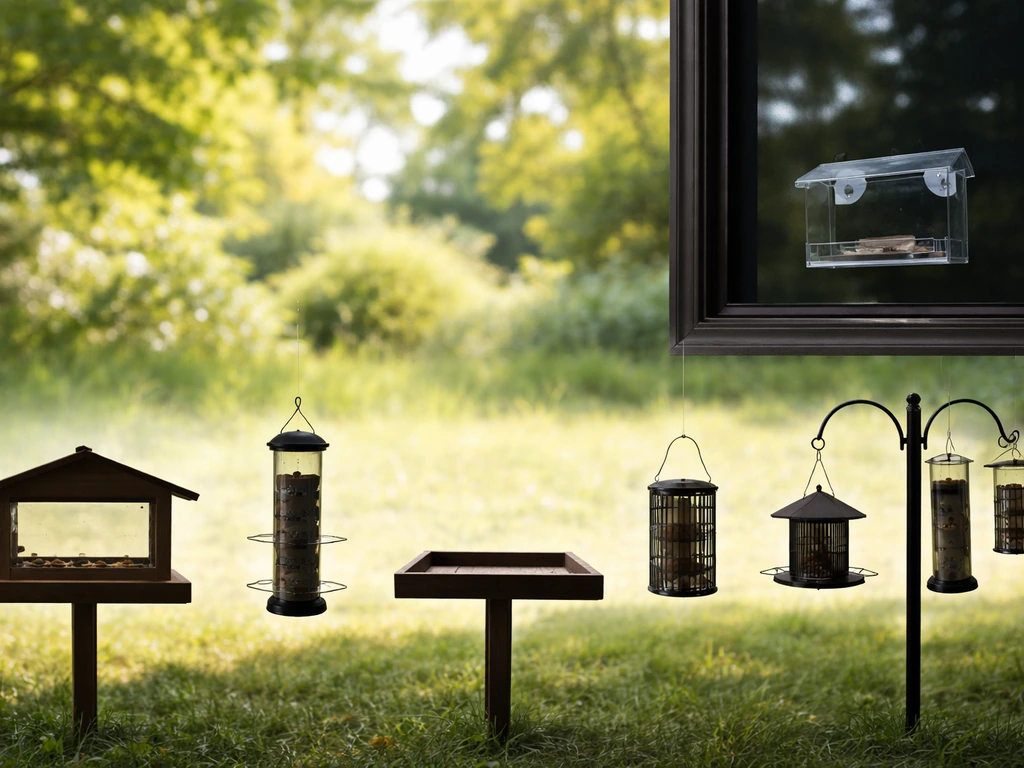
The design usually falls into one of two categories: a roofed platform (open tray with the plate suspended above on posts or a frame) or a roofed hopper (an enclosed seed reservoir with the plate on top). The roofed platform is simpler to build and easier to clean. The hopper version holds more seed and requires less frequent refilling, but it adds construction complexity. Both are legitimate, and which you choose depends on how often you want to refill and what birds you're targeting.
Choosing or buying the right license-plate feeder for your target birds
Before you build or buy, it helps to know what birds you actually want at the feeder, because that changes the design. Platform feeders with open trays attract a wide variety of species: cardinals, blue jays, mourning doves, dark-eyed juncos, sparrows, and even ground feeders that will pick up what falls beneath. Hopper-style versions with smaller seed ports tend to favor smaller birds like chickadees, nuthatches, and finches, because larger birds like grackles can't perch comfortably on a compact feeder. If you want species diversity, go with the open platform. If you want to favor smaller songbirds, go with a tighter hopper design.
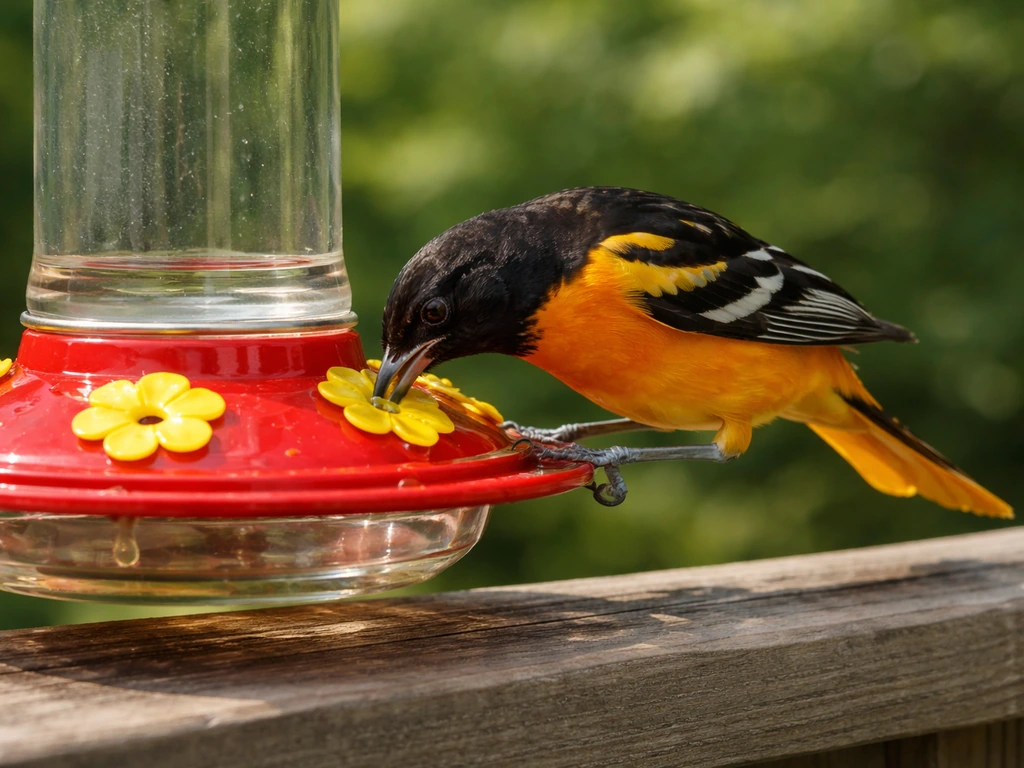
Seed choice matters just as much as feeder shape. Black-oil sunflower seed is the most universally attractive seed you can offer and works well in any platform or hopper design. Safflower attracts cardinals and discourages some pest species. Millet is excellent for ground-feeding birds like juncos and doves that will forage beneath the feeder. For the license plate feeder specifically, avoid fine seeds like thistle (nyjer) in an open tray: they blow away easily. Stick with larger, heavier seeds in the tray and save the thistle for a dedicated tube feeder elsewhere.
Commercially, license plate roof bird feeders do exist as a ready-made product (brands like Sporty Crafts sell state-specific versions). These are typically cedar or pine platform feeders with a roof bracket designed to hold a standard license plate. They're well-made, look great right out of the box, and are a reasonable option if you want the aesthetic without the project. The trade-off is cost: a store-bought version runs anywhere from $30 to $60 or more, while a DIY build using scrap lumber and a secondhand plate can cost under $10. If you enjoy building things and want full control over dimensions and wood quality, DIY is the better path.
DIY license plate bird feeder design options
There are three main DIY configurations worth knowing. Each has different strengths depending on your skill level, target birds, and where you plan to mount it.
| Design | Best For | Complexity | Seed Capacity | Weather Protection |
|---|---|---|---|---|
| Open platform with plate roof | Species variety, casual feeding | Low | Low to medium (tray depth) | Good (roof covers tray) |
| Enclosed hopper with plate roof | Songbirds, less-frequent refilling | Medium | High (reservoir) | Excellent (seed enclosed) |
| Hanging platform with plate roof | Flexible placement, small yards | Low | Low | Good (roof + elevation) |
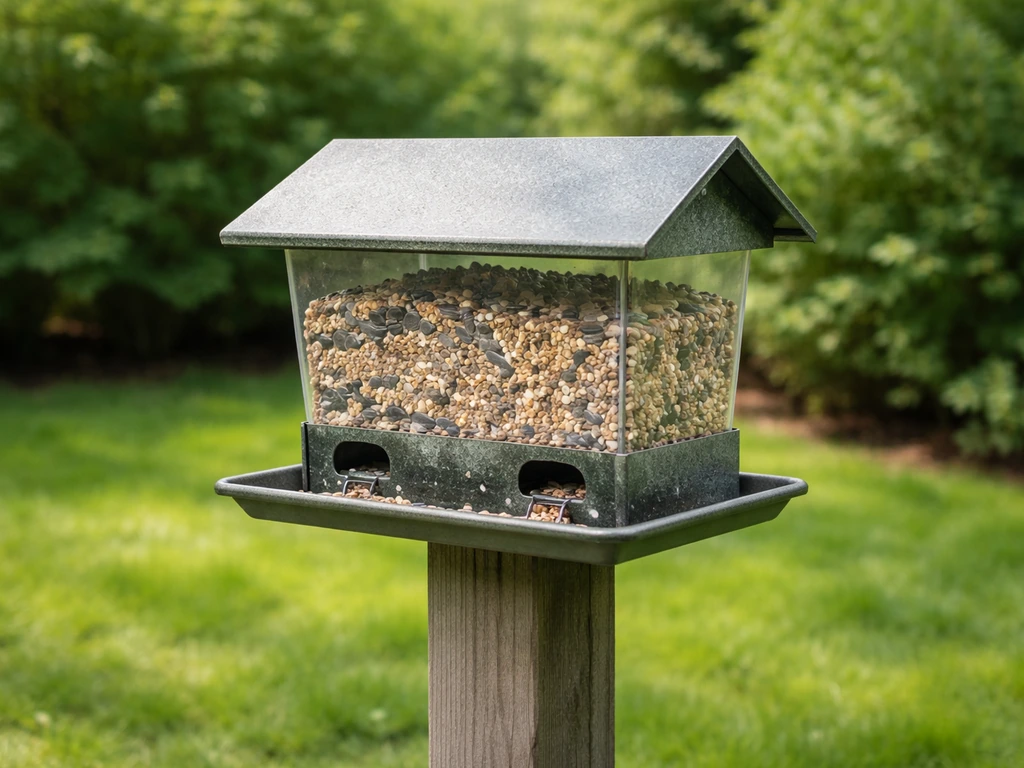
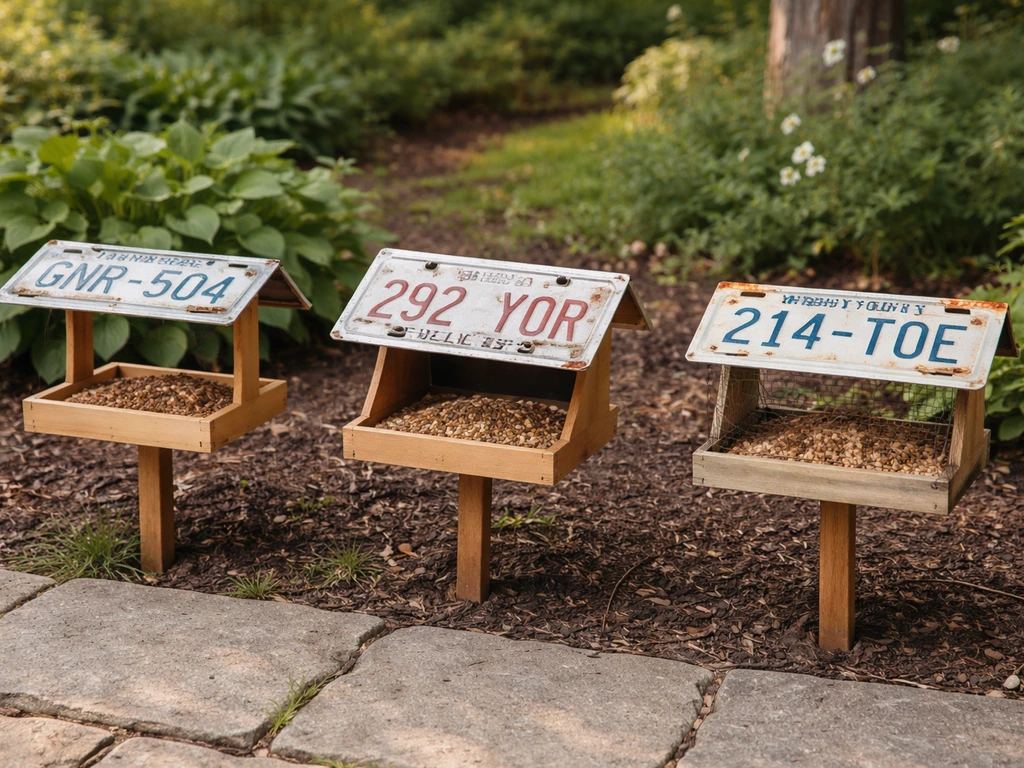
The open platform with plate roof is the most popular DIY version and the one most people mean when they search for plans. It's a flat tray (usually with low side rails to keep seed from blowing off) elevated on four corner posts, with the license plate spanning the top as the roof. The plate is slightly wider than a standard US plate (12 by 6 inches), so you'll want a tray footprint that fits comfortably under it with a small overhang on each side to divert rain.
The enclosed hopper with plate roof is structurally similar to a standard hopper feeder (think barn-shaped sides with a seed reservoir that gravity-feeds seed to a tray at the bottom) but with the license plate used as the primary roof panel instead of a wood or metal cap. This version is more complex to cut and assemble accurately, but it's much more weather-protective and holds seed for days rather than hours.
The hanging platform is a simpler tray suspended by wire or chain from a bracket or tree branch, with the license plate bolted across the top of the tray's corner posts to form a canopy. It's the easiest to build and can be moved around easily, but it sways in wind, which some birds find less comfortable. If you go this route, use heavier hardware and keep the tray weighted low so it stays stable.
Materials, tools, and hardware: what to use and what to avoid
The single most important material decision is your wood choice. Use untreated cedar, redwood, or pine. Cedar is the best all-around pick: it's naturally rot-resistant, dimensionally stable through freeze-thaw cycles, lightweight, and birds and wildlife are completely safe around it. Do not use pressure-treated lumber. A CSU wildlife education handout warns that pressure-treated lumber is impregnated with copper arsenate and that birds and humans can be harmed if the wood is not properly applied Do not use pressure-treated lumber.. Pressure-treated wood contains pesticides and fungicides that are toxic to birds and other wildlife, and this has been explicitly flagged by ornithology organizations as a hazard for any feeder or nest structure in contact with birds.
For the tray floor, you have two material choices: solid wood with a few small drainage holes drilled in the corners, or hardware cloth (wire mesh) stretched over the frame. The wire mesh option is excellent because it allows rain and snow to drain through immediately, prevents seed from sitting in standing water, and is easy to scrub clean. A 1/4-inch or 1/2-inch hardware cloth works well and is cheap at any hardware store.
- Cedar or untreated pine (1x4, 1x6, or 1x8 boards work well for the tray and sides)
- One standard US license plate (12 x 6 inches) or a decorative replica
- 1/4-inch or 1/2-inch hardware cloth (wire mesh) for the tray floor, optional but recommended
- Exterior wood glue and 1.5-inch or 2-inch galvanized or stainless steel screws (not zinc-plated, which corrodes faster)
- Small washers and galvanized or stainless bolts for attaching the license plate to the roof posts
- Eye bolts and heavy-gauge galvanized wire or chain if hanging the feeder
- Waterproof exterior wood finish (linseed oil or raw tung oil) -- avoid paints with heavy VOCs inside the seed tray
Tools you'll need: a drill with a 1/8-inch bit for pilot holes (always pre-drill to prevent the wood from splitting), a handsaw or circular saw for cuts, a staple gun if you're using hardware cloth, a tape measure, and a square. That's it. No specialized tools required. A miter box helps if you want clean 45-degree angles on the roof posts, but it's optional.
On hardware: use galvanized or stainless steel screws throughout. Zinc or untreated steel screws will rust within one season outdoors, staining the wood and weakening the joints. For the license plate attachment specifically, use small bolts with washers so the plate sits slightly proud of the wood and doesn't trap moisture underneath.
Step-by-step DIY build: plans, measurements, and assembly
These plans are for the most common version: a roofed open platform with a wire mesh tray floor. The dimensions are based on a standard US license plate (12 x 6 inches) as the roof, giving you a tray footprint of roughly 10 x 10 inches with the roof overhanging slightly on all sides. This is a generous platform for most songbirds and large enough to attract cardinals, jays, and doves.
- Cut your tray frame pieces: two pieces at 10 inches and two pieces at 11.5 inches from a 1x4 cedar board. These will form a rectangular box frame (the two longer pieces overlap the shorter ones at the corners to create a 10x10 interior). The tray depth should be about 3/4 to 1 inch, which is enough to hold seed without it blowing off easily.
- Assemble the tray frame: apply exterior wood glue at the corners, clamp, then drive two galvanized screws through the longer pieces into the ends of the shorter pieces at each corner. Pre-drill first to avoid splitting.
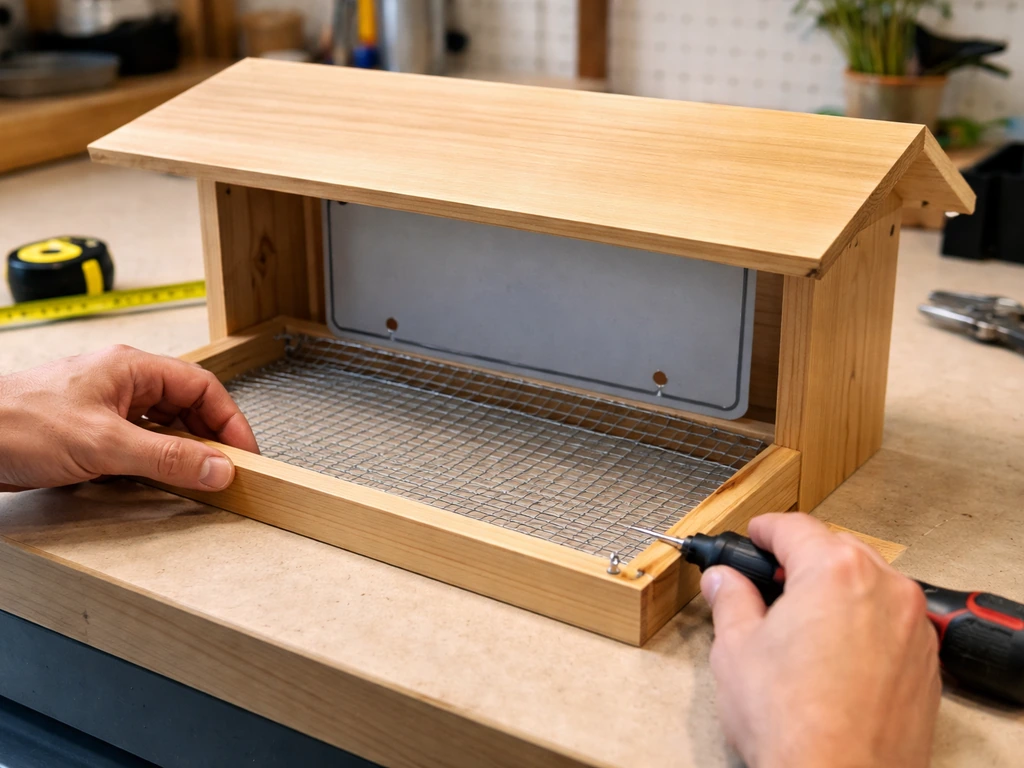
- Attach the tray floor: cut a piece of 1/2-inch hardware cloth to 10x10 inches and staple it to the bottom of the frame using a staple gun. Pull it taut before stapling so it doesn't sag under the weight of wet seed.
- Cut four corner roof posts: cut four pieces of 1x1 or 3/4-inch square dowel to 5 inches in length. These are the vertical posts that will hold the license plate roof above the tray. Five inches gives enough clearance for birds to feed comfortably underneath the plate.
- Attach the roof posts: position one post at each corner of the tray, on the inside of the frame. Drill a pilot hole down through the top of each post into the tray frame, then screw them down. Make sure all four posts are the same height so the plate sits level.
- Attach a horizontal roof rail: cut two pieces of 1x2 cedar to 12 inches. These span across the top of the two sets of posts (front and back), bridging them and giving the license plate something flat to rest on and bolt to. Drill and screw these into the tops of the posts.
- Mount the license plate: lay the plate across the two horizontal rails. It should overhang roughly 1 inch on each short side and sit flush or slightly over on the long sides. Mark the four bolt hole locations (using the plate's existing bolt holes if possible, or drill new ones), then bolt the plate down using small bolts, washers, and nuts. The washers prevent the bolt head from pulling through the plate. Leave a slight gap between the plate and the wood rails so moisture doesn't pool underneath.
- Add drainage holes (if using solid wood tray floor): drill four 1/4-inch holes in the corners of the tray floor to allow any standing water to drain out.
- Sand all exposed wood edges smooth with 120-grit sandpaper, paying special attention to any spots a bird's feet or feathers might contact.
- Apply one coat of raw linseed oil or tung oil to all exterior wood surfaces for weather protection. Let it cure for 48 hours before adding seed.
If you want to hang the feeder rather than pole-mount it, drill one eye bolt into each end of the horizontal roof rails at the center, then run a length of galvanized chain or heavy wire between the two eye bolts and up to a hook or branch bracket. Use a carabiner clip at the hanging point so you can take the feeder down for cleaning easily.
Placement, mounting, and keeping pests and weather out
Height and location
Mount the feeder at least 5 feet off the ground. This height gets it above casual ground predator reach and puts it in the zone where most feeder birds are comfortable feeding. Place it in a spot with some nearby cover (a shrub or tree within 10 to 15 feet) so birds have a perch to stage from before flying in, but not so close that squirrels can leap directly onto the feeder from a branch.
Window distance is worth thinking about carefully. Birds flushed from a feeder can hit windows at full speed, which is fatal. The safest placement is either within 3 feet of a window (so a startled bird doesn't have room to build fatal momentum) or at least 30 feet away. Anywhere in the middle range, roughly 4 to 30 feet from glass, carries the highest collision risk. A feeder in a garden bed 8 feet from your kitchen window is the worst-case scenario.
Squirrel and pest control
Squirrels will find a platform feeder quickly and can empty a tray in minutes. The most reliable deterrent for a pole-mounted version is a metal squirrel baffle: an 18-inch diameter cone baffle mounted on the pole below the feeder. Metal is important because squirrels will chew through plastic. Keep the pole at least 7 to 8 feet away from any structure, fence, tree, or other launch point that squirrels can jump from. If the feeder is hanging, use a tilting disc baffle above the hanging point: when a squirrel tries to shimmy down the wire, the baffle tips and deposits them off. A 14 to 18-inch-long hanging baffle is the typical effective size.
Rats are attracted by seed that accumulates on the ground beneath the feeder. Rake or sweep the area under the feeder every few days, and don't let husks and uneaten seed pile up. If you see evidence of rats, temporarily stop offering seed for a week and then restart with just enough seed to be consumed daily with nothing left overnight.
Weather protection
The license plate roof does a lot of work here. A standard plate (12 x 6 inches) isn't huge, so orient the tray so the long side of the plate faces your prevailing wind direction, giving maximum shelter. In heavy rain or snow, you may need to clear the tray more frequently because the roof won't cover the entire tray if the precipitation is coming in at an angle. In winter, check the feeder after any significant snowfall: a packed layer of snow on top of the plate can slide off and bury the seed tray. A quick knock with a gloved hand clears it.
Seasonal use and troubleshooting when birds aren't showing up
Winter feeding
Winter is when a license plate platform feeder earns its keep most visibly. Ground is frozen, natural food is scarce, and birds are actively searching for reliable calorie sources. High-fat seeds like black-oil sunflower and safflower are the right choice in winter. Check the feeder every morning in freezing temperatures because seed can clump or freeze into a solid mass overnight, especially if there was any moisture in the tray before the temperature dropped. A quick stir with a stick or gloved hand breaks it up. The metal license plate roof actually helps here: it absorbs a bit of solar heat during the day, which can slightly warm the tray below and slow ice formation.
Cleaning schedule
Clean the feeder at least every two weeks. This isn't just good practice, it's genuinely important: moldy seed and accumulated droppings can make birds sick, and a dirty feeder will stop attracting birds entirely once they associate it with illness or spoiled food.
The cleaning process is simple: remove all old seed, scrub the tray and frame with a diluted bleach solution (about two ounces of bleach per gallon of water), rinse thoroughly, and let it air dry completely before refilling. The CDC also advises people who feed birds to clean bird feeders regularly and to wear disposable gloves when cleaning [scrub the tray and frame with a diluted bleach solution](https://www. cdc. gov/bird-flu/risk-factors/bird-hobbyists.
html). Clean more often during hot and humid weather, after heavy rain events, or if you notice sick or lethargic birds visiting. Rake or clear the ground beneath the feeder on the same schedule.
Troubleshooting: birds aren't coming
If you've had the feeder up for two weeks and birds haven't found it, run through this checklist. First, check seed freshness: old or stale seed smells off to birds even if it looks fine to you. Dump and replace it. Second, check placement: if the feeder is in a wide-open area with no nearby cover, birds may be reluctant to fly into the open.
Move it closer to a shrub or hedge. Third, check for disturbance: a feeder near a frequently used door, a dog run, or a high-traffic path will see fewer visitors. Birds need to feel safe. Fourth, consider adding a second food type: if you're only offering one seed, try adding a small dish of peanuts or a suet cake nearby to draw in a wider range of species and create more activity that signals safety to other birds.
If birds visit but don't stay long, or if you see them picking up seed and flying off rather than feeding in place, the tray may be too exposed. Add a small stick or twig across the edge of the tray as a perch, and make sure the license plate roof gives enough shade so birds don't feel fully exposed while feeding. A little overhead cover goes a long way in making birds feel secure enough to linger.
Buy vs. DIY: the bottom line
If you want something you can set up today with zero tools, a store-bought license plate roof feeder from a brand like Sporty Crafts is a solid, well-finished option and worth the $40 to $60 if your time matters more than the project experience. Commercially, you can also find a bird feeder with license plate roof as a ready-made product, which may be the quickest option if you do not want to build one yourself.
If you want to customize dimensions, choose your own wood quality, pick your own plate, and spend a weekend afternoon on something satisfying, the DIY route delivers a better feeder for a fraction of the cost. The open platform with wire mesh tray floor and a 5-inch post clearance is the design I'd recommend building first: it's easy to replicate, easy to clean, and works for the widest variety of birds.
For the best platform bird feeder setup, prioritize an open tray with good drainage, easy cleaning access, and enough roof shelter for the conditions where you live. For the best platform bird feeder with roof, prioritize an open tray that drains well and a roof that keeps seed dry in your usual weather. Once you've built one, the hopper version is a natural next project if you want more seed capacity and less frequent refilling.
Hopper feeders are a close cousin of this design, and they work by keeping seed in an enclosed reservoir that dispenses to a feeding area.
FAQ
Can I use a real, old license plate (not a new one) on a license plate bird feeder?
Yes, but only if the plate is fully sanitized and the mounting hardware prevents rust leaks. Scrub off any dirt or grease, then rinse and dry completely before building. If the plate is heavily corroded, consider painting it with a food-safe, outdoor-rated coating designed for metal, or use a different plate, because pitted rust can flake into the tray over time.
What should I check on the license plate before drilling and attaching it?
Avoid powder-coated plates that are flaking or chipping. Birds feed on open trays and can come into contact with small metal pieces, so inspect the edges and corners after drilling. If the plate has sharp burrs, file or sand the edges smooth before bolting so it does not cut you or snag birds’ feet.
How do I prevent water from pooling in the tray (especially during rain)?
Use ventilation and drainage together. Even with a hardware cloth floor, rain can still blow back into the tray, so plan to clear standing seed after heavy storms. For solid wood bottoms, add drainage holes in multiple corners (not just one), tilt the tray slightly so water does not collect, and never seal the underside where moisture could stay trapped.
How can I make a license plate bird feeder more comfortable for small songbirds?
Yes. Platform feeders can be dangerous for small birds if the tray is too deep or the roof leaves them fully exposed. Add a simple perch (a twig or thin dowel) near the front edge of the tray, and make sure there is some roof shade when birds settle, not only when they land. If you see birds feeding then immediately flying off, it often means they feel too exposed.
What seed mix works best if I want to attract different birds without creating a mess?
For most climates, start with black-oil sunflower and adjust by bird activity. If you see mostly finches and chickadees, keep the sunflower but add a small dish of a second seed type, like safflower or thistle on a separate dedicated feeder, because thistle in an open tray gets scattered quickly. For ground foragers under the feeder, keep millet as the secondary option to encourage foraging beneath.
Can I use pressure-treated lumber if I seal it before building?
You generally should not use treated wood anywhere in contact with birds or food. If you already built with pressure-treated lumber, replace the affected sections, because chemicals can leach over time and birds repeatedly peck and stand on the feeder. If you are unsure what type you have, check the stamp and avoid compromising on safety.
How do I keep the license plate attachment from rusting through the wood?
Stainless or galvanized fasteners are the right choice, but you also need to protect the plate-to-wood interface. Use washers under the bolt heads so the plate does not sit directly against the wood, which reduces trapped moisture. If your bolts end up rusting around the washer, retighten after a week and keep the area dry during cleaning to extend lifespan.
How often should I clean and how do I handle seed clumping?
Yes, and it is easiest if you add a maintenance access routine. Clean on a two-week cycle, but do an extra quick empty-and-scrub after hot, humid spells or repeated rain. Also, if you notice seed bridging (sticking together), switch to slightly drier seed and break up clumps daily in freezing weather until patterns stabilize.
What’s the best way to reduce squirrel traffic without making birds stop coming?
Yes, but do it by changing the feeder conditions, not by stopping abruptly. If squirrels are learning the pattern, increase deterrence by adding (1) a proper baffle and (2) trimming the surrounding access lines, like removing nearby launch branches within jumping distance. For short-term relief, reduce seed volume so the tray is not constantly full, since squirrels exploit easy reach when food is abundant.
My hanging license plate bird feeder sways a lot, what can I adjust?
If you are pole-mounting, check that the pole is not near fences, tree trunks, or any structure squirrels can use as a jump-off point. For the hanging version, a tilting disc baffle must be above the hanging point, and the hardware should be heavy enough that the feeder stays steady when birds land. If the feeder sways too much, tighten connections and lower the hang point slightly.
If birds are hitting windows, what else should I do besides moving the feeder?
Placement near glass is less about distance alone, it is about line of sight and flight paths. Use the safest options mentioned in the guide, and also consider adding visual markers on windows if you cannot move the feeder. If birds repeatedly hit the same spot, treat that as a placement failure, increase window protection measures, and relocate the feeder immediately.
Can I put a license plate bird feeder near the ground or under a roof overhang?
You can, but only if you accommodate waste management. If the tray sits where seed can collect, rats will follow the food. Keep cleanup immediate under the feeder, and consider placing the feeder so the ground is hard to access (for example, not directly under overgrown cover). If you suspect rats, stop seed temporarily as described, then restart with minimal daily amounts that are fully consumed by evening.
Does the license plate roof fully protect seed in snow and wind-driven rain?
A license plate roof helps, but it does not seal out sideways precipitation. In heavy wind-driven rain or snow, expect more frequent tray checks and plan to clear the tray of wet seed and snow so birds do not find a sloppy, damp surface. Orient the feeder toward the prevailing wind and, if possible, add a small additional wind block behind the feeder using a non-toxic, stable structure.