The best bird feeder pole system for most backyards is a modular, powder-coated steel setup with an auger-style ground socket, at least one adjustable arm, and a baffle mount built into the design. Wild Birds Unlimited's Advanced Pole System (APS) hits that mark well: it twists into the ground without tools, holds straight in winds up to 35 mph (per WBU's own testing), and lets you add or swap arms and feeders as your setup evolves. That said, 'best' shifts fast once you factor in your yard size, the birds you're targeting, whether you're mounting on a deck instead of soil, and how serious your squirrel problem is. This guide walks through every one of those variables so you can pick the right system today and actually get it working.
Best Bird Feeding Pole System: Buy, Install, and Setup Guide
Marcus Hendricks
10 Jun 2026
What a bird feeder pole system actually includes
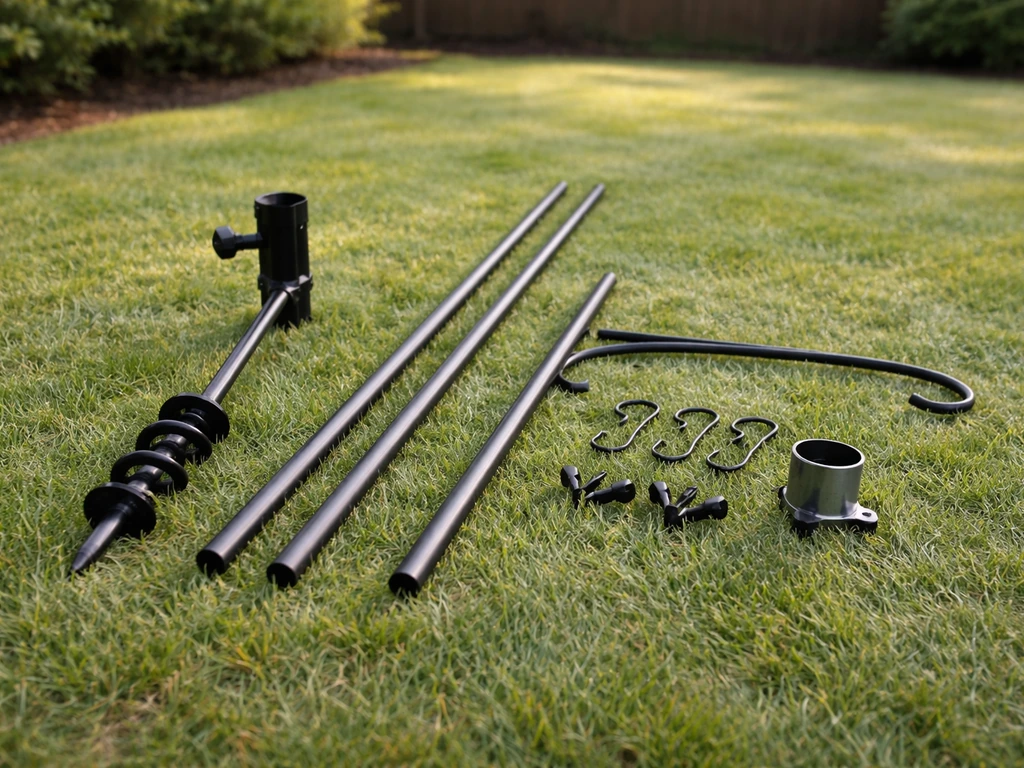
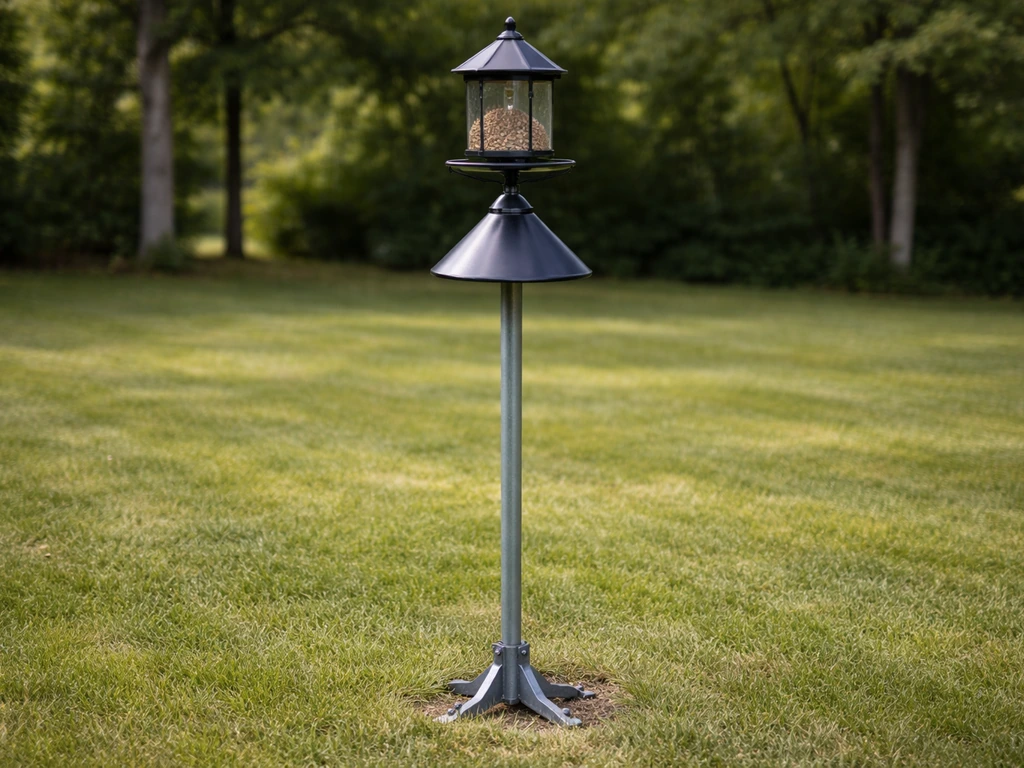
A pole system is more than just a metal stick in the ground. The full package typically includes a ground-mounting base (either an auger/twister socket that screws into soil or a deck-clamp bracket), one or more pole sections that stack to your desired height, a topper or arm hardware that holds feeders at the tip, and optional add-ons like baffles, side arms, and trays. Some systems, like the Kettle Moraine Two Arm Pole Package, bundle all of this together: three pole sections, a twister ground socket, and a two-arm topper. Others, like the WBU APS, are fully modular so you start with a base kit and expand later.
The attachment method between the pole and the feeder itself matters a lot. Some feeders, like the Bird Buddy smart feeder, use a dedicated universal pole mount that screws directly into the bottom of the feeder body with four included screws and slides onto a 1-inch (25 mm) diameter pole. Others use hook-style hang points, platform brackets, or suet cage clips that slot onto arms. Before buying a pole system, check what diameter poles it uses and what attachment style your feeders require, these two things cause most compatibility headaches.
Choosing the right system for your yard setup
Height and placement
Most songbird species are comfortable with feeders at 5 to 6 feet above the ground, which is also the minimum height you need if you're running a squirrel baffle (more on that below). If you're targeting woodpeckers or orioles, going a bit higher, 6 to 7 feet, can make the feeder feel more exposed and safe to them. Placement relative to windows matters too: place feeders either within 3 feet of a window or more than 30 feet away. The zone in between is where birds build up enough flight speed to injure themselves on glass.
Stability in wind
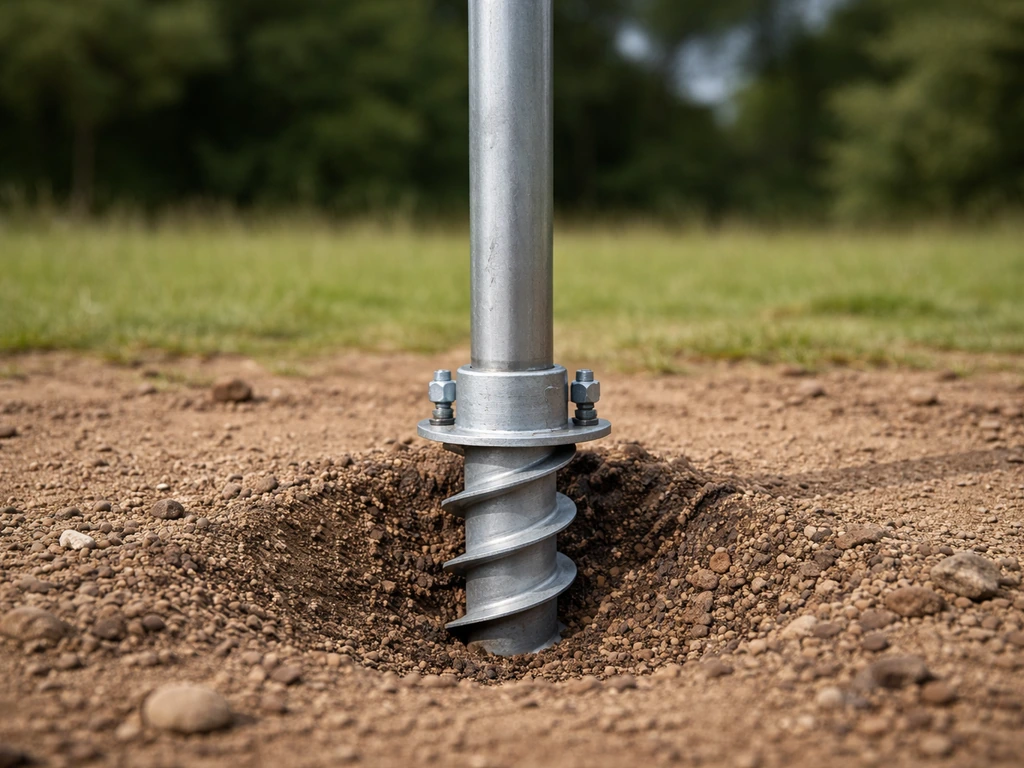
A wobbly pole empties fast and discourages shy birds. The single biggest stability factor is the ground anchor. Auger-style twist sockets (like the ones used in the WBU APS and the Kettle Moraine package) lock into soil much more firmly than simple spike bases, especially in loose or sandy ground. If you're on a deck or patio without soil access, look for systems with a dedicated deck-mount kit: the WBU APS Deck Kit uses powder-coated steel clamps and a swing-out arm that lets you refill feeders without leaning over the railing. For open backyards with regular wind, the WBU APS's stabilizer hardware is specifically designed to keep the pole vertical in gusts up to 35 mph.
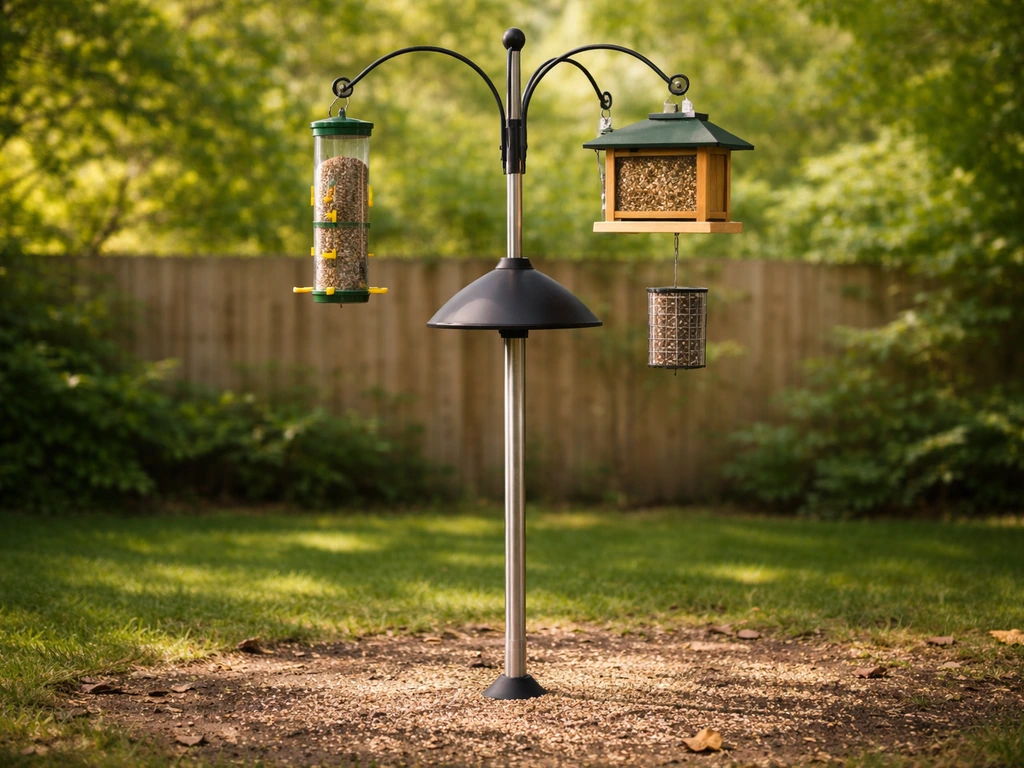
Single-arm vs. multi-arm
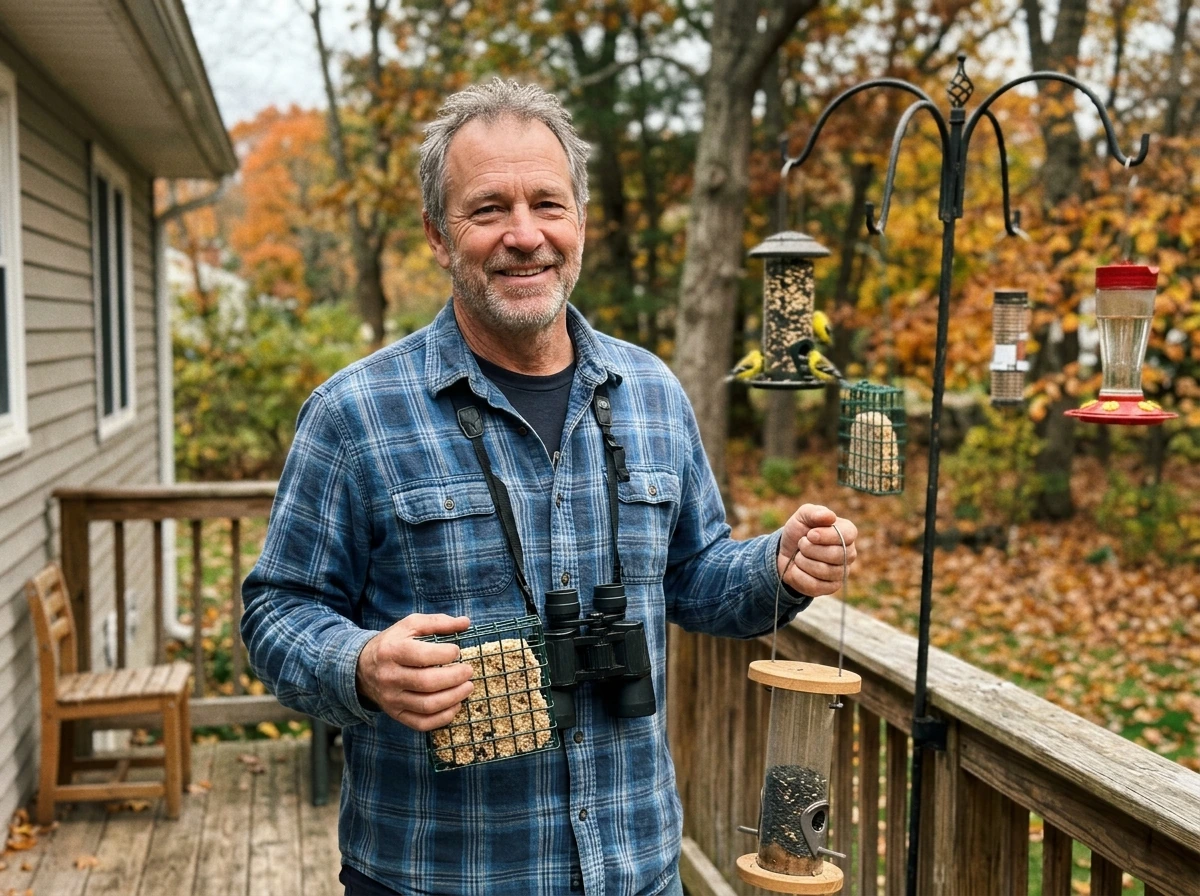
A single-arm system works well in small yards or when you're starting out with one or two feeders. Multi-arm systems let you hang different feeder types at different heights on the same pole, which genuinely does attract more species and keeps feeding stations from getting crowded. Erva's multi-arm pole systems are worth a look here: they're made in the USA, have a corrosion-resistant powder-coat finish, and offer configurable arm lengths so you can spread feeders out rather than clustering them. If you're running a tube feeder, a suet cage, and a platform tray all on one station, you'll want arms with enough reach that the feeders don't swing into each other.
Features that actually matter when you're comparing systems
| Feature | Why it matters | What to look for |
|---|---|---|
| Adjustability | Lets you change feeder height or arm position as your bird mix changes | Modular pole sections, knob-tightened arm positions |
| Weight capacity | Heavier feeders (especially full platform trays or hopper feeders) can torque arms | Check manufacturer arm rating; steel arms handle more than aluminum |
| Weatherproofing | Rust and flaking powder coat ruin poles after 1–2 winters | Thick powder-coat finish; galvanized or stainless hardware on joints |
| Ease of assembly | Poorly designed joints mean fiddling every time you refill or adjust | Tool-less or knob-tightened connections (WBU APS, Bird Buddy Nature Station) |
| Ground anchor type | Determines stability in wind and how easy removal is at season's end | Auger/twist socket for soil; deck clamp for balconies/decks |
| Baffle compatibility | Squirrel baffles must fit the pole diameter and attach at the right height | Check that your baffle fits the pole's outer diameter before buying |
Assembly simplicity is something I'd weigh heavily. Systems like the WBU APS connect without tools, which sounds like a small thing until you're reconfiguring your station in November with cold hands. The Bird Buddy Nature Station uses knob and set-screw style connections throughout, so you can level and tighten every component without a socket wrench. These details make a real difference in whether you actually maintain the setup over time.
Matching your pole system to the birds you want to attract
Different species feed at different heights and prefer different feeder styles, and getting the pole system right means thinking about both. Here's how the common backyard species map to pole-mounted feeders:
- Cardinals, finches, and blue jays: prefer elevated feeders, 5–6 feet up; tube feeders and hopper feeders on side arms work well; these birds are comfortable landing on a mounted feeder rather than ground feeding
- Woodpeckers: do best on suet cages mounted on a side arm or the pole face; they like a stable, fixed attachment rather than a swinging hook
- Orioles: attracted to nectar/jelly feeders or orange halves on a dedicated platform arm; a pole with a wide-reach arm keeps the feeder visible and accessible
- Bluebirds: not typical pole-feeder visitors for seed, but a mealworm tray on a low arm (4–5 feet) can work well during nesting season (spring through summer)
- Mourning doves, sparrows, towhees, and juncos: these birds strongly prefer ground-level or near-ground feeding; they'll often pick up seed that falls beneath your pole station rather than using the elevated feeders themselves
- Hummingbirds: nectar feeders on a pole arm are a good option, but hummingbirds prefer some nearby vegetation; a pole placed near a shrub or flowering plant works better than a totally open yard position
For winter feeding specifically, black-oil sunflower seed in a tube or hopper feeder on a pole is your most reliable all-season option, attracting chickadees, nuthatches, finches, and cardinals through cold months. Suet in a cage on a side arm is excellent for winter woodpeckers and nuthatches when insects are scarce. If you're in a region with heavy snowfall, make sure your pole system's arms have enough clearance that snow accumulation on the feeder doesn't pull the arm down or torque the connection.
Keeping pests out: squirrels, rats, and wasps
The most common reason a pole system fails in practice isn't the hardware, it's placement and baffle setup. Squirrels can jump horizontally up to 10 feet and vertically about 4–5 feet, so the math is straightforward: your pole station needs to be at least 10 feet away from anything a squirrel can launch from (fences, tree branches, sheds, deck rails). WBU and Perky-Pet both specify this 10-foot clearance rule, and Perky-Pet's baffle instructions call for 15 feet of clearance from jump points. Use whichever stricter standard fits your yard.
For the baffle itself, mount it so the top sits at 4–5 feet above the ground, with feeders hanging above the baffle. Wild Birds Unlimited also lays out similar squirrel-proofing placement guidance, including keeping the pole system 10 feet from launch points and setting the baffle top about 4, 5 feet above the ground. A bird feeder on top of pole setups are also easier to manage when you use the right height and add a squirrel-baffle geometry. WBU's guidance describes this as a three-part geometry: baffle top at roughly 5 feet, feeders above that, and the whole station 10 feet from squirrel launch zones. One thing WBU's own squirrel-proofing notes acknowledge: baffles can fail if the feeder is too large, because a squirrel can grab the feeder body and ride past the baffle rather than being stopped. Keep feeder diameter modest if squirrel pressure is high, or switch to a dedicated squirrel-proof feeder design.
Rats are attracted by seed that falls to the ground beneath poles. Use a seed tray or catcher that attaches below the feeder to reduce spillage, and avoid millet or mixed seed blends with lots of filler that birds toss aside. Wasps are drawn to nectar feeders in late summer; moving the feeder to a shadier position on an adjustable arm, or switching to a feeder with bee guards, reduces the problem without relocating the whole pole.
One more point on placement: while positioning your pole near natural cover (shrubs, hedges) gives birds a quick escape route from hawks, that same cover gives squirrels a staging area. The balance most experienced birders land on is placing the pole in a semi-open area about 10–12 feet from shrubs, close enough for bird safety, far enough to break the squirrel jump.
Best pole system picks by use case
There's no single winner here. What works in a small urban backyard is different from what you need for a large property running six feeders through a Minnesota winter. Here's how I'd break it down:
| Use Case | Best System Type | Why |
|---|---|---|
| Small yard, 1–2 feeders | Single-arm modular pole (e.g., WBU APS basic setup) | Easy to install, low footprint, expandable later if needed |
| Large yard, multiple feeders | Multi-arm system (e.g., Erva multi-arm or WBU APS with multiple arms) | Configurable arm lengths let you spread feeders without clustering |
| Deck or balcony, no soil | Deck-mount kit (e.g., WBU APS Deck Kit) | Clamps to railing, swing-arm makes refilling easy without leaning |
| Winter-heavy climates | Heavy-duty steel pole with auger base and powder-coat finish | Resists freeze-thaw ground movement; thick finish survives ice and salt |
| Smart feeder users (e.g., Bird Buddy) | Universal pole mount designed for 1-inch diameter poles | Screws directly into feeder base; check pole diameter before buying |
| High squirrel pressure | Any system with a dedicated baffle mount point and 10+ ft clearance | Baffle geometry only works when placement rules are followed exactly |
If you're starting from zero and want one recommendation, the WBU Advanced Pole System basic setup is the most versatile starting point for an in-ground installation. The top flight universal bird feeder pole is a strong option when you want a flexible, compatible setup for different feeder mounts. For multi-feeder stations or if you want US-made hardware with configurable arm options, Erva's multi-arm systems are solid. For a bundled, ready-to-go package without piecing things together, the Kettle Moraine Two Arm Pole Package gives you the ground socket, pole sections, and arm topper in one box.
Installing, maintaining, and troubleshooting your pole system
Installation basics
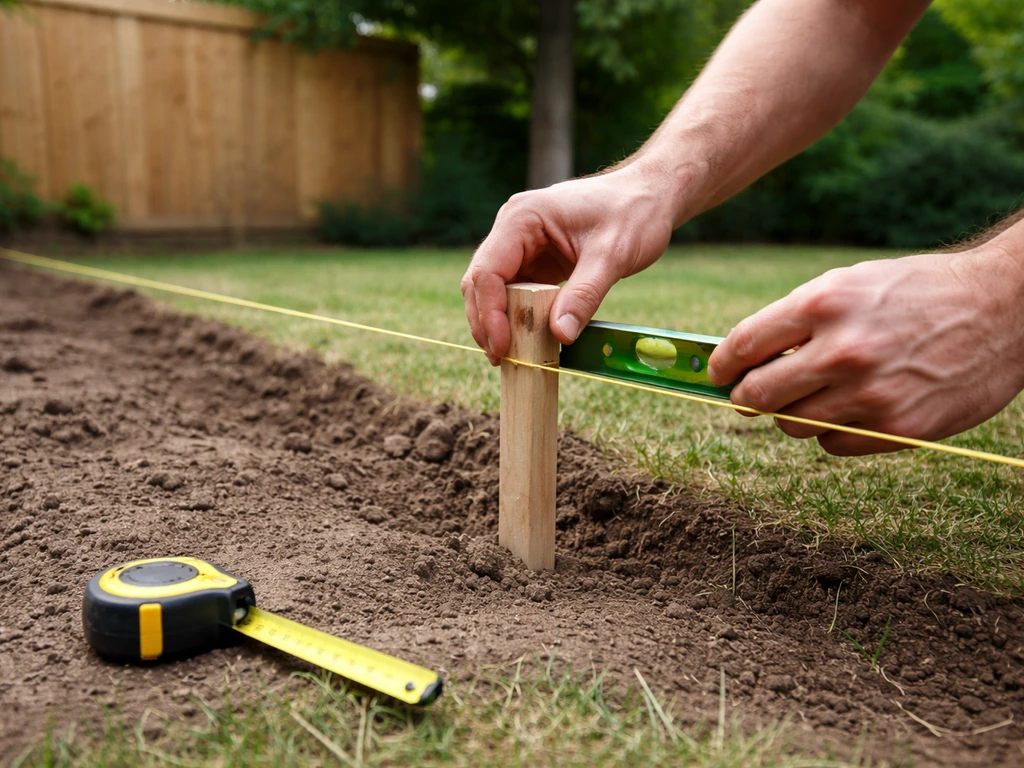
- Mark your placement first: measure 10 feet from fences, trees, and structures before touching the ground
- For auger-style bases, twist the socket straight down — use a level on the first pole section before adding more to catch any lean early
- Add pole sections one at a time, checking level as you go rather than at the end
- Attach baffles before hanging feeders so you can position the baffle top at 4–5 feet without the feeder in the way
- For knob-tightened systems (Bird Buddy Nature Station, WBU APS), hand-tighten all connections, then go back and firm up once the whole structure is level
- Hang your lightest feeders on the outermost arms to reduce torque on the arm joints
Seasonal maintenance
At the start of each season, pull feeders off and check every arm connection and the ground socket. Look for surface rust at joint points where the powder coat has chipped, hit those spots with a rust-inhibiting primer before they spread. In freeze-thaw climates, the ground socket can loosen over winter as soil expands and contracts; re-seat and tighten it in early spring. Lubricate any threaded connections lightly with a food-safe silicone spray rather than oil, which attracts grime.
Troubleshooting common issues

- Pole leaning after a few weeks: the ground socket has loosened, usually from rain softening the soil; remove, let the soil dry, then re-auger and add a stabilizer ring or concrete collar if lean is persistent
- Feeder spinning or rotating on the arm: the hook or hang point is too loose; add a locking S-hook or use a hook with a closing latch to stop rotation in wind
- Arms drooping under feeder weight: you've exceeded the arm's weight rating, or the arm connection has loosened; tighten the connection and switch to a lighter feeder, or upgrade to a steel arm with a higher load rating
- Rust appearing at joints: surface rust at powder-coat chips is common after the first winter; sand lightly, apply a metal primer, and touch up with outdoor spray paint rated for metal
- Squirrels bypassing the baffle: check that the baffle top is still at 4–5 feet (frost heave can raise the whole pole), that you're maintaining 10 feet of clearance from launch points, and that the feeder itself isn't wide enough for a squirrel to grab past the baffle
- Birds ignoring the feeders: new setups can take 1–3 weeks for birds to discover; try placing a small platform tray with mixed seed at ground level near the base to attract ground feeders first, then work up to the elevated feeders
One last thing worth knowing: the pole system itself is only part of the equation. The feeders you hang, the seed you use, and the species in your area all shape what you actually see. A heavy-duty pole with well-placed baffles and the right feeder types for your target birds will outperform the fanciest system with the wrong setup every time. Get the placement and pest-proofing right first, and then tweak feeder selection from there.
FAQ
What pole diameter do I need if my feeders use different attachment styles (screws, hooks, or clips)?
Don’t just match the feeder brand, confirm the pole diameter the system supports (for example, Bird Buddy units are built around a 1-inch pole). Also verify whether the connection is designed to clamp to the pole or to thread into the feeder base, because mixed styles can require an adapter or specific topper hardware to keep feeders from twisting.
Can I use a feeding pole system on deck boards or a balcony without digging into soil?
Yes, but you typically need a dedicated deck-mount kit designed for clamp stability and controlled leverage. Before buying, check that the clamp package can handle side loads from a full feeder plus wind, and plan your arm so you can refill from the safe side without leaning over railings.
How high should I set the baffle and feeder if I have heavy squirrel pressure?
Use the stricter clearance guidance in your yard. As a practical approach, set the baffle top around 4 to 5 feet, keep feeders above it, and maintain at least 10 feet from squirrel launch points (15 feet is safer if squirrels are very active). Also choose smaller feeder diameter if you’ve seen squirrels grab and “ride” a large feeder past the baffle.
What’s the fastest way to fix a pole that still wobbles after installation?
Wobble usually comes from either an under-set ground socket or a missing level step in the arm hardware. Re-seat the socket if you’re in freeze-thaw soil, then inspect the stacked pole joint tightness and re-tighten without over-torquing. If your system uses a tool-free coupler, confirm the connection fully bottoms out, some systems need a firm, consistent “seat” for best rigidity.
Do I really need multiple arms for different feeder types, or is one arm enough?
One arm is often enough for a starter station, but multiple arms matter when feeder footprints differ. If you’re running a tube plus suet cage plus a platform tray, extra arms reduce swinging and collisions and lets you separate heights for different species. Aim for spacing so one feeder doesn’t bump another when the wind gusts.
How do I choose a ground socket for sandy or loose soil?
Auger-style twist sockets generally hold better than simple spike bases in loose ground. If you know your soil is prone to shifting, prioritize a system with a ground auger designed to lock into the earth and plan on a spring re-check, because expansion and contraction can slightly loosen joints over time.
What should I do if snow or ice keeps pulling the feeder downward on winter days?
Check arm clearance and feeder hang geometry so snow buildup won’t add enough weight to torque the connection. If you get heavy snowfall, choose arms that keep the feeder high enough to shed accumulation, and inspect after storms for any loosening at the threaded or coupler joints before the next cold snap.
What’s the best way to reduce mess and keep rats away under the pole?
Add a seed catcher or tray below the feeder to capture spill, and avoid high-filler seed blends that birds discard. This matters most in winter and during high feeder traffic, when dropped seed piles up quickly and becomes a consistent food source beneath the pole.
Will a baffle alone stop all pests, like squirrels and rats?
A baffle is targeted at climbing and jump reach for squirrels, it does not manage ground-level food. For rats, focus on catching fallen seed and minimizing spill. For wasps near nectar feeders, adjust shadiness and consider bee-guard style feeders, because wasp pressure is more about nectar access than climbing barriers.
How do I prevent window collisions when I place the pole near glass?
Follow the two-zone rule used by many backyard birders, either within 3 feet of the window or more than 30 feet away. If you can’t meet those distances, use window safety options like adding visual breaks to the glass, because the “in-between” zone encourages birds to pick up speed before impact.
What maintenance should I do at the start of each season beyond re-checking connections?
Inspect powder-coat chips at joint points, treat any bare metal with a rust-inhibiting primer, and then re-tighten the base connection in early spring if you get freeze-thaw. For threaded parts, use a light food-safe silicone spray on threads instead of oil so grime doesn’t build up and seize connections.
If I’m buying the best bird feeding pole system for the long term, what upgrade path should I plan for?
Pick a modular base and a topper/arm system that lets you add arms, swap feeder mounts, and upgrade to dedicated squirrel-proofing rather than replacing the entire pole. Before you buy, list the exact feeder types you plan to use this year and next (tube, suet cage, platform, smart feeder) to ensure the pole mount styles are compatible with your future lineup.
Next Article
Best Heavy Duty Bird Feeder Pole Buying Guide and Specs
Buying guide for the best heavy duty bird feeder pole: specs, metal strength, stability, pest-proof setup and maintenanc