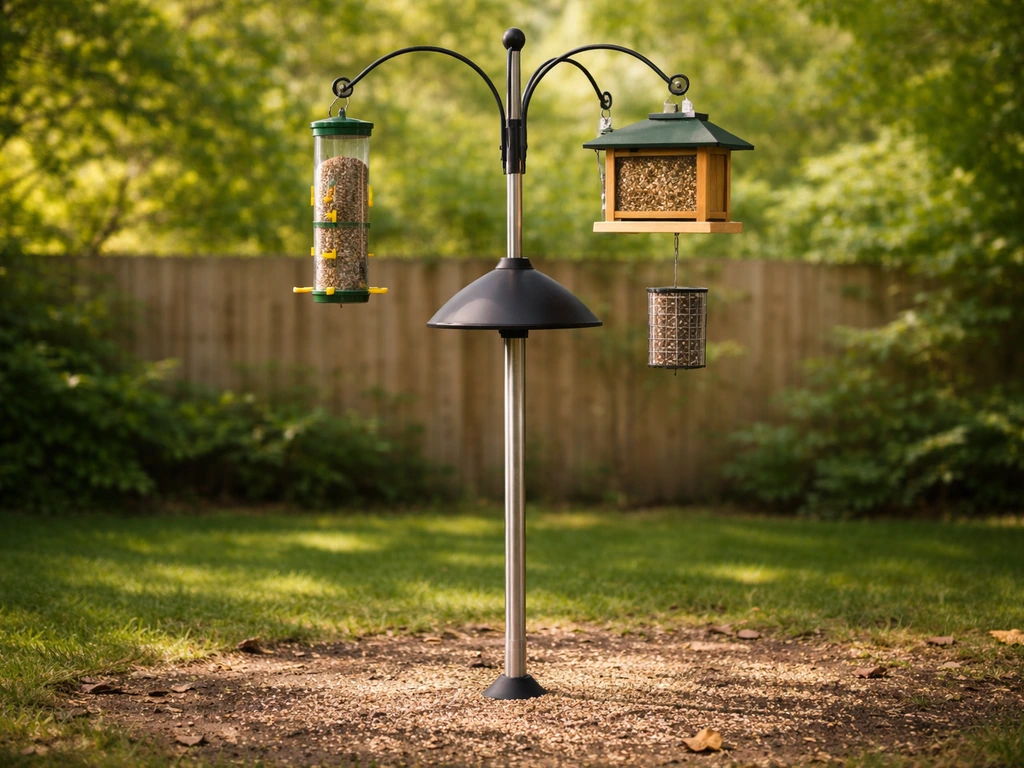
Mounting a bird feeder on top of a pole is the single most effective setup for backyard bird feeding. Selective Bird Feeding: Deterring Nuisance Wildlife from Bird Feeders (University of Nebraska–Lincoln Extension) notes that For pole-mounted feeders attach baffles at least 4 ft above ground and immediately below the feeder; stationary baffles should be 14–18 in wide/long and made of smooth material (metal/plastic) so claws cannot grip. You get a clean sight line, easy access for filling and cleaning, and a real fighting chance against squirrels and cats, provided you choose the right pole, anchor it properly, and add a baffle. This guide walks through everything: how to pick a pole material and system, which feeders and bird species benefit most, step-by-step installation with specific measurements, pest-proofing and weatherproofing, maintenance schedules, and DIY retrofit options if you already own a feeder you love.
Bird Feeder on Top of Pole: Complete Mounting & Care Guide
Who this guide is for
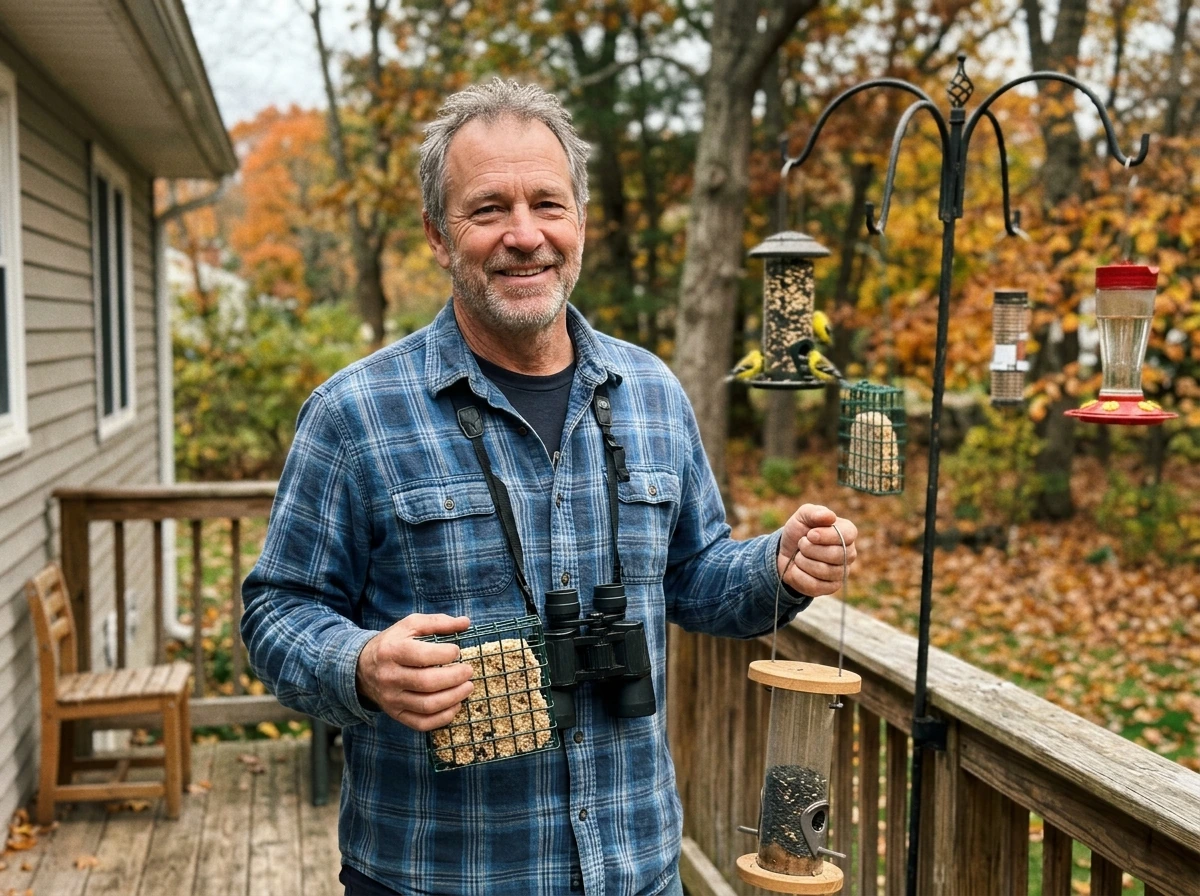
Whether you're setting up your first backyard feeding station or replacing a wobbly shepherd's hook that's been losing the war against squirrels, this article is for you. It's written for homeowners who want a durable, tidy setup and for bird watchers who care which species show up and want the feeder visible from a window. I've personally installed and tested a range of pole systems, from budget three-piece push-in kits to the Wild Birds Unlimited Advanced Pole System, so the comparisons here are grounded in real use, not just spec sheets.
What 'bird feeder on top of pole' actually means
A bird feeder mounted on top of a pole is exactly what it sounds like: a freestanding vertical post driven into the ground (or anchored to a deck), with the feeder sitting at or near the top via a mounting bracket, hook, or adapter plate. This is distinct from a feeder hung from a tree branch, an eave hook, or a shepherd's crook, though some shepherd's crooks technically count if they're anchored and baffled. The key word is 'freestanding', the pole controls every variable. You decide the height, the location, and the hardware between the ground and the feeder.
The benefits over tree-hung or eave-hung setups are practical and measurable. First, neatness: a pole keeps the feeder away from siding, gutters, and branches, so seed hulls and droppings fall in a contained zone you can manage. Second, visibility: you can position the pole precisely for your best window view without being constrained by where your trees happen to be. Third, predator distancing: a correctly placed and baffled pole puts real physical barriers between mammals and the feeder. University of Nebraska–Lincoln Extension research confirms that pole-mounted feeders, when combined with baffles and correct clearances, give you the most control over non-target mammals of any common feeder setup. Fourth, maintenance: filling and cleaning a feeder at a fixed, chest- or eye-level height is far less awkward than reaching up into a tree or crouching under a hanging feeder.
How your mounting choice affects birds and your yard
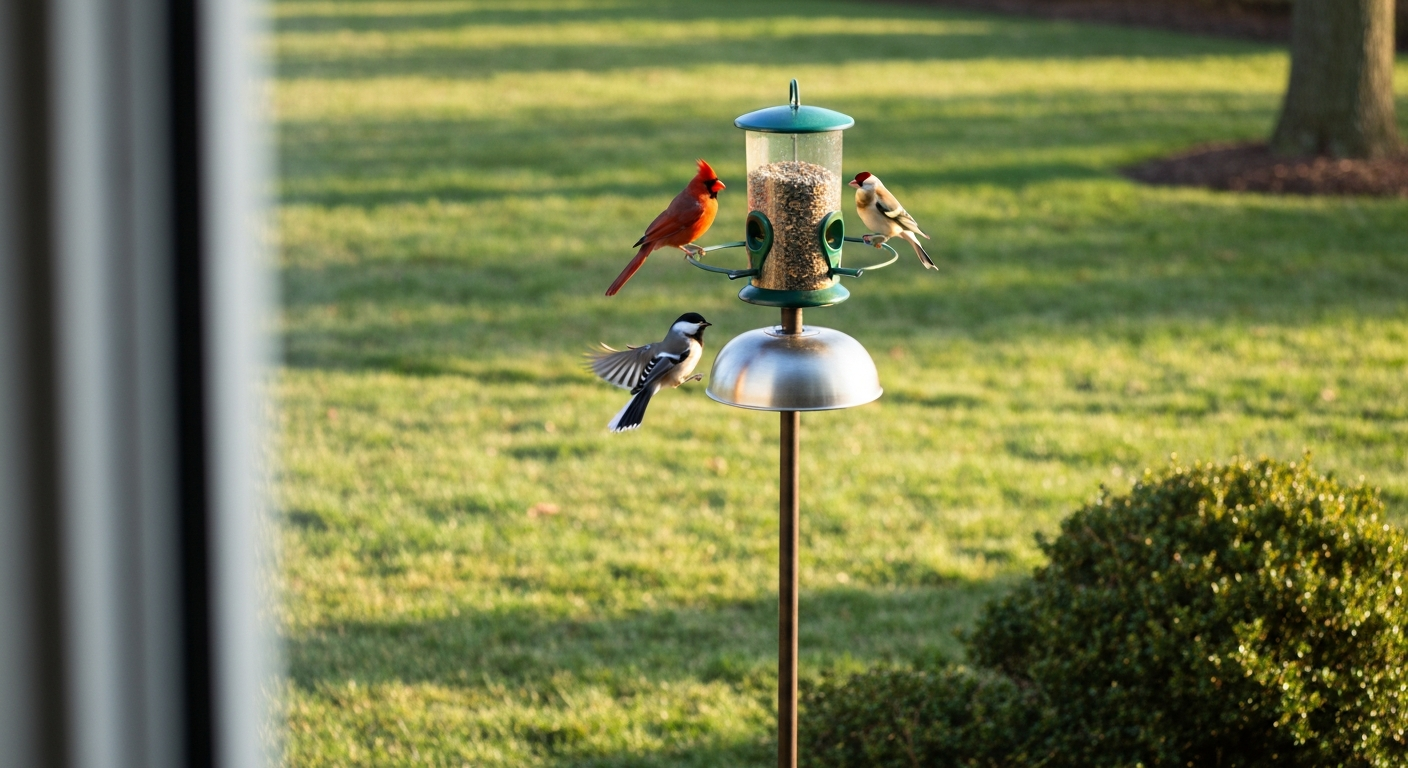
Not every bird or backyard benefits equally from a pole-top setup. Ground-feeding species like mourning doves and juncos prefer low platform feeders and are actually better served by a low-hanging or ground-level tray. But for the core backyard cast, cardinals, chickadees, finches, nuthatches, titmice, woodpeckers (on a suet cage), and orioles, a pole-mounted feeder at the right height puts the food exactly where they're comfortable feeding.
One thing worth stating plainly: concentrating birds at a single feeding station does increase disease transmission risk and can attract predators like Cooper's hawks and sharp-shinned hawks. Research published in Ecography confirms that feeders attract both prey birds and predators, and that congregation changes local predator-prey dynamics, especially in winter. That's not a reason to avoid pole feeders, but it is a reason to spread feeders out if you're running multiple stations, clean them religiously (more on that below), and monitor for sick birds.
For yard setup, poles work best in open lawn areas, at least 7 to 8 feet from any tree trunk, branch, deck railing, or fence top, that's the minimum jump distance for a squirrel. If you're in a small city yard, a deck-mounted flanged pole can work, but you'll need to think carefully about squirrel access routes. A wide, unobstructed view of the pole from a window is the other thing worth planning for from the start.
Pole materials and dimensions: what actually holds up
Walk into any garden center and you'll find poles in half a dozen materials. Here's how they compare in the real world.
| Material | Pros | Cons | Best For |
|---|---|---|---|
| Steel (powder-coated) | Strong, heavy, resists bending under load, widely available | Can rust at chips/scratches if coating is damaged; heavier to install | Heavy feeders, multi-feeder stations, permanent setups |
| Galvanized steel | Excellent corrosion resistance, very durable long-term | Heavier than aluminum, limited color options | Wet climates, permanent in-ground installs |
| Aluminum | Lightweight, rust-proof, easy to handle | Less rigid under heavy loads, can bend with a large full hopper in wind | Lightweight tube or hummingbird feeders, temporary or seasonal use |
| PVC | Completely rust-proof, cheap, easy to cut to length | Flexes and wobbles under load, degrades in UV over time, not ideal for heavy feeders | Lightweight DIY builds, temporary setups |
| Wood (cedar/redwood) | Attractive, blends naturally into garden | Requires annual sealing, prone to rot at soil contact, splits over years | Decorative or low-use setups, not recommended for heavy feeders |
| Cast iron (base fittings) | Extremely stable, used in commercial/heavy-duty base flanges | Heavy, expensive, overkill for single-feeder residential use | Commercial or multi-arm stations with concrete footings |
For most backyard setups, a powder-coated steel pole is the right call. It's rigid enough for a 5- to 8-lb filled hopper feeder, resists rust unless the coating is badly scratched, and is available in the most useful diameter range: 3/4 inch to 1 inch outer diameter for standard feeder mounts, and 1.5 to 2 inches for heavy-duty and modular systems. Common above-ground heights run from 5 feet (too low for good squirrel protection) up to 9 feet. A 7- to 8-foot above-ground height, achieved with a total pole length of 9 to 11 feet when you account for burial depth, hits the sweet spot for visibility, squirrel clearance, and comfortable filling without a stepladder.
Pole system categories: which type fits your situation
There are four main categories of pole systems, and choosing the right one saves a lot of frustration.
Universal mount poles
These are the most common entry-level option, multi-section push-together steel or aluminum poles with a hook or platform at the top designed to accept most standard feeders. Woodlink's three-piece mounting pole kits are a representative example, typically rated for about 8 to 12 lbs of static load per hook. They're inexpensive (usually $15 to $30) and work fine for a single tube or lightweight hopper feeder. The limitation is load: fill a large hopper with safflower seed and you're already pushing the upper weight limit, and any wind load on top of that will cause wobble or lean. Universal mounts are best paired with a screw-in ground anchor rather than relying on the push-in stake alone.
Heavy-duty poles
Heavy-duty poles use a larger-diameter tube (typically 1.25 to 2 inches), thicker wall steel, and more robust anchoring hardware. They're designed for large hopper feeders, multi-feeder arms, or any setup where you're hanging more than 15 lbs of combined feeder and seed weight. Bob Vila's 2026 feeder testing notes specifically recommend switching to a dedicated anchored pole or a heavy-duty multi-section steel pole when drooping or wobbling becomes a problem with lighter shepherd's hooks. The trade-off is installation effort: these poles almost always need a concrete footing or at minimum a ground sleeve set in a concrete pad.
Modular systems (WBU APS and equivalents)
Modular systems like the Wild Birds Unlimited Advanced Pole System are the top choice for birders who want a multi-feeder station that can grow over time. The APS uses a proprietary post size with interchangeable arms, hangers, and accessories, including a 23-inch-wide raccoon baffle that's sized specifically to the post diameter. The upside is flexibility: you can run a hopper, a tube feeder, a suet cage, and a water source off the same post. The downside is cost and lock-in to one brand's accessory ecosystem. If you're planning a serious backyard station, this investment pays off; if you want one clean single-feeder setup, it's more than you need.
Top-Flight style universal mounts
Top-Flight style universal mounts are a specific subtype of universal pole accessory designed to convert nearly any feeder (even feeders designed to hang) to a pole-top mount without modifications to the feeder itself. Brome's BirdsUP single-pole kit and their pole adapters are a good example: they use a 1-inch pole standard and include adapters that mate with the base of Brome's SquirrelBuster feeders but also work as a retrofit for other common feeder designs. This category is ideal for anyone who already owns a quality feeder and just wants to get it off a branch and onto a proper pole.
Feeder compatibility: what mounts on a pole and how
Not every feeder is designed with pole-top mounting in mind, but almost any feeder can be adapted. Here's a practical breakdown by feeder type.
| Feeder Type | Native Mount Interface | Typical Weight (filled) | Pole Compatibility Notes | Target Species |
|---|---|---|---|---|
| Tube feeder | Top hanger loop | 2–6 lbs | Use hook-top pole or universal adapter; most work with 3/4" pole hooks | Finches, chickadees, nuthatches, titmice |
| Hopper feeder | Roof hanger loop or base plate | 5–15 lbs | Heavier filled weight — confirm pole load rating; base-plate mount preferred for stability | Cardinals, blue jays, grosbeaks, sparrows |
| Platform/tray feeder | Base plate or open tray | 3–10 lbs | Best on a flat-top pole adapter or modular arm with tray fitting; low sides mean seed can scatter in wind | Doves, cardinals, juncos (lower pole heights) |
| Suet cage | Wire loop or s-hook | 1–3 lbs | Lightweight — works on any standard hook-top pole; consider an arm extender to keep suet feeder slightly separate from main feeder | Woodpeckers, nuthatches, chickadees, starlings (pest risk) |
| Hummingbird feeder | Top hanger loop | 1–2 lbs | Very light — any universal pole works; prioritize placement near flowers and partial shade over pole type | Ruby-throated, Anna's, and other hummingbirds |
| Window-to-pole adapter | Suction cup (window) to pole bracket | 1–5 lbs | Specialty bracket spans gap between window frame and a nearby pole; useful for small yards | Chickadees, finches, sparrows (tame, proximity-tolerant species) |
One practical note on weight: manufacturer-stated feeder weights are usually for empty feeders. A large hopper feeder that weighs 3 lbs empty can easily hit 12 to 14 lbs when filled with sunflower seed. Always calculate filled weight when checking your pole's rated load capacity. Brome's SquirrelBuster Plus, for example, weighs about 3.3 lbs empty but around 7 lbs fully loaded, well within a standard 1-inch pole's capacity, but something to verify before you assume a budget universal pole will hold it steady in wind.
Step-by-step installation and placement
Good placement is just as important as good hardware. Work through these decisions in order before you dig or drive anything into the ground.
Step 1: Choose your location
Start with these non-negotiables. The pole must be at least 7 to 8 feet horizontally from any tree trunk, branch, deck railing, fence top, or roof edge, that's the minimum horizontal distance a squirrel needs to launch a successful jump. It should also be at least 6 feet from dense shrubs or brush piles that could provide cat cover. If you're near a building, check whether the feeder will be within the 3-foot or within-30-foot zones for window strikes: feeders within 3 feet of glass are generally safer than those in the 4- to 30-foot range where birds hit windows at dangerous speed. Position the pole with your best watching window in mind, you want an unobstructed view at an angle that shows the feeder clearly.
Step 2: Set the height
Mount the feeder no lower than 6 feet above the ground, University of Nebraska–Lincoln Extension cites this as the practical minimum for effective predator separation. Seven to eight feet above ground is the practical sweet spot for most birders: it keeps the feeder above squirrel vertical leap range, it's visible from a seated position indoors, and you can still fill it without a ladder if you have a pole with a removable top section or a tilt-down arm. Allow for burial depth when buying your pole: plan to bury 2 to 3 feet for a 6- to 9-foot above-ground installation.
Step 3: Orient for wind and sun
In most of North America, prevailing winds come from the west or northwest. Orienting the feeder opening away from the prevailing wind direction reduces seed getting blown out and keeps the interior of tube and hopper feeders drier. In summer, partial shade in the afternoon is preferable, it keeps nectar feeders cooler (important for hummingbird feeders) and slows seed spoilage. In winter, a south- or southeast-facing position catches more winter sun and helps keep the feeder visible against snow backgrounds.
Step 4: Mark the dig zone and check for utilities
Before you dig or drive a spike, call 811 (the US national utility-locate service) or your local equivalent to check for underground lines. A buried gas or electrical line hit with a pole spike is a serious risk. This step takes five minutes and is always worth it.
Step 5: Set the pole
For a permanent installation, dig or auger a hole 2 to 3 feet deep (roughly one-third of total pole length above ground, following standard post-setting practice), set the pole, check it for plumb with a level, and pour a concrete footing, a standard 50-lb bag of fast-setting concrete mix works for a single-feeder pole. For a removable setup, install a ground sleeve (a metal tube slightly larger than your pole's diameter) in the concrete, and slip the pole in and out as needed. Screw-in auger anchors work in softer soils and are a good semi-permanent option that doesn't require concrete. In rocky soils or on a patio, a flanged base plate lag-bolted to a deck board or concrete anchor is the right move.
Securing methods and hardware in detail
The securing method you choose depends on soil type, how permanent the installation needs to be, and the total load (pole weight plus feeder weight plus wind load). Here's a comparison of the main options.
| Securing Method | Best Soil/Surface | Permanence | Tools Needed | Notes |
|---|---|---|---|---|
| Concrete footing (direct set) | Any soil, most durable | Permanent | Post-hole digger, level, concrete mix | Bury 1/3 of pole; allow 24–48 hrs cure before loading |
| Ground sleeve in concrete | Any soil | Semi-permanent (pole removable) | Post-hole digger, level, concrete mix, sleeve | Best of both worlds — pole can be swapped or stored in winter |
| Screw-in auger anchor | Soft to medium soil, lawns | Removable | Drill or hand bar | Fast install, works well for standard poles up to ~15 lb load; can loosen in very wet soil |
| Spike/drive anchor | Soft soil only | Temporary | Mallet or post driver | Least stable; fine for lightweight feeders and short-term use |
| Flanged base + lag bolts | Deck, patio, concrete slab | Permanent | Drill, lag bolts, appropriate anchors | Eliminates soil concerns entirely; use stainless or galvanized hardware to prevent corrosion |
Once the pole is set, check it for level from two perpendicular directions. A slightly out-of-plumb pole will lean further over time under load and wind. Set-screws and locking collars on multi-section poles should be tightened firmly (use the included hex key if supplied, or a matching size from your own toolkit) and checked again after the first hard rain or wind event, sections can settle slightly in the first few weeks.
Pest-proofing: squirrels, raccoons, and cats
A pole without a baffle is just a very expensive squirrel ladder. The baffle is the piece that makes pole mounting work. The placement rules are specific and matter: attach the baffle at least 4 feet above the ground and directly below the feeder, with no gap between the baffle and the pole that a squirrel could reach around. Stationary baffles should be 14 to 18 inches wide or in diameter, and made of smooth metal or hard plastic, textured surfaces give claws a grip. University of Nebraska–Lincoln Extension research explicitly specifies these dimensions as necessary for effective exclusion.
Audubon's guidance on squirrel deterrence confirms that a correctly baffled freestanding pole is the most effective squirrel-reduction strategy available to backyard birders, more effective than any feeder design alone. The WBU Advanced Pole System's proprietary baffles measure 23 inches wide by 8 or 10 inches deep specifically to match the APS post diameter and maximize coverage. Brome's raccoon baffle, included in their BirdsUP accessory line, is a good fit for their 1-inch pole systems and larger animals. The key failure mode I've seen repeatedly: birders set a baffle at the right height but then the pole is too close to a deck or fence, giving squirrels an alternate launch route. Clearance matters as much as the baffle itself.
For cats, the 6-foot clearance from dense ground cover is your main tool. Motion-activated sprinklers (like the Orbit Yard Enforcer) work well as a secondary deterrent and don't harm the birds. There's no pole hardware solution for cats specifically, distance and sight lines are the practical levers.
Weatherproofing and seasonal care
Most quality steel poles handle weather without special treatment, but a few things to watch for: chips or scratches in powder coating on the pole should be touched up with rust-inhibiting paint before corrosion sets in, especially at the ground line. In climates with hard winters, ice loading on a large platform feeder or multi-arm station can add significant weight, up to several additional pounds. If your setup is near its rated load capacity in summer, consider removing a feeder or two before ice storm season, or choose a heavy-duty anchored pole from the start.
Hummingbird feeders need to come in when temperatures drop below freezing overnight, since nectar solution will freeze and crack feeder bodies. Tube and hopper feeders with metal ports and all-metal perches hold up better in winter than those with plastic ports, which can crack in sustained hard freezes. If you're in a snow-heavy region, a platform feeder positioned near the top of the pole with a slight pitch to shed snow (some models have a slight roof angle for this) will keep feeding more consistent through winter.
Cleaning, maintenance, and disease prevention
The cleaning protocol that appears in peer-reviewed feeder disease studies (published in Ecological Solutions and Evidence, 2026) is: scrub with soap and water, disinfect with a 10% bleach solution (1 part bleach to 9 parts water), rinse thoroughly, and allow to fully dry before refilling. Weekly cleaning is the standard recommendation for active feeders; in damp conditions or during periods of high use, more frequent cleaning is warranted. A completely dry feeder before you add new seed matters as much as the disinfection step, wet seed molds quickly and creates conditions for disease spread regardless of how clean the surfaces are.
It's worth noting what cleaning can and can't do. Research shows that surface cleaning can prevent transmission of Mycoplasma gallisepticum (house finch eye disease) via contaminated surfaces alone, but if infected birds are continuously visiting the feeder, cleaning alone won't stop spread. If you're seeing sick birds at your feeders (eye swelling, lethargy, fluffed feathers), the right response is to take the feeder down temporarily, clean and disinfect everything, and report sick or dead birds to your state wildlife agency. During confirmed regional disease events like HPAI outbreaks, follow your local public health or wildlife agency's guidance, some situations call for temporary removal of feeders and baths entirely, as Los Angeles County issued during recent avian flu detections.
For pole maintenance specifically: check the pole's set-screws and locking pins twice a year (spring and fall), look for rust forming at ground level, and inspect the baffle mounting hardware for looseness. If a locking pin or retaining clip is corroded or bent, replacement parts are available from most pole manufacturers, don't improvise with zip ties or wire, which fail without warning.
DIY mounting and retrofit options
If you already own a feeder that was designed to hang and you want to move it to a pole, you have a few good options without modifying the feeder itself. Brome's BirdsUP pole kit and pole adapters are specifically designed for this: they convert a hanging feeder to a pole-top mount using a standard 1-inch pole and a top adapter that mimics a branch or hook. These are the most elegant retrofit solution I've used, the feeder looks intentional on the pole rather than cobbled together.
For a true DIY build, a 1-inch galvanized steel conduit pipe from a hardware store (usually sold in 10-foot sections for around $8 to $12) threaded into a ground-set flange or paired with a screw-in ground anchor makes a solid, cheap pole. Cut it to your preferred height with a pipe cutter. At the top, a standard conduit hook fitting or a short piece of threaded rod with a washer and nut can support a hanging feeder. It's not beautiful, but it's structurally sound and completely rustproof. Add a torpedo-style metal baffle from any wild bird supply store and you have an effective, sub-$30 total setup.
If you're dealing with a heavy feeder that's causing a standard pole to droop or wobble, the fix isn't a bigger baffle or a different hook, it's the pole itself. Testing by Bob Vila in 2026 confirms this: switch to a concrete-anchored heavy-duty pole rated for the filled feeder's actual weight, including wind load allowance.
Common problems and how to fix them
- Feeder wobbles or leans: Tighten all set-screws and locking collars first. If the pole itself is leaning, the anchor is failing — re-set in concrete or switch to a concrete-footed ground sleeve.
- Feeder falls off the pole: Check retaining clips and locking pins. If they're bent or corroded, order manufacturer replacement parts rather than improvising. Brome and Droll Yankees both sell replacement hardware.
- Motorized squirrel-flipper stops working: Droll Yankees' Yankee Flipper manual is the first reference point — it covers battery/charging steps for the Power Stick (separate 1-year warranty from the feeder body's lifetime warranty). Follow the disassembly and charging steps before assuming the motor has failed.
- Squirrels still getting to the feeder: Recheck horizontal clearances (7–8 ft from any launch point) and baffle placement (4 ft+ above ground, 14–18 in diameter, smooth surface). Both conditions must be met simultaneously.
- Feeder fills with water after rain: The feeder design itself is usually the issue, not the pole — look for a model with drainage holes in the base or a domed rain guard. Orienting the feeder with ports facing away from prevailing rain helps.
- Rust at ground line: Touch up with rust-inhibiting primer and paint immediately. If the pole section at ground level is heavily corroded, replace just that section on a multi-section pole rather than the whole setup.
- Seed clumping and mold: Clean and dry the feeder more frequently; switch to no-mess hulled seed blends in wet seasons, which resist clumping better than whole sunflower in the shell.
Buying checklist: what to prioritize
Before you buy a pole or a pole-mounted feeder system, run through this list. It covers the decisions that actually matter for a durable, effective, low-frustration setup.
- Pole material: powder-coated steel for most setups; galvanized if you're in a consistently wet climate or doing a permanent in-ground install.
- Pole diameter: 3/4 to 1 inch for a single feeder up to 8 lbs filled; 1.25 to 2 inches for heavy feeders, multi-arm stations, or exposed windy locations.
- Above-ground height: 7 to 8 feet as a target minimum; confirm total pole length accounts for 2 to 3 feet of burial.
- Load rating: always check the pole's rated static load against your filled feeder weight, not empty feeder weight.
- Anchoring method: concrete footing or ground sleeve in concrete for anything permanent or heavy; screw-in auger anchor for light-to-medium temporary setups.
- Baffle included or available: confirm a compatible baffle exists for the pole diameter you're buying; 14-inch minimum diameter for squirrel exclusion.
- Feeder compatibility: check whether your existing feeder or target feeder model has a pole adapter available (check manufacturer accessory pages) or uses a universal hook mount.
- Modularity: if you think you might add feeders later, invest in a modular system now rather than buying multiple incompatible single-feeder poles.
- Warranty and parts availability: check whether replacement locking pins, clips, and baffle hardware are sold separately; a system with no parts support is harder to maintain long-term.
- Winter plan: decide upfront whether you'll store the pole or keep it up year-round, and choose corrosion resistance accordingly.
Recommended systems and next steps
For a single-feeder beginner setup with a lightweight tube or hummingbird feeder, a universal pole kit with a screw-in anchor and a torpedo-style metal baffle is all you need. For a serious backyard station with multiple feeders and heavy hoppers, the Wild Birds Unlimited Advanced Pole System or a heavy-duty anchored steel pole is the right foundation, the modular baffles and arm attachments make the extra cost worthwhile. If you're retrofitting an existing hanging feeder to a pole, Brome's BirdsUP adapter kit is the cleanest no-modification solution available.
For specific product comparisons and tested recommendations, the Best Bird Feeders Guide reviews cover the best pole bird feeders across all price points, the best heavy-duty bird feeder poles for large or multi-feeder stations, the best bird feeding pole systems for modular and expandable setups, and Top-Flight style universal mounts in detail. See our roundup of the best bird feeding pole system for tested, side-by-side comparisons and installation notes (reference ID a8768728-b201-4c2c-85f9-a8dd1d89866d). See our roundup of the best pole bird feeders for tested, ranked options across price points. Each review includes real-world installation notes, load testing observations, and squirrel-proofing performance, which is where marketing claims most often diverge from actual backyard results. For a deeper comparison of options, see our guide to the best heavy duty bird feeder pole.
FAQ
What are the main benefits and trade‑offs of mounting a bird feeder on top of a pole?
Benefits: easier access for cleaning/maintenance, better control of mammal pests when paired with baffles, neat sightlines for backyard viewing, and the ability to cluster multiple feeders on a modular pole. Trade‑offs: poles concentrate birds (can increase predation and disease transmission), require sturdy anchoring and correct clearance to stop squirrels, and heavier/large feeders need heavy‑duty poles or concrete footings to avoid wobble or failure. These conclusions reflect university extension guidance and field studies of feeder effects on wildlife dynamics.
Which pole types and materials should I consider (universal, heavy‑duty, modular)?
Universal/lightweight poles: inexpensive, easy to install (shepherd’s hook or thin steel), suitable for single light feeders under ~8–12 lb but sag/tilt with heavy hoppers. Heavy‑duty poles: thicker steel/aluminum, higher static load ratings, recommended for large hopper feeders or multi‑feeder setups — pair with concrete footing or ground sleeve. Modular systems (e.g., Wild Birds Unlimited Advanced Pole System/AP S style): designed for multi‑feeder stations with proprietary baffles and accessory compatibility. Choose material for corrosion resistance (galvanized or powder‑coated steel, aluminum) and tube strength for the intended feeder weight.
How do I match feeders to pole systems (tube, hopper, platform, suet, hummingbird, window adapters)?
Tube feeders: fit most pole‑top hooks or threaded mounts; lightweight tubes work on universal poles, larger tube assemblies need heavier poles. Hopper/belly/large seed feeders: often exceed small pole ratings — use heavy‑duty or anchored poles. Platform feeders: light platforms use simple poles; heavy or multi‑platform stations need modular/anchored poles. Suet: suet cages are light; mount on small arms or short spike tops. Hummingbird feeders: use dedicated hanger arms or a short pole arm; ensure pole finish resists nectar corrosion. Window‑to‑pole adapters and retrofit brackets exist to convert hanging feeders to pole‑top use — check manufacturer fit dimensions. For squirrel‑resistant motorized/spring‑activated feeders (Brome SquirrelBuster, Yankee Flipper), use compatible pole accessories from the manufacturer when available to preserve warranty and function.
What is the evidence‑based guidance for placement height and distance from cover?
Place the feeder at least 6 ft above ground and at least 7–8 ft from tree trunks, large branches, or decks to prevent squirrel launches. Keep feeders about 6 ft (or more) from dense shrub or cover that could harbor cats to reduce ambush risk. These siting rules are recommended by wildlife extension services and reduce nuisance mammal access and predator risk.
How should I anchor or secure a pole to avoid wobble, tilt or failure?
Permanent installation: bury pole in concrete footing or use a removable sleeve set in concrete; as a rule of thumb, bury about one‑third of the above‑ground pole length (e.g., 2–3 ft for a 6–9 ft pole). Removable/temporary: use screw‑in ground anchors or robust ground sleeves; in rocky soils, use rock anchors or bolt a flanged base to a deck/rail with lag bolts. If a pole wobbles with a full feeder, upgrade to a sturdier pole or concrete‑anchored sleeve rather than adding counterweights.
What baffle size, placement, and materials work best to stop squirrels and raccoons?
Install a smooth, stationary baffle at least 4 ft below the feeder and/or immediately below the feeder to block climbing. Baffle diameter/length: 14–18 in for cylindrical baffles is effective; larger raccoon baffles (20+ in or the large APS baffles) are recommended where raccoons are active. Use smooth metal or plastic (powder‑coated steel, aluminum, or UV‑stable plastic) so claws cannot grip. Combine correct baffle placement with the required clearance from launch points (trees/decks) for best results.
Best Bird Feeding Pole System: Buy, Install, and Setup Guide
Compare the best bird feeder pole systems: choose, install, match feeder types, stop pests, and troubleshoot rot and wob