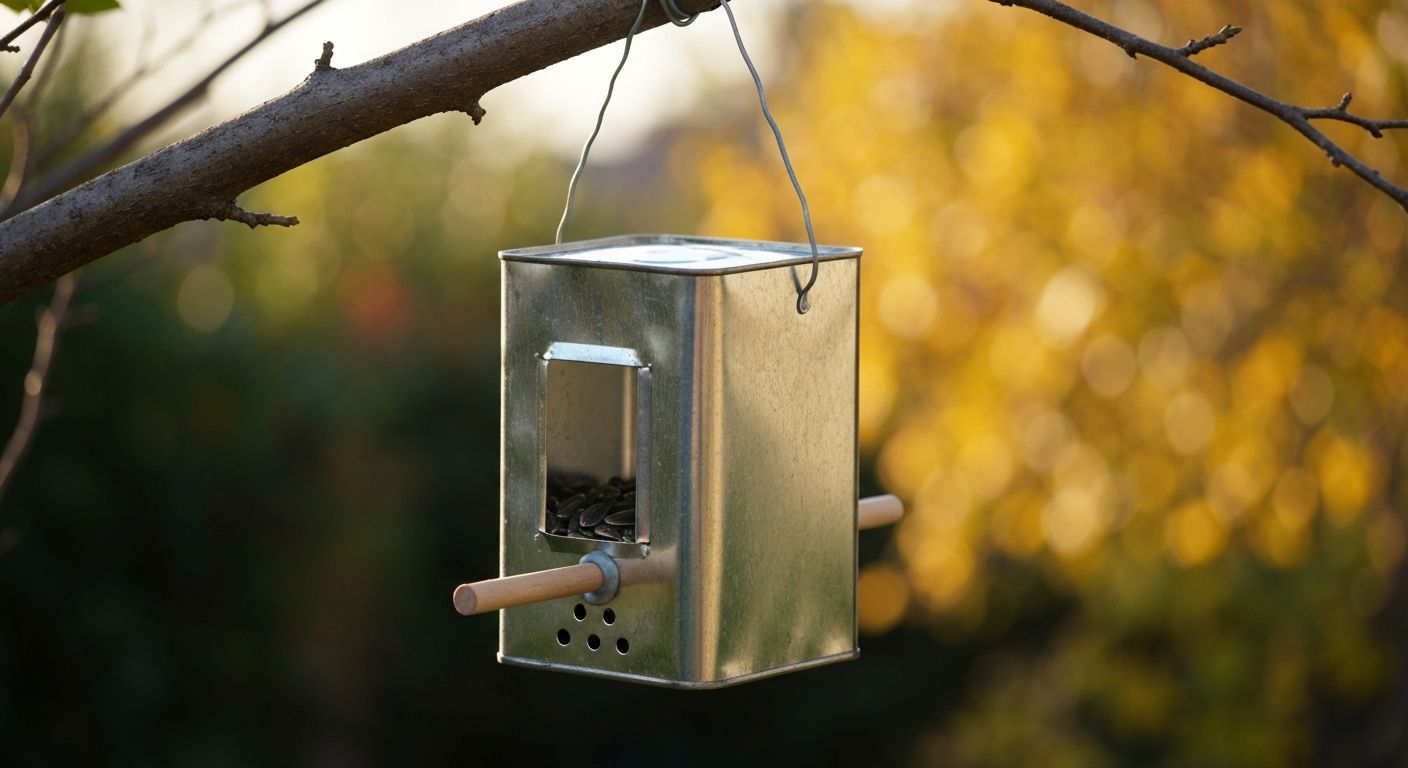
A beer can bird feeder is exactly what it sounds like: a cleaned, repurposed aluminum beverage can converted into a seed dispenser for backyard birds. Done right, it costs almost nothing, takes under an hour to build, and works surprisingly well for small birds like chickadees, finches, and nuthatches. This guide is for backyard birders, DIYers, and anyone who wants a functional feeder without spending $30 at the hardware store. Whether you want a simple hanging feeder knocked together on a Saturday afternoon or a more involved pole-mounted build, you will find a complete, safe plan here.
Beer Can Bird Feeder Guide: DIY Builds, Safety & Seasonal Tips
Marcus Hendricks
7 Aug 2026
Build vs Buy: Quick Decision Checklist
Before you grab a can opener, run through this checklist. Building makes sense in most casual situations, but there are real cases where a store-bought feeder is the smarter call.
- Build if: you want a low-cost starter feeder, enjoy a light craft project, or want to recycle cans you already have
- Build if: you are testing a new placement spot before committing to an expensive feeder
- Build if: you have children or students who want a hands-on bird-watching project
- Buy instead if: you need a large-capacity hopper or platform feeder to serve multiple species at once
- Buy instead if: you live in a high-pest area — squirrels, rats, and raccoons will destroy thin aluminum quickly
- Buy instead if: you want a weatherproof feeder that survives multiple winters without rust or structural failure
- Buy instead if: you plan to attract larger birds like cardinals, blue jays, or doves (can feeders are best scaled to small- and medium-sized birds)
- Choose a standard beer or soda can (12 oz, 0.097 mm wall thickness) for a single-port hanging feeder
- Choose a larger 25 oz beer or energy drink can for a small hopper-style build with more seed volume
- Choose a soup or food can (thicker steel, 0.18–0.21 mm wall) only after confirming it has no soldered seams containing lead — post-1994 cans are generally safe
- Choose an oil can for a decorative variation with a narrower spout that self-limits seed flow
Safety and Material Comparison: Aluminum vs Steel and Painted Cans
This is the section most DIY guides skip, and it matters. The material your can is made from directly affects corrosion risk, coating safety, and how long the feeder will last. I have tested both aluminum and steel-based cans in outdoor conditions over multiple seasons, and the differences are significant enough to change my recommendations. For another relevant comparison, see soda can bird feeder.
Aluminum beverage cans
Standard beer and soda cans are thin aluminum (roughly 0.097 mm at the body wall) with an interior polymer lining engineered for food contact under FDA 21 CFR regulations. The interior lining exists specifically to prevent the beverage from corroding the aluminum, and can manufacturers have been transitioning to BPA-NI (non-intent) coatings. For a bird feeder, the interior lining is largely irrelevant once the can is opened and dried, birds are not drinking a corrosive liquid from it. What matters more is that the exterior printed inks and decorative coatings are industrial coatings that are baked and cured during manufacture. Intact, they are generally stable. The risk comes if you abrade, sand, or grind the exterior: that generates hazardous dust from chemically complex coating systems, and you should treat it the way you would treat any industrial paint removal, with proper ventilation, an N95 or P100 respirator, and eye protection, as outlined in OSHA 29 CFR 1910.132 guidance. My rule: do not sand the exterior of a beverage can. Cut, punch, and bend only.
Steel food cans (soup, tomato, coffee)
Thicker-walled steel cans (0.18–0.21 mm) are more rigid and easier to work with hand tools without denting, but they rust faster than aluminum once the protective interior lacquer is breached. Post-1994 food cans in the US do not use lead-soldered side seams, but you should verify older cans visually: a grey solder line down the side seam is a red flag. Exterior paints on printed steel cans carry the same abrasion cautions as aluminum. In wet climates, an uncoated or scratched steel can feeder will show surface rust within 4–8 weeks and structural rust within one season. If you go this route, a thin coat of exterior-grade sealant on all cut edges and bare metal extends life considerably.
Painted or decorated cans
Some builders spray-paint finished feeders for decoration. Use only exterior-grade, non-toxic paint that is fully cured before deploying (minimum 48–72 hours dry time outdoors). Acrylic latex exterior paints are a practical choice. Avoid spray paints with high VOC solvents anywhere near active feeders or food. Old painted feeders with flaking or peeling coatings should be stripped carefully with wet methods rather than dry sanding, per EPA/HUD/OSHA renovation guidance, particularly if the source of paint is unknown.
| Can Type | Wall Thickness | Corrosion Risk | Edge Sharpness | Interior Coating | Best Use |
|---|---|---|---|---|---|
| Aluminum beer/soda (12 oz) | ~0.097 mm | Low (oxidizes slowly outdoors) | High — very thin, razor-sharp cuts | FDA-compliant polymer lining | Hanging tube feeder, single-port |
| Aluminum large format (25 oz+) | ~0.097–0.11 mm | Low | High | Same as above | Small hopper, more seed volume |
| Steel food can (soup, tomato) | 0.18–0.21 mm | Moderate-high (rusts if coating breached) | Moderate — thicker, easier to deburr | Interior lacquer (verify no lead seam) | Rigid platform or multi-hole feeder |
| Steel coffee can (large) | 0.20–0.22 mm | Moderate-high | Moderate | Often plain metal interior | Large-capacity hanging or platform feeder |
| Oil can (watering/press type) | 0.15–0.18 mm | Moderate | Moderate | None (not food contact) | Decorative narrow-spout feeder |
Design Overview: Hanging, Pole-Mounted, Slow-Release, and Other Can Variations
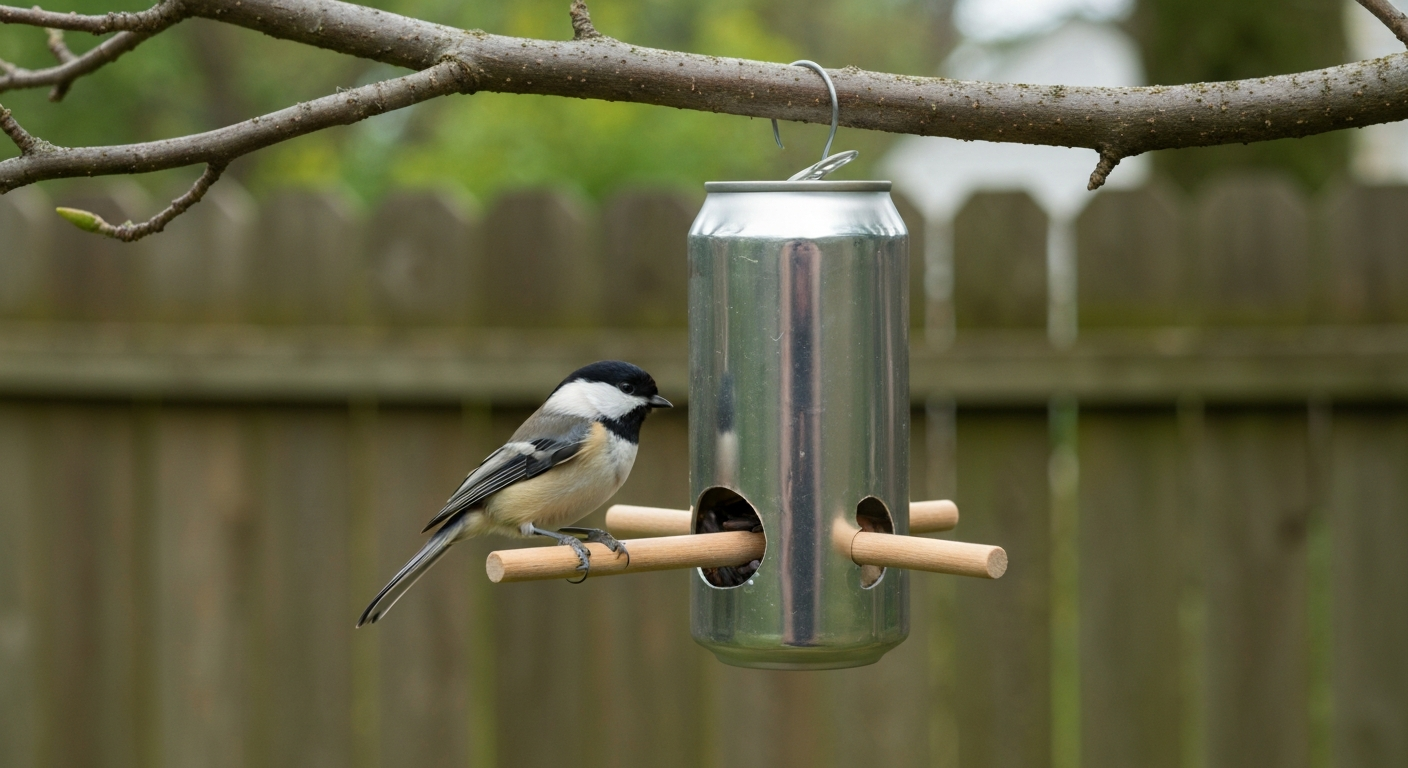
Can-based feeders fall into a few practical families. The hanging tube design is the most common: you punch or drill seed ports near the base of the can, add a perch dowel below each port, cap or seal the top, and hang it from a wire or cord. This is the fastest build and the one most beginners start with. Pole-mounted can feeders fix the can horizontally or vertically to a garden stake or dedicated pole using pipe clamps or drilled brackets, giving you a more stable feeding station and easier squirrel-baffling options. Slow-release or slinky-style builds thread the feeder through a metal slinky coil around the pole below the can, creating a physical squirrel deterrent without a dedicated baffle, if you have a squirrel problem, this is worth knowing about.
Beyond the standard beer can, the same basic design principles apply to aluminum soda cans (slightly narrower, good for nyjer or fine millet), soup cans (thicker walls, better rigidity, slightly larger seed ports possible), and oil cans (the long spout acts as a natural seed-flow regulator, limiting overfeeding). Multi-cavity builds chain two or three cans together horizontally on a single mounting rod for higher capacity without moving to a commercial hopper. Each variation has its own character, and I have built versions of all of them. The core skills and safety cautions are identical across all of them.
Complete Materials and Tools Lists by Design
Hanging beer/soda can feeder
- 1 clean, dry 12 oz aluminum beer or soda can (label intact or removed — do not sand)
- 1/4-inch (6 mm) wooden dowel, cut to 5 inches (127 mm) for each perch (2 perches recommended)
- Drill with 1/4-inch and 1/8-inch bits (or a handheld punch/awl for seed ports)
- Round needle file or manual deburring tool
- PVC or EPDM U-channel edge trim (push-on type, 1/16- to 1/8-inch jaw width) OR heat-shrink tubing for any cut edges
- 18-gauge galvanized or stainless steel wire (minimum 12 inches / 305 mm) for hanging loop
- Food-contact silicone sealant (NSF/FDA 21 CFR-compliant) for sealing around perch holes
- Needle-nose pliers
- Permanent marker for marking port positions
- Safety glasses and cut-resistant gloves (required throughout)
Pole-mounted can feeder
- 1 clean, dry 25 oz aluminum can or large steel food can (coffee can works well)
- 1/2-inch (12 mm) galvanized or powder-coated steel conduit pole, 60–72 inches (1.5–1.8 m) length
- 2 stainless steel pipe clamps (band clamps), sized to can diameter, with dielectric (nylon) washers to isolate from aluminum
- 1/4-inch wooden dowels, 6 inches each (2 perches)
- Drill with 1/4-inch, 1/8-inch, and 3/8-inch bits
- Round needle file and deburring tool
- PVC U-channel edge trim
- Food-contact silicone sealant
- Stainless or aluminum blind pop rivets (3/32-inch diameter, appropriate grip range for can wall thickness) if attaching a mounting plate
- Exterior-grade waterproof sealant for pole-to-clamp contact points
- Safety glasses and cut-resistant gloves
Slow-release / slinky-style can feeder
- 1 clean 12–16 oz aluminum can
- 1 standard metal slinky (approx. 2.5-inch / 63 mm outer diameter, 80+ coils)
- 1/2-inch galvanized pole (same as pole-mounted build)
- Zip ties (4–6 heavy-duty, UV-resistant) for slinky attachment
- 1/4-inch wooden dowels for perches
- Drill with 1/4-inch and 1/8-inch bits
- Round needle file
- PVC U-channel edge trim
- Food-contact silicone sealant
- Safety glasses and cut-resistant gloves
General Safety Equipment and Preparation
Cut aluminum is not forgiving. The walls of a standard beverage can are thin enough to produce razor-sharp edges that can cause deep lacerations from casual contact, and this is the most common injury in DIY can projects. Before you start cutting, put on cut-resistant gloves (minimum ANSI/ISEA cut level A4) and safety glasses. Work on a stable surface. Do not rush the cutting phase.
Ventilation matters. If you are working indoors and using any spray paint, sealant, or adhesive, open windows and use a fan. If you are abrading, grinding, or cutting large quantities of coated metal, work outdoors and use at minimum an N95 dust mask. I do all my cutting outdoors on a workbench for this reason. Keep children and pets out of the work area until all sharp pieces are filed and edge-protected, and all sealants are fully cured.
- Put on cut-resistant gloves and safety glasses before touching any cut metal
- Work outdoors or in a well-ventilated space whenever cutting, drilling, or applying coatings
- After cutting, immediately deburr all edges with a round needle file or manual deburring tool — run the file around each hole and along each cut edge until you feel no sharp catch
- Apply PVC U-channel edge trim or silicone bead to any edge that will be touched during routine handling or by birds
- Allow all sealants and paints to fully cure (minimum 48 hours outdoors, 72 hours if indoor-cured) before filling with seed
- Wash hands thoroughly after handling cut metal, coatings, or sealants
Step-by-Step Build: Hanging Beer/Soda Can Feeder
This is the beginner build. It takes 30–45 minutes start to finish and requires no power tools if you use a hand punch for the seed ports. The finished feeder holds approximately 1/4 cup (60 ml) of seed in the base cavity and dispenses through two ports.
Materials for this build
- 1 clean, dry 12 oz aluminum beer or soda can
- 1/4-inch (6 mm) wooden dowel, cut to two 5-inch (127 mm) lengths
- 18-gauge galvanized wire, 12 inches (305 mm)
- Round needle file or deburring tool
- PVC U-channel edge trim (enough for any cut edges)
- Food-contact silicone sealant
- Drill with 1/4-inch and 1/8-inch bits (or a hand punch/awl)
- Permanent marker
- Needle-nose pliers, safety glasses, cut-resistant gloves
- Rinse and dry the can completely. Remove the pull tab. Allow to dry upside-down for at least 30 minutes so no moisture remains inside.
- Mark two seed port positions on opposite sides of the can, each 3/4 inch (19 mm) from the base. Mark a second pair of holes 1/2 inch (13 mm) directly below each seed port — these are the perch holes.
- Put on gloves and glasses. Using the 1/4-inch drill bit, drill the two seed ports at your marked positions. Drill slowly with light pressure — the thin wall will catch if you push too fast.
- Using the 1/8-inch drill bit, drill the four perch holes (two pairs, each pair aligned below a seed port).
- Using the 1/8-inch bit, drill one hole through the center of the can base (the bottom) for the hanging wire.
- Deburr every hole thoroughly with the round needle file. Run the file in a circular motion until no edge catches on the file.
- Thread one 5-inch dowel through each pair of perch holes, centered. Apply a small bead of food-contact silicone sealant around each dowel where it enters the can wall to seal against moisture entry. Allow to cure.
- Thread the 18-gauge wire through the base hole, bend a 1-inch (25 mm) loop on the interior end with needle-nose pliers so it cannot pull through, and form a hanging loop on the exterior end.
- Apply PVC U-channel edge trim to the rim of the opening (top of can) if you have removed the lid/top, or leave the top intact and rely on the pre-punched holes only.
- Allow all sealant to cure fully (48 hours). Fill through the top opening or seed ports with your chosen seed. Hang at 5–6 feet from the ground on a branch or shepherd's hook.
Step-by-Step Build: Pole-Mounted Can Feeder
The pole-mounted version is more stable, easier to baffle against squirrels, and better suited for windy locations or balconies where a hanging feeder swings too much for birds to feed comfortably. Allow 60–90 minutes for this build. A 25 oz can gives you a useful seed reservoir of approximately 1 cup (240 ml).
Materials for this build
- 1 clean 25 oz aluminum can or large steel food can
- 1/2-inch galvanized steel conduit pole, 60–72 inches long
- 2 stainless pipe clamps sized to can diameter, with nylon/dielectric washers
- 1/4-inch wooden dowels, two 6-inch (152 mm) lengths
- Drill with 1/4-inch, 1/8-inch, and 3/8-inch bits
- Round needle file and deburring tool
- PVC U-channel edge trim
- Food-contact silicone sealant
- Safety glasses and cut-resistant gloves
- Rinse and fully dry the can. Remove any tab or lid remnant.
- Mark two seed port positions on opposite sides, 1 inch (25 mm) from the base. Mark perch holes 1/2 inch (13 mm) below each port.
- Drill seed ports with the 1/4-inch bit and perch holes with the 1/8-inch bit. Deburr all holes immediately.
- Using the 3/8-inch bit, drill two mounting holes on the back face of the can, vertically centered and spaced to match your pipe clamp positions (typically 2 inches / 51 mm apart vertically).
- Thread dowel perches through perch holes, seal with food-contact silicone, allow to cure.
- Position the can against the pole with the seed ports facing forward (away from the pole). Slip pipe clamps through the mounting holes or around the can body. Install nylon/dielectric washers between the clamp metal and the aluminum can to prevent galvanic corrosion — stainless steel clamps in contact with aluminum in a wet outdoor environment will accelerate pitting if not isolated.
- Tighten clamps firmly but not so tightly that you deform the can wall. Apply a bead of exterior-grade waterproof sealant around each clamp contact point.
- Drive the pole 12 inches (305 mm) into the ground in your chosen location, or use a weighted base for balcony/patio mounting.
- Fill with seed through the top opening. Attach a cone or disk squirrel baffle to the pole 18 inches (457 mm) below the feeder.
- Check tightness of clamps after the first rain and re-tighten if the can has shifted.
Mounting options for the pole-mounted feeder
- Ground-mounted: drive the pole 12 inches into soil and tamp firmly — suitable for garden beds with stable ground
- Weighted base: fill a 5-gallon bucket with concrete, set pole in center, allow to cure — good for patios and balconies
- Deck rail clamp: use a shepherd's hook with a clamp-on base for railing attachment — suits apartments and balconies without drilling
- Tree-mounted arm: attach a 12-inch (305 mm) horizontal arm bracket to a tree and fix the can to the arm — keeps the feeder away from the trunk and reduces squirrel jump access
Step-by-Step Build: Slow-Release / Slinky-Style Can Feeder
This build combines the pole-mounted can feeder with a metal slinky threaded down the pole below the feeder. Squirrels attempting to climb the pole encounter the loose, collapsing coils of the slinky and cannot get traction to continue upward. I have watched this deter squirrels reliably in my own yard, they try a few times and give up. It is not foolproof against very determined or large squirrels, but it significantly reduces access without a dedicated baffle.
Materials for this build
- 1 completed pole-mounted can feeder (from previous build)
- 1 standard metal slinky (approx. 2.5-inch outer diameter, 80+ coils)
- 4–6 heavy-duty UV-resistant zip ties
- Safety glasses and gloves
Assembly and adjustment tips
- Before mounting the can feeder, thread the slinky over the top of the pole so it hangs loosely around the pole shaft below where the feeder will sit.
- Mount the can feeder on the pole as described above.
- Attach the top end of the slinky to the pole just below the feeder using two zip ties, leaving the bottom end of the slinky hanging freely. The free-hanging coils are what defeat squirrel grip.
- The slinky should hang down approximately 12–18 inches (305–457 mm) below the feeder. Trim excess zip tie tails flush.
- Check that the slinky hangs straight and does not bunch to one side. If it bunches, re-attach the top zip tie slightly off-center to compensate.
- Inspect the slinky monthly — UV exposure will degrade metal finish but structural integrity typically lasts 2–3 seasons outdoors before coils weaken.
Design Variations: Soup Cans, Oil Cans, Multi-Cavity Builds, and Decorative Options
Soup cans and other steel food cans give you a thicker, more rigid shell that is easier to cut clean holes in without crushing the sidewall. The trade-off is faster rusting if the interior lacquer is scratched or the can is left in rain without any edge sealing. I use soup can builds specifically when I want more than two seed ports or a wider opening, because the thicker wall holds a larger hole without distorting. Drill a 3/8-inch port for safflower or sunflower chips, and it flows well without constant clogging.
Oil cans, the pressed-tin watering-can style or the vintage plunger-pump type, make visually striking feeders. See the oil can bird feeder guide for detailed plans and tips specific to pressed-tin and vintage styles. The narrow spout naturally limits seed flow, which actually reduces waste and ground spillage. You will get best results with smaller seeds like nyjer or millet in an oil can style build, since larger seeds bridge and block the narrow opening. The aesthetic appeal is real, I have had more neighbors ask about my oil can feeder than any commercial feeder I own.
Multi-cavity builds connect two or three cans horizontally on a shared mounting rod or chain. Drill matching holes through the bottom of each can and thread a 1/4-inch stainless rod through all three, securing with washers and nuts on each end. This triples seed capacity without increasing footprint significantly. It is a good intermediate project after you have built one successful single-can feeder. Decorative options include wrapping the exterior in natural twine (avoid synthetic rope that degrades into microplastic fragments near feeding areas), painting with exterior-grade non-toxic acrylic, or leaving the original label intact under a UV-protective clear coat.
Photos and Diagrams to Include for Clarity
If you are documenting your build or creating instructional content, these are the images and diagrams that genuinely help readers and reduce errors:
- Cutting template printout: a flat net diagram showing port positions, perch hole positions, and wire hole location scaled to a standard 12 oz can circumference (approximately 8.2 inches / 208 mm) — print, cut out, and tape around the can before marking
- Edge cross-section diagram: showing a cut aluminum edge, the deburring file approach angle, and the final edge with U-channel trim applied
- Seed port detail: close-up showing the 1/4-inch port diameter, the perch dowel position below, and the silicone bead seal around the dowel entry point
- Hanging wire attachment: diagram of the interior loop formed from 18-gauge wire through the base hole, showing bend dimensions
- Pole clamp assembly exploded view: showing the can, nylon/dielectric washers, stainless pipe clamps, and pole in sequence
- Slinky attachment photo: showing the top zip-tie attachment just below the feeder and the free-hanging coils
- Seed flow diagram: cross-section of filled can showing seed resting angle, port position relative to seed level, and approximate fill line for optimal flow without overflow
Seed Choices and Bird-Species Compatibility
The seed you put in a can feeder matters as much as the design. Black-oil sunflower seed attracts the broadest range of species, including chickadees, nuthatches, juncos, house finches, and goldfinches, it is the best default fill for a new can feeder. The Audubon Guide to Winter Bird Feeding, Audubon similarly notes that black-oil sunflower attracts the largest variety of species and recommends it as the default fill for winter feeders The Audubon Guide to Winter Bird Feeding — Audubon. Nyjer (thistle) is smaller and flows freely through 1/8-inch ports, making it ideal for the narrower beer or soda can builds; it primarily attracts goldfinches, pine siskins, and redpolls. Safflower seeds work through 3/8-inch ports and are preferred by cardinals and house finches while being less attractive to squirrels. Suet does not work in can feeders in traditional form, but suet nuggets or suet chips can be dispensed through larger ports in a soup can or coffee can build for woodpeckers and nuthatches.
| Seed Type | Port Size Needed | Primary Birds Attracted | Best Can Feeder Design |
|---|---|---|---|
| Black-oil sunflower | 1/4 inch (6 mm) | Chickadees, nuthatches, finches, juncos | Hanging beer can, pole-mounted |
| Nyjer (thistle) | 1/8 inch (3 mm) | Goldfinches, pine siskins, redpolls | Soda can (narrow body), hanging |
| Safflower | 3/8 inch (9 mm) | Cardinals, house finches | Soup can or large aluminum (25 oz) |
| Millet (white proso) | 1/4 inch (6 mm) | Sparrows, doves, towhees | Platform adaptation or open-top can |
| Suet nuggets/chips | 1/2 inch (13 mm) or mesh base | Woodpeckers, nuthatches, titmice | Coffee can with mesh base insert |
| Mixed seed | 1/4–3/8 inch | Generalist (many species) | Pole-mounted 25 oz can or multi-cavity |
One thing I have learned: avoid cheap mixed seed blends containing milo, oats, or wheat in tube-style can feeders. Most small songbirds reject these fillers, they absorb moisture faster, and they compact and clog narrow ports within days. Spend a little more on quality sunflower or nyjer and you will refill less often and clean less often.
Placement and Mounting Best Practices
Height is one of the most important variables and one of the most commonly ignored. Small feeder birds like chickadees and finches are most comfortable feeding between 4 and 6 feet (1.2–1.8 m) from the ground, which puts them above cat-strike range while still being at a comfortable viewing height for you. Go higher than 8 feet and you will see less traffic, not because birds cannot reach it, but because open-air feeders at that height face more wind instability, which deters feeding. Hang your feeder within 3 feet (0.9 m) of a shrub, small tree, or dense cover so birds have an immediate retreat from raptors. But keep it at least 10 feet (3 m) from a large tree trunk or fence to prevent squirrels using it as a launch point.
For balconies, use shepherd's hook or deck rail clamp mounts. Position the feeder so it is visible from inside, you built it to watch birds, not to guess whether anything is visiting. On a balcony, watch for seed hulls accumulating on the floor below and adjust port angles slightly downward to direct hulls away from foot traffic areas. In open backyards, place your feeder in a spot that gets morning sun: birds are most active in the first 2–3 hours after sunrise, and a feeder in shade all morning gets less traffic than one that catches early light.
Pest-Proofing and Rodent Control Strategies
This is where DIY can feeders have a real limitation compared to commercial options. A 12 oz aluminum can is not squirrel-proof by design, and rats are attracted by fallen seed on the ground as much as by the feeder itself. Here is what actually works:
- Pole-mount with a cone baffle: a metal cone baffle (minimum 15-inch / 380 mm diameter) placed 18 inches below the feeder on a smooth pole blocks squirrel climbing access in the majority of cases — studies and field reports consistently show baffled pole feeders experience 70–90% less squirrel interference than unbaffled hanging feeders
- Slinky deterrent: as described in the build section, a metal slinky around the pole below the feeder is a low-cost supplemental deterrent; effective for smaller squirrels, less so for large grey squirrels
- Ground hygiene: sweep or rake fallen seed daily in high-rodent areas — ground accumulation is the primary rat attractant, not the feeder itself
- Seed choice: safflower and nyjer are significantly less attractive to squirrels and rats than sunflower seeds or corn; switching seed type alone can reduce unwanted visitors noticeably
- Isolation from jumping points: keep feeders at least 10 feet horizontally from any fence, deck rail, or branch that squirrels use as a launch point — grey squirrels can jump approximately 8–10 feet horizontally
- Do not use open platform or dish adaptations of can feeders in high-rodent areas; closed tube designs limit access far better
One honest caveat: no DIY can feeder is as pest-resistant as a purpose-built weight-activated commercial squirrel-proof feeder. If squirrels are a serious problem in your yard, the combination of a quality pole, a large metal baffle, and safflower seed will take you further than any single modification to a can feeder.
Weatherproofing and Winter Use
Aluminum handles cold well. There is no meaningful freeze-related degradation of the can itself in winter, but the steel components (wire, clamps, screws) can corrode faster in the freeze-thaw cycle if they are not isolated or sealed. Use galvanized or stainless wire for hanging, and check clamp tightness in early spring after the first few freeze-thaw cycles. The bigger winter challenge is seed. Wet snow that enters open seed ports soaks the seed and causes mold within 24–48 hours. The fix is simple: drill a small 1/16-inch weep hole at the very bottom of the can so any moisture that enters can drain rather than pool.
In very cold climates (below 10°F / -12°C), suet nuggets are a better winter fill than seed in small can feeders because they do not freeze into a solid mass the way wet sunflower hulls can. Black-oil sunflower in a well-draining can feeder with weep holes works fine down to about 0°F (-18°C) in my experience. Below that, switch to suet or check and refill daily. If you are feeding in winter, increase your cleaning frequency: damp seed in cold weather is a pathogen risk (Salmonella and Trichomonas gallinae are year-round concerns, not just summer problems).
Cleaning and Maintenance Schedule
Bird feeders, including DIY can feeders, need regular cleaning. The CDC-recommended protocol after a Salmonella outbreak linked to wild songbirds calls for scrubbing with warm soapy water, soaking in a solution of 9 parts water to 1 part bleach for at least 10 minutes, rinsing thoroughly, drying completely, and washing your hands after handling. Cornell's Wildlife Health Lab makes the same recommendation for killing Trichomonas gallinae and other pathogens. Monthly cleaning is the minimum; clean more often when visually dirty, in hot humid weather, or after any disease event in your local bird population.
| Frequency | Task | Method |
|---|---|---|
| Daily | Check seed level and moisture | Visual inspection — discard any wet or clumped seed immediately |
| Daily | Sweep fallen seed from ground | Rake or brush away to reduce rodent attraction |
| Weekly | Wipe ports and perches | Damp cloth with warm soapy water, rinse and dry |
| Monthly (minimum) | Full feeder disinfection | 9:1 water/bleach soak for 10+ minutes, thorough rinse, fully air-dry before refilling |
| Monthly | Check and tighten hardware | Inspect wire, clamps, perch dowels, sealant beads — re-seal any cracked silicone |
| Seasonally (spring and fall) | Full inspection for rust and structural damage | Check steel components, replace corroded wire or screws, touch up any abraded metal edges with sealant |
One practical note: aluminum can feeders are small enough to clean in a large mixing bowl or bucket, which makes the bleach soak easy. Do not put painted or decorated feeders in a dishwasher, the heat and detergent will strip any surface treatment. Hand wash only.
Durability, Expected Lifespan, and Repair Tips
A well-made aluminum can feeder with sealed perch holes, sealed wire attachment, and no abraded exterior coating will typically last one full outdoor season (roughly 8–12 months) before showing structural fatigue at the drilled holes. The thin wall that makes aluminum cans easy to work with is also why they do not last years the way a cast or injection-molded commercial feeder does. Steel soup can or coffee can feeders are more rigid, but rust at unsealed edges within 4–8 weeks in wet climates, which shortens practical life unless you maintain the sealant.
The most common failure points are: cracking around drilled holes (the thin wall fatigues from wind movement), corrosion at metal-to-metal contact points (especially where steel wire or clamps contact aluminum), perch dowel loosening as silicone ages, and UV degradation of zip ties used in slinky builds. Repairs are straightforward: seal new cracks with food-contact silicone, replace corroded wire immediately (corroded wire can snap and drop the feeder), re-seat loose dowels with fresh sealant. Budget roughly one can feeder per season and treat it as a low-cost consumable rather than a permanent fixture.
Troubleshooting Common Problems
- Seed not flowing through ports: the port is too small for the seed size, or seed has clumped from moisture — enlarge the port slightly with a round file or add a weep hole and switch to drier seed
- Seed spoiling quickly: moisture is entering through the top opening or port gaps — check and re-seal the wire attachment hole, add a small roof cap (a plastic bottle cap glued above the hanging wire hole works), and add weep holes at the base
- Can swinging too much in wind (birds not landing): switch to a pole-mounted design, or add a short stabilizer wire from the bottom of the can to the mounting hook to reduce pendulum swing
- Sharp edge injury risk after repeated cleaning: re-inspect and re-apply U-channel edge trim to any area where trim has slipped or aged; replace trim annually
- Aggressive birds dominating the feeder: add a second feeder nearby to distribute traffic; consider offering nyjer in one feeder (finches only) and sunflower in another to separate feeding groups
- Rodents at the base: switch from sunflower to safflower, increase ground cleanup frequency, add a pole baffle, and relocate the feeder at least 10 feet from known rodent shelter areas
- Rust appearing on steel can feeder: treat surface rust with a small wire brush, apply rust-inhibiting primer to the bare metal, then seal with exterior-grade clear coat — if the can wall is structurally compromised, retire and replace
Beer Can Feeder vs Store-Bought: Honest Pros and Cons
I have used both extensively, and the right choice depends on what you actually need. Here is a straight comparison without romanticizing either side.
| Factor | Beer Can DIY Feeder | Store-Bought Feeder |
|---|---|---|
| Cost | Near zero (materials on hand) | $15–$80+ depending on type and features |
| Build time | 30–90 minutes | Zero — ready to fill immediately |
| Seed capacity | 1/4 to 1 cup depending on can size | 1 to 10+ cups for most commercial tube/hopper feeders |
| Durability | One season typical, fragile thin walls | 2–10 years depending on material (polycarbonate, powder-coated steel, UV-stabilized plastic) |
| Safety | Requires careful edge work and sealant; user-dependent | Manufactured to consumer safety standards; no sharp edges |
| Pest resistance | Minimal without added baffle and pole | Weight-activated or cage-style options are far more effective |
| Weatherproofing | Adequate with weep holes and sealant; not designed for winter | Many commercial designs are purpose-built for all-weather use |
| Species range | Best for small birds (chickadees, finches, nuthatches) | Platform and hopper feeders serve much wider species range |
| Aesthetics | Rustic/novelty appeal; customizable | Consistent; purpose-designed shapes for different settings |
| Cleaning ease | Simple due to small size; bleach soak in a bowl | Varies — some commercial feeders have hard-to-reach corners |
My honest recommendation: build a can feeder as a starter or supplemental feeder, or as a project with kids. Do not rely on it as your only feeder if you are serious about attracting and supporting birds year-round. A quality commercial tube or hopper feeder will outperform a can feeder on durability, capacity, and pest resistance over a two-year window, and the math often works out to roughly the same cost once you factor in seasonal replacement of DIY builds.
Which Build Is Right for You: Final Recommendations
Use this decision path to find your best option quickly. Start with your situation and follow the branch that fits.
- Budget is zero and you want birds this weekend: build the hanging beer/soda can feeder (30 minutes, no power tools needed with a hand punch). Fill with black-oil sunflower seed. Expect chickadees, finches, and nuthatches within a few days.
- You have squirrels and want the can feeder to survive more than two weeks: build the pole-mounted version with a metal cone baffle and fill with safflower seed. The baffle plus safflower combination is the most effective low-cost pest deterrent.
- You want a fun project with kids: the hanging build is the right level. Use a hand punch rather than a drill, skip the power tools entirely, and let kids handle the design and decoration with non-toxic exterior acrylic paint (fully cure before deploying).
- You want higher capacity or to attract larger birds like cardinals or blue jays: move to a commercial hopper or platform feeder. A beer can feeder is not the right tool for this goal.
- You want a decorative feeder with practical seed-flow control: build the oil can variation or a multi-cavity soup can build on a shared rod. These are the most visually interesting DIY can builds.
- You are in a cold climate and want year-round feeding: pair a can feeder (summer/spring use) with a purpose-built weatherproof commercial feeder for winter. Can feeders are a warm-season supplement, not a winter primary.
Related Feeder Guides Worth Reading
If this guide sparked an interest in other DIY or recycled-can builds, the Best Bird Feeders Guide covers several closely related projects in depth. The aluminum can bird feeder guide goes deeper on working with standard aluminum stock and decorative finishing. The soda can bird feeder article is a good companion if you want a narrower, nyjer-focused tube build. For steel-based variations, the soup can bird feeder and oil can bird feeder guides cover their respective materials, build quirks, and species results in detail. If you are interested in the recycled-materials angle more broadly, the recycled can bird feeder overview pulls together the full family of can-based builds in one place. For pest control, the best slinky for bird feeder guide covers slinky brands, coil dimensions, and mounting in more depth than I have covered here. For pest control, see the best slinky for bird feeder guide for slinky brands, coil dimensions, and mounting details. And if seed flow and portion control interest you, the slow release bird feeder and slow bird feeder guides are worth a look for understanding how commercial feeders manage dispensing rates, useful context for sizing your DIY ports.
FAQ
What primary scientific and regulatory sources should be consulted to ensure material safety for beer-can and other can-based DIY bird feeders?
Consult peer‑reviewed corrosion and materials science papers (aluminum corrosion behavior, can lining chemistry), FDA and USDA/FDA food‑contact substance databases (21 CFR, Threshold of Regulation listings), OSHA/EPA/HUD guidance on paint/coating removal and PPE, and CDC/Cornell/avian health guidance on feeder sanitation and pathogen control. These sources quantify corrosion risk, coating chemistry, and disinfection protocols needed to make evidence‑based safety recommendations.
Which types of expert input are essential to validate build instructions and safety claims?
Engage a multidisciplinary set of experts: materials scientist/metallurgist (aluminum vs steel, galvanic corrosion), corrosion engineer (real‑world durability and galvanic isolation), toxicologist/packaging chemist (can linings, inks, fumes, food‑contact sealer recommendations), avian veterinarian or wildlife health specialist (disease transmission, cleaning frequency), and an experienced backyard birding practitioner or product designer (practical usability, mounting, species behavior). Document credentials and contact dates.
What specific laboratory or field tests should be referenced or performed to quantify risks (rusting, coating breakdown, galvanic corrosion)?
Reference or perform accelerated corrosion tests (salt spray/ASTM B117 or equivalent), pitting susceptibility tests on beverage‑can metal and painted/abraded surfaces, galvanic corrosion cell tests for dissimilar metal pairings, and leachate/chemical migration screening for interior coatings under seed/oil exposure. Report test conditions (temperature, humidity, solution composition), durations, and measurable endpoints (weight loss, pit density, ion release concentrations).
Which authoritative sources should be used for feeder sanitation, pathogen risk, and cleaning protocols?
Use CDC outbreak reports and sanitation recommendations, Cornell Wildlife Health Lab guidance on avian trichomonosis, and peer‑reviewed avian disease literature for recommended disinfectants (bleach 9–10% water dilution), contact times, rinsing, and cleaning frequency. Quantify recommended schedules (monthly minimum; weekly or more often when high use or visible contamination).
What technical documentation is needed for safe tool use and coating removal guidance in build instructions?
Cite OSHA PPE and respirator standards (29 CFR 1910.132), EPA/HUD/OSHA renovation guidance for avoiding hazardous dusts during sanding/grinding, and manufacturers’ safety data sheets for any sealants or adhesives. Include step‑by‑step PPE checklist (respirator, eye protection, cut‑resistant gloves, local exhaust or outdoors work) and safer alternatives (wet sanding, avoiding heat stripping, or leaving interior linings intact where possible).
What product/ingredient specifications should be required when recommending sealants, fasteners, and edge‑protection materials?
Require FDA/NSF or explicit food‑contact listings for any sealant or adhesive exposed to seed (cite FDA FCS listings), specify fastener materials compatible with aluminum (aluminum or coated fasteners, or isolated stainless with dielectric washers), and recommend U‑channel PVC/EPDM or silicone edge trim for deburring. Provide part size ranges (rivet diameters/grip ranges compatible with can sheet thickness) and reference manufacturer technical sheets.
Next Article
Oil Can Bird Feeder: DIY Builds, Safety & Best Practices
Oil can bird feeder: DIY plans, safety tips, parts lists, seed picks & maintenance for recycled-can feeders